Master of Orion II
Battle at Antares — Game Manual
Introduction — Orions and Antarans
ORIONS AND ANTARANS (Excerpted from “Pre-Psilonic Galactic Civilizations” Vol. II, by Ectron Victor, retired Master Adjudicator, Psilon Central History Institute.) As a story is told and retold over the course of generations, no matter the attention paid to detail and no matter the importance of the tale, the truth is gradually nibbled away by little mistakes and innocent exaggerations. Carried off on these well-intentioned, tiny feet, the facts deteriorate softly and painlessly into a condition generally referred to as “shrouded by time.” The legends concerning the Orions and Antarans are shrouded by time. What is certain is that at one time both races coexisted in the galaxy. The scope of their power and technical advancement has surely been enhanced by hyperbole, but that they were far superior to anything now known is indisputable. Perhaps it was inevitable that two such behemoths meet in violence. The legends paint the Antarans as ruthless, xenophobic killers, but we all know that history is written by the victors. The Orion-Antaran war was a protracted holocaust of galactic proportions. While we can never know if they truly flung entire star systems across deep space as weapons (as the storytellers claim), our astrophysicists have uncovered evidence of directed energy bursts the power of which staggers the imagination. That both races had the ability to raze planets no one contests. The Orions eventually defeated the Antarans. Rather than exterminating the race, as the stories claim the Antarans would certainly have done, the Orions chose to imprison their enemies in a “pocket dimension”—a volume the size of a single star system, formed and carved somehow out of the fabric of space-time. Physicists to this day puzzle over the theory and the technique, but the result was obvious; the Antarans were banished one and all from this dimension. At this point, even the storytellers admit that the legends become vague. Some time after the war, the Orion race inexplicably disappeared. They left only two legacies for the galaxy’s future inhabitants. One was the tales of their power and legends of the Antaran war; the other is the Orion system itself. One planet circles this star, and it is reputed to be the original home world of the Orion race. Despite the incredible potential this abandoned world must hold, no one has yet plundered or colonised it. The reason for this is that the system is only uninhabited, not undefended. The Orions left a single Guardian to protect their home. Perhaps they intend to return some day. Perhaps the Antarans intend to return, too.
iv
1. Requirements and Installation
- The graphics must be Super VGA quality or better.
- There must be a mouse or trackball attached to the computer. The mouse driver must be fully compatible with the Microsoft mouse driver.
THE TECHNICAL STUFF
If you think you have all of these, but still have a problem running the game, please contact Crucial Customer Support for assistance.
For Master of Orion II to work, there are a few things your computer must have.
- The processor has to be a 486 or better. Basically, any computer with “486”, or “Pentium” in its name should do just fine. The system speed should be at least 66 MHz (megahertz).
- You must have a double-speed CD-ROM drive.
- Your computer must have at least 8 Mb (megabytes) of RAM (random access memory) installed. (This is the working memory; do not confuse it with the Mb of storage space on your hard drive.) We recommend having 16 Mb of RAM or more for optimum performance.
- You must have either DOS version 5 or later or Windows 95 installed and running on your computer. Almost all 486 and Pentium computers include one of these in the standard software package.
- Since the installation program will copy parts of Master of Orion II onto your hard disk, you must have sufficient storage space on your hard drive. To find out whether you have enough space in Windows 95, double-click on the My Computer icon. Change the View setting to Details, and the amount of empty space on your hard drive (usually drive ‘C’) is listed under Free Space. In DOS, simply type dir at any prompt, then press E. One of the last things listed is the amount of free space on the current drive. Important Note: With the advent of larger hard disks, a peculiar problem has arisen. Different sizes of hard disks have different sized “clusters” (the smallest unit of file space that the drive can read and write). Without getting into too much technical detail, the result is this: The larger your hard disk, the more space each file takes up. To prevent misunderstandings, we’ve prepared the following chart of necessary free space (in megabytes) vs. hard disk size for Master of Orion II: Disk Size 0–128 Mb 256–512 Mb 512 Mb–1 Gb 1–2 Gb 2–4 Gb Space Required 74.5 74.5 76.5
You’ve got the box open, the CD-ROM in your sweaty palm, and a manic gleam in your eyes. What do you do now?
INSTALLING THE GAME
Before you can play Master of Orion II, the installation program must copy some files onto your hard disk. To have it do so, follow these instructions:
- Turn on your computer. The Microsoft CD-ROM Extension should load when the computer starts up. (If you have problems installing, this extension may not be loaded. Check your computer manuals for instructions on making it load itself.)
- Open the CD-ROM drive, place the Master of Orion II CD in there, and close the drive.
WINDOWS 95 USERS:
- Master of Orion II is a Windows 95 “auto-run” CD-ROM. That means that if you are running Windows 95, just putting the disk in the drive for the first time starts up the installation program.
- After you’ve watched the introduction, you’re left looking at the Main menu.
- Click on Install to continue.
- The only decision you need to make during the installation process is to what directory you want to install the game. When you’re prompted, you can accept the default (c:\mps\orion2), type in a directory path, or use the Browse button to seek out a directory. Click OK when you’re done.
DOS USERS:
- Make your CD-ROM drive the current drive. To do this, type the letter of the drive (usually “D” or “E”), followed by a colon, at any command prompt. Then press E .
- Next, type install and press E again.
- When the installation screen appears, you have a couple of decisions to make. First, use the mouse to click on the hard drive to which you want to install the game. You’re not allowed to install to any drive that does not have enough free space.
- After you’ve chosen a drive, you need to determine which directory you want the game files copied into. You can accept the default (\mps\orion2) or type in a name. (If you enter the name of a directory that does not yet exist, the installation program will ask whether you want that directory created for you.)
- Finally, click the OK button to accept your choices and begin the installation.
ONCE YOU’VE MADE ALL THE NECESSARY DECISIONS:
- Master of Orion II will now copy some files to your hard drive from the CD-ROM.
- After the game itself has been copied over, Master of Orion II installs a few necessary utility programs. These include Microsoft’s DirectX drivers. The space these take up is included in the total noted above.
- When the installation program is done, you are returned to the Main menu (in Windows 95) or the command prompt (in DOS).
TO START PLAYING THE GAME IMMEDIATELY:
- Leave the Master of Orion II CD-ROM in the drive.
- Windows 95: Click on Play Game.
- DOS: Make sure that the directory you installed the game into is the current directory. Type orion2 and press E .
TO PLAY LATER:
- Make sure that the Master of Orion II CD-ROM is in its drive.
- Windows 95: Open the Start menu, then open the SimTex sub-menu, then click the Master of Orion II option.
- DOS: Make sure that the directory into which you installed the game is the current directory, then type orion2 and press E .
Have fun!
2. The Universal Menu

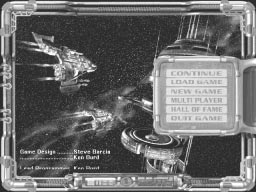
Whenever you start Master of Orion II, the Universal Menu arcs into view on the right. (You’ll also notice the game credits scrolling up the screen to the left.) To select one of the options from this menu, move the mouse pointer to that option—you’ll know you’re in the right place when the option is highlighted—and click. These options are pretty straightforward:
- Continue restarts the last game you were playing, but not necessarily exactly where you left off. Master of Orion II’s “autosave” feature periodically saves the game for you. When you choose to continue a game, you begin at the point when the game was last autosaved. This could be as many as 4 turns earlier than the point at which you stopped playing.
- Load Game allows you to return to a game you saved previously. You’re presented with a list of all the games you’ve saved. Just click to select the game you want to load.
- New Game generates a fresh galaxy for you to explore. Once you click this option, the Game Setup screen appears. The next section, Beginning a New Game, steps you through the setup process.
- Multiplayer takes you to the Multiplayer Setup screen. This is where you get ready to play against human opponents. For the lowdown, read Multiplayer Galaxies.
- Hall of Fame presents the best scores of previous emperors.
- Quit Game leaves Master of Orion II and returns you to your operating system. You get one chance to change your mind. Now let’s take a look at setting up your first new game.
3. Beginning a New Game
Galactic Setup
Before you can actually start building your empire and rampaging around the galaxy, there are a few decisions you need to make. The overall tenets of the galaxy must meet with your approval, and you need to choose which of the several races you want to rule.
When you start a new game, you’re taken to the Game Setup screen. Here, you must make the Eight Serious Decisions. Five of these are represented by icons, three by buttons. You can click on any of the icons to cycle through the possible choices for that galactic setting. The buttons are simple toggles; when each is turned on, it’s highlighted. (Thus, if it’s dark, then it’s turned off.) When you’re happy with the settings, click the Accept button to go on to select the race you wish to rule. If you decide you’d rather quit this process and return to the Universal Menu, click the Cancel button.
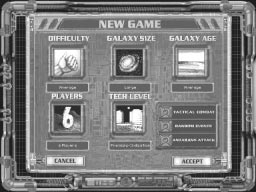
Difficulty
Master of Orion II has five different difficulty settings. Click on the icon to cycle through to the one you feel capable of facing.
Tutor is best for the new player who wants to become familiar with the game. Enemy races won’t put up too much of a fight. The only drawback to this difficulty setting is that you aren’t allowed to create a custom race.
Easy is only slightly more challenging than Tutor. The other races’ production and research proceed more slowly than yours, and any of them you encounter are significantly more friendly than it is realistic to expect. As with the easiest mode, you cannot create and use a custom race in Easy mode.
Average difficulty is exactly what it sounds like. All the races’ developments proceed at normal rates, including yours. If you feel you’re familiar with the basics of the game—including espionage and diplomacy—you’re ready for this difficulty.
Hard is the setting for those who want a challenge. You’d better know what you’re doing.
Impossible is reserved for those of you who enjoy fighting your way out from under a disadvantage. The other races operate with significantly accelerated research and production, and none of them are friendly. In fact, they all hate you right from the start.
Galaxy Size
Galaxies come in all shapes and sizes, but for the sake of simplicity, in Master of Orion II they’re boiled down to four classifications. As with difficulty, click on the icon to cycle through to the galaxy size you feel comfortable with. (Note that the number of stars mentioned is approximate, as the term “stars” includes black holes and some other phenomena.)
A Small galaxy is little more than a star cluster. This little, 20-star neighbourhood guarantees early contact with other races and a fast-paced game—not to mention fierce competition for the limited space and resources.
Medium galaxies include only 36 star systems. Conflict is neither as quick to begin nor quite as ferocious as in a Small cluster. With luck, you have time to develop a few advanced technologies before running into your neighbours.
Large galactic neighbourhoods give you some elbowroom. The planets available in 54 systems allow for expansion and fleet building in preparation for eventual contact with other races. The research possibilities are better, too, but colony management becomes more important in larger empires.
In Huge galaxies, you have the time and space to conduct epic campaigns and pit massive, technologically advanced empires against one another over a span of 72 stellar systems.
Galaxy Age
Regardless of their size, most galaxies age in similar ways.
Young galaxies are nurseries for the development of hot, new stars. These clusters consist primarily of blue and white stars that have only recently blown off the remnants of the stellar nebula from which they formed. If these newborn stars have any planets at all, they tend to be mineral rich, but nearly uninhabitable.
Galaxies of Average age have had time to mature. Overly energetic young stars have settled down into the main sequence, allowing the occasional planet that is amenable to life. Orange and yellow primaries have appeared, along with the rare red helium burner. Mineral-rich planets are still around, but they’re less abundant.
Old galaxies have run riot with orange and red grandfathers, well layered and on their way to final burnout. Planets where life can take hold are plentiful, though minerals are not. An explorer might find an ancient white dwarf with a few rocky planets or a rare star in second childhood after a partial nova, but rich mining opportunities are otherwise not extant.
Click on the icon to cycle through to the type of galaxy you prefer to explore.
Starting Civilization
Pre-Warp is for those of you who like to start at the beginning. Every race has one colony—their home star system. Exploring outside that system is impossible until faster than light (FTL) technologies are discovered.
Average Civilization starts each race with the same single colony, but with all the technologies necessary for interstellar flight already achieved (plus a few random extras). Every empire has a small star fleet, including one Colony Ship capable of settling a planet.
Finally, Advanced Civilization is for those who want to get right into the thick of it. Much of the galaxy is already explored and settled. Each race begins with several technological advancements in hand and a substantial fleet of ships capable of interstellar travel.
Manipulating the level of technology with which every empire begins is another way Master of Orion II provides for extra challenges. Click on the icon to cycle through to the level of advancement at which you want to start.
Number of Players
The number of races you go up against is also under your control. You can choose any number of players from 2 (you and one opponent) through 8 (seven vs. you). Choosing fewer players, naturally, allows more time for developing colonies, technology, and fleets before you make first contact. Having more players sets up a galaxy destined for lots of action and conflict over relatively scarcer resources.
Click on the icon to cycle through to the number of races you want involved in your game.
Tactical Combat
Of the three buttons on the Game Setup screen, the top is the Tactical Combat toggle. When this button is on (highlighted), all combat in the game is tactical. If this is off (dark), all combat takes place under the strategic rules. What does that mean?
“Tactical” combat gives you a more detailed game experience. You can design and redesign each of your classes of ship, based on the available technology, as often as you like. In fact, you must design ships in order to have effective fleets. When one of your fleets joins in battle, you personally control the movements, weapons, and special systems of every ship under your flag. This is the mode for a “hands-on” general.
“Strategic” combat means that Master of Orion II takes care of the fighting for you. This is the mode to use if you’re interested in playing a strategy game without the distraction of designing ships and participating in ship-to-ship combat. In strategic combat games, ship designs are automatic, and battles are decided statistically.
For more detail regarding both these combat modes, read the Combat section.
Random Events
The middle button controls whether random events, both helpful and hurtful, occur during the game. If you leave random events active, the Galactic News Network will sometimes report an unusual circumstance. Any race in the game could be the target of each event, and some events affect all races.
Antaran Attacks
The bottom button toggles the existence of the mysterious Antarans. When this is off, you can rest easy; the Antarans will not actively seek to attack the colonies of any race in the game. On the other hand, leaving this toggled on can seriously spice up the game, as this powerful race will certainly meddle destructively in galactic affairs.
Race Selection
Once you finish setting up the galaxy, the Race Selection screen appears. Here, you select which of the several available races will make up the population of your empire.
Moving the cursor over the name of a race brings up a picture of an average individual of that race. Any special abilities, advantages, and disadvantages that race has are listed with the portrait. We’ve also included a brief description of each race here. When you find the one you would like to play, click on the name.
If you’d prefer to create your own, customised race, click on Custom instead of one of the predesigned races. You are immediately prompted to choose one of the other races; this is simply to select an appearance for your new race. Once you have chosen a portrait, you need to define the racial characteristics. How you do so is detailed below, under Custom.
After you have chosen a race (and finished defining it, if you chose to create a custom race), you have a chance to name yourself. If the suggested name suits you, just click the Accept button or press Enter. If not, type in a name you prefer first. Next, you must choose the colour of your flag. This colour is used to denote systems you control, your ships and colonies, and that sort of thing. Just click on the flag of the colour you like.
The advantages and disadvantages of each form of government are discussed under Custom.
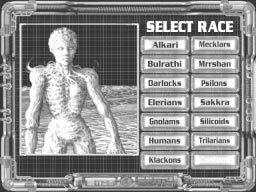
Alkari

The Alkari are an avian race descended from great flying reptiles. Reared as fliers, Alkari pilots have an almost instinctive grasp of the dynamics of three-dimensional motion. As a result, Alkari ships gain a 40% defensive bonus in space combat. Long ago, the Alkari home world was once a colony of the powerful Orion empire. The ancient artifacts left from that time give their researchers an advantage. The Alkari government is a Dictatorship.
Bulrathi

A large, bear-like people, the Bulrathi possess tremendous strength and hardiness. They evolved on a high gravity (High-G) home world, and thus are able to colonise High-G and Normal-G planets without penalties. The Bulrathi enjoy a 10% bonus in ground combat and a +20 to the Ship Attack of all their ships. Their government is a Dictatorship.
Darloks

A race almost as enigmatic as the ancient Antarans, the Darloks are shape-shifters who can assume almost any humanoid form. As a result, Darlok spies are 20% more likely to be successful on any mission. Their early research has run along lines parallel to their evolution, and so Darlok pilots have the ability to render their ships invisible to long-range detection. These mesomorphs’ government is a Dictatorship.
Elerians

The warrior castes of the Elerians are the only face most outsiders ever see. This humanoid society is matriarchal, and to date only females are allowed to join the military. Those who do are provided with the best possible training. Thus, Elerian ships gain a 20% defensive and 20% offensive bonus in combat. While the females fight, the all-male philosopher caste has developed incredible mental powers. Their meditations have produced remote knowledge of every system in the galaxy, and their telepathic powers are second to none. The Elerians’ social structure is strengthened by a Feudal government in which only the warrior castes hold positions of power.
Gnolams

The Gnolams are a dwarf-like people from a Low-G home world whose society focuses almost exclusively on monetary gain as a measure of status. As a result, the Gnolams are Fantastic Traders, and thus receive greater benefit from trade treaties and higher than normal income from excess food and trade goods. The capitalistic nature of the Gnolam race is so intense that each unit of Gnolam population generates an additional 1 BC per turn. The Gnolams’ Low-G roots put them at a 10% disadvantage in ground combat. To maximise the potential for profit, their government is a business-friendly Dictatorship. Somehow, these lucky creatures always manage to avoid the consequences of random natural disasters.
Humans

Humans are the galaxy’s most charismatic race; they’re the deal makers and diplomats. When dealing with any other race, Humans gain a 50% bonus to their diplomatic efforts. Furthermore, the ever-flexible Humans have great cultural diversity, and as such assimilate conquered colonists with seeming ease. Mercenary leaders are eager to work with the Humans; their hiring prices are lowered for this race. For some reason, they still cling to a Democracy form of government.
Klackons

The Klackons are an insectoid people from a large home world. Though they’re not exactly a hive mind, the Klackon communications system is fast and efficient, and the population is completely satisfied with their lives. This is reflected in their extreme industriousness. Klackon farmers produce 1 more food each than those of other races, and their workers also give +1 to production. The entire race communicates, thinks, and operates virtually as one. All this makes the Klackon practically, if not actually, a shared consciousness, and has paved the way for their successful Unification government. The down side to all this thinking alike is that the Klackons are rather Uncreative.
Meklars

The Meklars are a physically weak race whose population has become dependent on cybernetic exoskeletons. This, of course, has led to even further physical deterioration, to the point that their bodies have atrophied to tiny, fragile husks. Unlike other races, Meklars survive partly on the lithosphere of their home world. They consume half a unit of minerals and half a unit of food each per turn (rounded up), instead of the usual unit of food. Furthermore, their powerful exoskeletons add to their production ability; millions of untiring Meklar factory workers each provide a +2 production bonus. Their cybernetic interfacing makes shipboard repairs possible without specialised equipment, even during combat. The Meklar government is a strict Dictatorship.
Mrrshan

The Mrrshan look as though they’ve evolved from cat-like predators because they have. This genetic heritage has left them with keen senses and fast reflexes, which add 50% to their chances of hitting in ship-to-ship combat. The fierce Mrrshan are Warlords. Despite their mineral-rich home world, only a strict status-based social order has enabled the Mrrshan to control their fierce feline territorial instincts, so they have never been able to progress beyond a Dictatorship government.
Psilons

The Psilons are a delicate race of brilliant researchers from a Low-G home world. Each Psilon scientist produces 2 more research than the galactic norm. In addition, the Psilons are very creative, and they never ignore a potential avenue of research. Thus, all technologies are available to their scientists. That ancient artifacts are plentiful on their home world doesn’t hurt. Peer review and tenure squabbles have prevented them from achieving a form of government more advantageous than a Dictatorship.
Sakkra

The Sakkra are a hardy reptilian race with impressive regenerative capabilities. As a result of their low mortality rates, the Sakkra population grows at double the normal rate (+100%). Overcrowding pressures, even on their large home world, long ago forced them to become partially subterranean, living both under and above the surface of a planet. This allows them to support a greater maximum population on every planet they colonise, and it makes their defensive ground troops 10% harder to dig out. These reptiles survive partly because they produce +1 food per farmer and partly because their Feudal government is so efficient at starting internecine wars. The life of the average Sakkra is by no means pleasant. Their dispirited spies operate at -10.
Silicoids

The Silicoids are an incredible oddity; they’re the only known sentient crystalline life form. These strange beings are lithovores; they eat minerals instead of food. Silicoids are environmentally tolerant, and thus can support a greater maximum population on nearly every type of world. They also spend no effort to clean up pollution, as it has no effect on them. They do, however, have an extremely low rate of reproduction, 50% below galactic standards. Their unusual chemistry also affects their ability to communicate with other races; Silicoids are considered repulsive by all other sentient species. The Silicoids have a Dictatorial government.
Trilarians

Trilarians are aquatic life forms. This race suffers none of the usual penalties associated with living on ocean and swamp worlds. In addition, there is a legend among the Trilarians that their race is descended from a long-lost Antaran colony. Regardless of whether there is any truth to this, this race has proven to be Trans-Dimensional. Even without the aid of FTL drives, Trilarian pilots can move their ships from star to star, though slowly. Ships with FTL drives move more quickly than they should. The Trilarian government is a Dictatorship.
Custom
The screen you use to design your custom race needs to have a name, so we’ll call it the Race Customisation screen. On this screen are three columns of options, 11 topics in all. Every one of the options included under these topics represents an advantage or disadvantage you can give your new race.
The usual first step in creating a race is to click on the Clear button to erase all of the selections. This leaves you with a “Galactic Normal” race—no advantages, no disadvantages, and no special characteristics. Notice that the two boxes at the bottom of the screen show that you have 10 Picks and 200% Score. What does that mean?
“Picks” is shorthand for Racial Ability And Characteristic Points, which wouldn’t fit. You have 10 picks that you can use to develop your race. To the right of every option is that option’s Pick Modifier. If you choose that option for your race, you lose (if the modifier is positive) or gain (if it’s negative) that many picks. Note that you can not choose disadvantageous options to gain more than 10 extra picks, and you are also not allowed to start a game with a negative pick total.
“Score” is short for Score Multiplier As Determined By Picks. This is the percentage of your earned game score that will be awarded as your total score. Your picks total directly affects this. For example, if you have zero picks, your score is 100%; in this case, your earned score and your awarded score would be the same. If you choose not to use five of your picks, your score would be 150%; this would make your final awarded score 1.5 times your earned score.
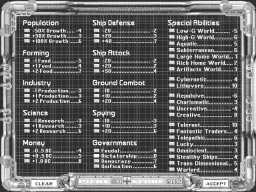
Short descriptions of every optional characteristic follow. To pick or unpick a specific option, click on it. When you’re satisfied with all your choices, click the Accept button to move on.
Colonial Production
Population growth modifiers affect the rate at which the population of every colony grows. This affects the base to which the effects of a planet’s terrain and pollution are applied. Low population growth rates are usually the result of shorter life spans, slower biological processes, physical weakness, or some similarly inherent problem. Higher growth rates result from things like long life spans, strong immune systems, or general fecundity.
Farming production modifiers increase or decrease the amount of food each unit of population assigned to agriculture can grow. Like those for population growth, the farming modifiers affect the base that the effects of a planet’s terrain and pollution are applied to. A farming bonus represents long familiarity with agriculture, resulting in effective techniques, while a penalty represents a simple lack of farming aptitude. (If the planet has a life-bearing environment, though, the penalty cannot go below 1 food per farmer.)
Industry modifiers affect the amount of production that each unit of population assigned to factory work can produce. Under no circumstances can industrial penalties reduce the capabilities of a population below 1 production per unit.
Science modifiers are applied to the amount of research that each scientist unit of a colonial population generates. Races with science bonuses are not necessarily more intelligent, but they are likely to be more inclined to rational investigation of the facts rather than superstitious beliefs. Science penalties cannot reduce the research abilities of a race below 1 research per unit of population assigned to science.
Money modifiers affect the tax burden (in BC) a population can withstand. Races with monetary bonuses have an instinctive grasp of commercial concepts, while races with penalties lack economic skills, interest, or avarice. Racial monetary penalties cannot reduce taxation possibilities below zero per population unit.
Combat and Espionage
Ship Defense modifiers change the chances of enemy fire hitting your ships during ship-to-ship combat. Races with bonuses in defense tend to be those with keen senses, giving them better luck at avoiding fire and misleading an attacker. Penalties, on the other hand, usually indicate that members of the race are physically slow or perhaps have difficulty visualising complex three-dimensional motions.
Ground Combat modifiers affect the combat effectiveness of troops engaged in planetary combat or ship boarding actions. Bonuses are generally representative of extraordinary strength, aggressiveness, and agility, while minuses indicate the lack thereof.
Spying modifiers affect the sabotage and espionage skills of a race. Races with specialised disguise abilities get bonuses, as well as those with a cultural bent toward deceit.
Ship Attack modifiers improve or hurt the chances of your ships’ attacks hitting their intended targets. Racial bonuses are based on the ability to anticipate defenders’ evasive tactics. Penalties might be the consequence of poor depth perception and tracking skills—or a simple unfamiliarity with aggressive behaviour.
Governments
The type of government of each empire is determined at the beginning of the game and does not change, though research can lead to a more advanced form of the same government. There are four types of governments, each with its own strengths and weaknesses. Your government type affects what method of managing your empire is most effective.
Feudal: A feudal government structure rests on the inherited titles and holdings of an elite class, somewhat as in medieval Europe. An emperor keeps the throne of a feudal government by balancing and subtly encouraging the rivalries between the more powerful members of this class.
- The morale of each planet under a Feudal government incurs a penalty of 20% until a Marine Barracks or Armour Barracks is built there. (Local troops are necessary to keep the serfs in line.)
- It takes 8 turns for a Feudal government to assimilate a unit of population in a conquered colony.
- Feudal populations will instantly assimilate if their colony is conquered by an opponent. (There is little loyalty to the central government, and local barons are always on the lookout for personal gain.)
- Due to the generally warlike nature of feudal governments, ship production costs are 2/3 normal.
- For the same reason, research is half the standard.
- If the capital of a Feudal empire is captured, the entire empire is thrown into a state of anarchy as rival claimants to the throne battle for supremacy. This period of anarchy lasts until a new capital is built. Morale suffers a 50% penalty during this period.
The advanced form of a Feudal government is Confederation. Confederated empires receive the following benefits in addition to the usual Feudal characteristics.
- Assimilation of conquered colonists takes only 4 turns.
- Ship production costs are reduced further below the Feudal baseline (the exact fraction printed here was lost to a scanning artifact in the source PDF).
- Confederation populations no longer instantly assimilate when captured.
Dictatorship: In a dictatorial government, one individual rules the entire empire without having to answer to anyone else. Orders and decisions are enforced through a ruthless and efficient organisation, by any means necessary.
- Due to the increased internal security needed to prevent revolts, defensive spies gain a 10% bonus to every mission.
- The morale of each planet under a Dictatorial government suffers by 20% until a Marine Barracks or Armour Barracks is built there. (The presence of local troops is necessary to exert control.)
- It takes 8 turns for a Dictatorship to assimilate a unit of conquered population.
- If the capital of a Dictatorship is captured, a morale penalty of 35% is applied to all colonies until a new capital is built.
The advanced form of a Dictatorship is an Imperium. Imperium governments receive the following benefits in addition to the usual Dictatorial characteristics.
- Assimilation of conquered colonists takes only 4 turns.
- The Defensive Spy bonus is increased to 20%.
- Your command rating is increased by 50%.
Democracy: The “democracy” form of government is not a true democracy in the classical Greek style, but rather a “representative” democracy similar to that of the ancient United States of America. Control of the government is balanced between its multiple branches, and the population enjoys the most personal freedom allowed under any of the known forms of government.
- Because of the emphasis on personal freedom, privacy, and civil rights in a Democracy, defensive spies operate under a 10% penalty.
- On the other hand, greater personal liberty makes the people happier and more productive, giving a 50% bonus to both research and per capita (tax) income.
- It takes only 4 turns for a Democratic government to assimilate a unit of conquered population.
- Democracies are prohibited from eradicating conquered populations.
- If the capital of a Democratic government is captured, the entire citizenry suffers a period of uncertainty and chaos. This results in a 20% morale penalty until a new capital is built.
The advanced form of a Democracy is called a Federation. Federated governments receive the following benefits in addition to the usual Democratic characteristics.
- Assimilation of a unit of conquered population takes only 2 turns.
- The research and income bonus is increased to 75%.
Unification: The Unification form of government is available to those scant few races that can exist harmoniously together without jealousy, envy, or concern for individual advancement. Each individual works for the good of the community rather than the self. The analogy is often made between a Unified government and a colony of bees. Though correct in some ways, this is a misleading comparison. Unified populations are neither mindless nor uncreative; some unknown characteristic (many have suggested genetic uniformity) simply allows them to forego competition with one another.
- Since every individual works for the good of the whole, there can be no traitors. This gives Unification defensive spies a 15% bonus.
- Unification colonies do not have morale as such. They do, however, receive a 50% bonus to food and industry production due to the harmonious nature of their society. This functions like a morale bonus.
- All morale effects of buildings are ignored by Unification governments.
- The vast societal differences make it difficult for outsiders to join a Unified culture. It takes 20 turns for a Unified government to assimilate a unit of conquered population.
- The loss of the capital is irrelevant to a Unified race. Unified governments neither have nor need a capital.
The advanced form of Unification is Galactic Unification. Galactic Unification governments receive the following benefits in addition to the usual Unification characteristics.
- Assimilation time is reduced to 15 turns.
- The harmony production bonus (to food and industry) increases to 100%.
Special Abilities
In addition to the more run-of-the-mill racial modifiers, there are also a variety of special effects that make races more interesting to play. Some of these might seem to bend or break the galactic rules, but that’s part of the fun. Note that several of the special abilities are mutually exclusive, as they would contradict or negate the effect of one another.
Low-G World
Indicates that the race originally evolved on a home world with low gravity. This results in a population physically weaker than races from Normal-G or High-G worlds. Colonists from these races have difficulty adapting to intense gravitational fields, and can operate only on Low-G worlds without penalty. On Normal-G worlds, they suffer half the normal High-G penalty. Low-G troops suffer a 10% penalty during ground combat. Low-G World and High-G World are mutually exclusive.
High-G World
Means that the race originates on a High-G planet. The members of such a population are considerably hardier and physically stronger than races from other types of world, and thus their colonists can operate in both High-G and Normal-G worlds without penalty. In addition, High-G ground troops can sustain substantially more physical damage than other troops; they take 1 hit more than normal troops before being slain in ground combat. High-G World and Low-G World are mutually exclusive.
Aquatic
Races are spawned from ocean worlds, and therefore can more easily adapt to environments that are primarily water-based. For their purposes, Tundra and Swamp worlds count as Terran environments, and Ocean and Terran planets are considered Gaia class.
Subterranean
Races are semi-troglodytic—adapted to living underground through the construction of expansive complexes of chambers and tunnels. As a result, a subterranean race’s maximum population on any planet is increased by that world’s size class (i.e., +2 for Tiny, +4 for Small, and so on up to +10 for Huge). Finally, due to the difficulty in navigating the underground labyrinths to dig them out, subterranean troops receive a 10% ground combat bonus when defending their colonies.
Large Home World
Gives a race the advantage of having some elbowroom early on. A large home world allows greater population growth, which leads to more food, quicker research, and faster production.
Rich Home World
Is another early advantage that can make a big difference. A mineral-rich home world means accelerated production, which is a very good thing.
Artifacts World
Means that the race’s planet of origin was part of a great empire some time in the distant past. Artifacts from that time abound, giving the researchers a boost. Each unit of population assigned to science produces 5 research points instead of the usual 3.
Cybernetic
Races use mechanical appendages and artificial organs to sustain and augment their organic bodies. These populations consume minerals as well as food—one half unit of each. This cuts down on the necessity for farming, but causes an equivalent detriment to production. Their familiarity with machine interfaces allows these races to repair their ships completely after any combat. Even during combat, they fix armour and structural damage at 10% per round and systems damage at 5% per round. Cybernetic and Lithovore are mutually exclusive.
Lithovore
Describes those populations that have the ability to subsist on rock alone, without organic foodstuffs. These races can subsist on any planet simply by eating the minerals. This means farming is completely unnecessary (other than for profit) and freighters are unnecessary, except for transportation of colonists. Lithovore and Cybernetic are mutually exclusive.
Repulsive
Races find diplomacy frustrating, since all other races take an immediate dislike to the leader of a repulsive race. This severely limits the diplomatic options available. In addition, repulsive races assimilate conquered colonists into their population at only half the normal rate. Mercenary leaders are less likely to offer their services to a repulsive race, and they raise their hiring prices, as well. Repulsive and Charismatic are mutually exclusive.
Charismatic
Races make allies easily and quickly and can almost always talk themselves out of situations. This ability doubles the effects of all good diplomatic actions and halves that of negative ones. When proposing deals, charismatic races have a 50% bonus to the chance of acceptance. Since they’re so well admired, charismatic races assimilate conquered colonists easily into their population. Mercenary leaders are more likely to offer their services to these races, and they lower their hiring prices, too. Charismatic and Repulsive are mutually exclusive.
Uncreative
Describes those races that have great difficulty conceiving new ideas for applications of basic research. These races’ researchers and engineers only recognise the possibility of one technology associated with any field of scientific endeavour. The Uncreative and Creative options are mutually exclusive.
Creative
Races have little difficulty seeing the more unusual possibilities inherent in a field of study. As a result, these races are able to discover all of the technological applications appropriate to a field of research. No race can be both Creative and Uncreative.
Tolerant
Means that a race is practically immune to extreme environments. Typically, these races have strong regenerative properties or a metabolism quite unlike that of the average humanoid. Races that are tolerant can use 25% more of a planet’s surface for habitation, living in places no other race would dare and boosting the planet’s maximum potential population. Thus, for example, while a typical race could live on 25% of a Barren planet, a Tolerant race could use 50% of the same planet. Tolerant races also suffer no harm from pollution and need not spend production resources cleaning it up.
Fantastic Traders
Possess a keen understanding of economics and deal making. They receive a 25% bonus to the profit taken from trade treaties, plus 1 BC (instead of the usual half) for every surplus unit of food generated. On top of that, traders get a 50% bonus to all income derived from producing trade goods.
Telepathic
Races are capable of reading the minds of other beings, allowing them to exactly isolate the motivations of anyone with whom they are attempting to negotiate. As a result, telepathic races gain a 25% bonus when conducting diplomatic negotiations with other races. Furthermore, telepaths in orbit around an undefended planet can directly affect the thoughts of the besieged population. Highly trained telepaths are assigned as crew on each ship of size Large or bigger. These telepaths can break down the resistance of the enemy population and conquer the colony without bloodshed. (Of course, this doesn’t work on Telepathic races.) Telepathic races instantly assimilate conquered populations into their empire. Also, telepathic spies are extremely adept and get a 10% bonus, regardless of their mission. Unlike everyone else, Telepathic races can immediately use ships captured in combat.
Lucky
Refers to those races who, somehow, never suffer from random galactic disasters. Lucky races also benefit from more than their fair share of good random events. Space monsters and even the Antarans tend to overlook the colonies of lucky races.
Omniscient
Races are those who have some (usually secret) method of gleaning information from the entire galaxy without ever physically leaving home. Thus, these races know the make-up of every star system and planet throughout the entire galaxy at the start of the game. They see the whereabouts, movements, and destinations of enemy fleets, regardless of any stealth abilities or technologies.
Stealthy Ships
Some races have found ways to completely mask their ships from long-range sensors. This ability does not have any effect during combat, but it prevents a scanning system from detecting the approaching fleet.
Trans-Dimensional
Beings are capable of folding the fabric of space with their minds. This allows them to travel without the aid of FTL drives (though they still must have ships in which to travel). Those ships with FTL capability add 2 to the speed at which they travel the interstellar distances and 4 to their combat speed. Trans-Dimensional races are also not affected by Hyperspace Fluxes.
Warlord
Races evolve from cultures with a high regard for all things military or warlike. All ship crews of a warlord race begin at one level of experience higher than normal, and these crews have the potential to eventually reach Ultra-elite status. Ground defenders—Marines and Armour—are produced at double the normal rate, and warlord barracks can support twice the usual number of ground troops. Mercenary leaders working in the hire of a Warlord race are inspired by example, and have effects as if they were 1 experience level higher than they actually are. Every colony you control contributes 2 points to your Command Rating.
4. The Galactic Command Interface
ONE VERSATILE MAP
GAME MENU
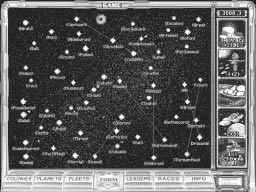
The main portion of the screen is a map of your entire galaxy.
TREASURY COMMAND FOOD FREIGHTERS ZOOM
RESEARCH END TURN
Stars: Every star system you can visit is shown on the map in the colour of its primary star. (Refer to Star Colour, in the Star Systems section, for the details on the different types and colours of star.) You can click on any star you have already visited to open up the System window. We explain the uses of this window shortly, in The System Window. If you look closely, you’ll notice that your home system is labelled by name and in your imperial colour. After you have explored other systems, their labels show up. Systems colonised by any race (including yours) are labelled in that empire’s colour. To quickly find the distance between two star systems, use the keyboard shortcut 9. You’ll need to click on the first star, then move the mouse cursor over any other star to see the distance (in parcsecs) between them. Some problematic interstellar stuff also appears on the map:
THE WHOLE GALAXY
When the galaxy has been generated and the game begins, the first thing you see is the Galaxy Map. This is the central interface from which you conduct your entire imperial campaign. There are several useful components on this interface—including the map itself. Let’s take them one at a time.
HELP AND QUIT
Before you start, it’s nice to know that there’s a Help system in place for novice galactic emperors. When the mouse pointer is on one of the active areas of a screen, window, panel, or whatever, you can right-click to call up basic information about that active area. (Not all areas have help, but most do.) When you’re done reading, click on the Close button to clear the Help window away.
Nebulae: These are huge interstellar clouds of tiny particles. Their brightness and colours are normally caused by ionizing radiation from some nearby source. Though this wispy ionized plasma is thin by terrestrial standards, compared to the vacuum of space, it’s extremely dense. Ships travelling through a nebula are reduced in speed to 1 parsec per turn. More importantly, the fierce ionization prevents deflector shields from functioning without Hard Shields technology. Planets found inside nebulas are often mineral rich. Black Holes: When enough mass accumulates in a small enough volume (most commonly at the centres of galaxies and when giant stars collapse), the gravitational field becomes so powerful that even light cannot escape. A gravity well of this incredible magnitude is known as a black hole. Black holes are by their nature invisible (except in some portions of the X-ray spectrum), so their locations are represented on the map by dark whirlpools. The effects of such an awesome force extend even into the hyperspace through which your ships travel. No ship can safely pass within 2 parsecs of a black hole (unless the ship contains an officer with the Navigator skill).
If at any time you wish to quit Master of Orion II quickly and return to the operating system, use the keyboard shortcut a + Q.
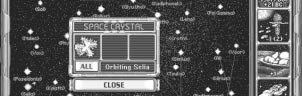
Fleets: Any ship or group of ships you have control of is indicated on the map by a tiny ship icon in your imperial colour. If you somehow know the current location of another race’s fleet, it’s shown, too, but in that empire’s colour. You can click on any displayed fleet to get information about it or—in the case of your ships at certain times— give orders. The details are below, in The Fleet Window.
Travel Lines: When any of your fleets are between stars, the space between the ships and their destination is marked by a solid line. Near the fleet is a tiny number—the remaining flight time. If you somehow know the destination of another race’s fleet, that is displayed as well. Wormholes: These bizarre spatial anomalies are thought to be created when two black holes collide at unimaginably high velocity and turn each other inside-out. Somehow, the interaction of the singularity regions “pinches” two distant points in hyperspace together. Regardless of the cause, the effect is clear; any ship can travel from one end of a stable wormhole to the other in only 1 turn, no matter what the distance. Wormholes are marked on the map as grey lines connecting two points. Structures: Scientific advancement eventually leads to the possibility of controlling some of the more esoteric forces of the galaxy. When an empire builds a Dimensional Portal or an Artemis System Net (see Research and Development for details), it shows up on the map near the system in which it was built. Along the bottom of the Galaxy Map is a button bar. All of these buttons except the ones in the centre open windows in which you manage some aspect of your empire. That’s why they’re called the Management buttons. There’s also an important button down in the lower right-hand corner. We’ll cover the two non-management buttons here and the rest a little further on.
At the widest zoom setting, which is the one you start on, you can see the entire galaxy at once. If you’d prefer to focus on a smaller region, you usually can. (In a Small galaxy, you can’t.) In the centre of the button bar are the Zoom buttons. Click on the + button to zoom in. A box that covers the extent of your new viewing area appears. Use the mouse to move this box to the region on which you want to focus, then click. In a Huge galaxy, you can zoom in a maximum of three levels from the whole galaxy view. To zoom out again, click the - button. Large galaxies have 2 zoom levels and Medium have only 1. When the map view is zoomed in to show only a portion of the galaxy, you still have control over what area you’re viewing. To centre the map on a specific point in the galaxy, place the mouse pointer there and right-click. This is useful for sliding the view by increments; if you need to go all the way to the other end of the galaxy, it might be more convenient to zoom out, then focus back in on the area you need to see.
The location of each icon tells you something about it. If it’s between star systems, then it is en route to somewhere. Icons sitting above and to the right of a star are in orbit around a planet in that system. Tiny ships above and to the left of a star have been given orders to leave that system for another and are just about to go. Monsters: From time to time, explorers discover immense, hostile creatures living in a star system. At other times, similar monsters “invade” the galaxy. The space monsters, when their location is known, appear on the map. For tracking and combat purposes, they’re treated as fleets.
Zooming
At the beginning of most campaigns, that’s all you see in the galaxy, but as you explore your stellar neighbourhood, other things gradually show up on the map. These include:
Ending Your Turn
When you’re done making adjustments to your colonies, moving fleets, and whatever else needs doing, you signal the end of your turn by clicking the Turn button. Once you do this, things are out of your hands—except for defensive combat, of course—until every other race has had their turn and all the production and random events have been finished. Each turn represents one-tenth of one galactic standard year. If you have the End of Turn Wait option (on the Settings sub-menu of the Game menu) toggled on, which is the default setting, one turn takes place every time you click the Turn button. However, if you have that option turned off, time will flow on until either (1) you click again to stop the clock, or (2) something of note happens to stop time automatically. What constitutes “something of note”? Several things, including but not limited to:
- One of your fleets has arrived at its destination.
- One of your colonies has run out of production orders.
- An enemy’s fleet (or a space monster) has been detected heading for one of your fleets or systems.
- One of your fleets, colonies, or outposts is attacked.
- A random event has occurred.
- Your scientists have made a breakthrough.
- One of your colonies is experiencing starvation.
- Your income or food supply per turn has become negative.
- A Colony Base, Colony Ship, or Outpost ship has been built in a system with an unused planet.
- The leader of another race requests an audience with you.
- A mercenary leader offers to join your empire.
A TYPICAL BATCH OF PLANETS
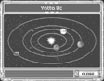
To take a look at what you know about a specific star system, click on that star (on the Galaxy Map). The System window opens. In this window is a representation of the system. The star itself and all the planetary bodies in the system (including asteroid belts) are shown in their orbits. At the bottom of the window is an area where any fleets or monsters in the system are noted. Move the mouse pointer over any planetary body or fleet icon to get a summary of what you know about it. If you’ve got a colony or outpost in the system you’re viewing, your planet is marked with your imperial colour. Note that you can get to the Colony screen from here. To look over and manage one of your colonies in this system, just click on the planet. For the details on the Colony screen, please refer to the section Managing a Colony. Right-click on any planet to view the effects that world’s characteristics and environment would have on any colony established there. Click on any fleet to open the Fleet window (described next). Whenever the System window is open, there are a few keyboard shortcuts you can use to cycle through the star systems you’ve explored: 5 This changes the view to the next colonised star system. 6 This returns the view to the previous colonised system. ,
The comma key lets you view the next explored star system.
.
Use the period key to return the view to the previous explored star system.
To move this window around the screen, position the mouse cursor over the name of the system, then click and drag the window to where you want it. To leave this window, click the Close button.
The Fleet Window There’s a way to view a specific fleet—regardless of to whom it belongs. At the Galaxy Map, click on the icon for the fleet you want a look at. (You get the same effect if you click on a fleet icon in the System window.) The Fleet window opens. This shows every vessel in that fleet, lists the owner of the ships, and notes the destination of fleets in transit.
If the fleet you clicked on is not already en route—and it’s one of yours— you can assign it a new destination. First, you must choose which of the ships in the fleet are to go. Those which are highlighted are awaiting orders. To select or deselect a ship in the window, simply click on it. (To select or deselect all of the ships in the window, you can use the All button.)
The System Window
Next, move the mouse pointer to another system. If this destination is beyond the range of the selected ships, the travel line between the fleet’s present location and the destination system is red. Note that a fleet can only travel as far from a friendly colony or outpost as the ship in that fleet with the shortest range is allowed (ships with Extended Fuel Tanks might be held to less than their full range). If the destination is a valid one, the travel line is green. When you have a green line, click on the destination system to assign that route to the fleet. Unless you have discovered the necessary equipment, you cannot communicate with ships while they are en route between stars. That means you can’t change their course in mid-flight. If you want more information on a specific, friendly vessel, right-click on that ship to call up the Ship Info box. This is a detailed breakdown of everything you know about the ship. To clear the info box from the display, click anywhere on it. To move the Fleet window around the screen, position the mouse cursor over the name of the fleet, then click and drag the window to where you want it. To leave this window, click the Close button.
THE GAME PANEL
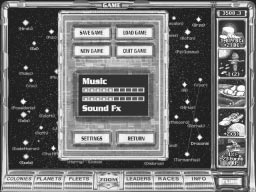
At the top centre of the Galaxy Map is the Game button. Clicking on this pulls down a control panel for configuring and managing the game as a whole—the Game panel. The use of most of these controls is fairly straightforward: Save Game: puts your current game situation into a file for safekeeping. At the prompt, type in a name for the game you’re saving. You can use the next control to use those saved games later. The Quick Save shortcut, 0, saves your game under the same name as the last game you saved. Be careful when using this, as it overwrites the previous saved game completely and irreversibly.
You can cycle through the known fleets using the keyboard shortcuts 1 and 2 . The first moves you through the fleets in one direction, and the second takes you back in the other direction.
End of Turn Summary determines whether you are presented with a summary report of the events of every turn at the end of the turn. Even when this option is turned off, some situations are drastic enough to necessitate a summary. a + 1 End of Turn Wait controls the passage of time. If this option is on, you must click the Turn button every time you want a single turn to pass. Otherwise, the turns go by until there is a reason to stop. (Most of the possible reasons are listed above, in Ending Your Turn.) a + 2 Enemy Moves governs whether you are shown the moves enemy fleets (those you know about, of course) make. If you’d rather not know what’s going on out there, turn this option off. a + 3 Expanding Help switches off the expansion animation that some of the windows go through when you open them. This doesn’t affect how the windows work, just how they look as they open. Turning this one off could speed things up a little.
WHERE YOU GO TO SAVE GAMES
Load Game: calls up a list of the games you’ve saved previously. You can select one from the list to have that game situation loaded into Master of Orion II. If you’re in the middle of a game when you load a saved game, your current game will not be saved. You can also load a game from the Galaxy Map using the keyboard shortcut a + 9. New Game: tosses out the game you’re in the middle of and lets you begin anew. Quit Game: shuts down Master of Orion II and returns you to your operating system. You can also quit from anywhere in the game using the keyboard shortcut a + Q.
Auto Select Ships, when on, has every ship in a fleet selected for action when you open the Fleet window. When this option is off, no ships are selected for you. a + 4 Animations turns the various game animation—the spinning tech items, moving alien ambassadors, and so forth—on and off. This does not affect how the game works, just how certain things are displayed. Turning this one off could speed up the game. a + 5 Auto Select Colony allows you to skip the System window when you click on a star system in which you have a colony. Thus, clicking on a star takes you right to the Colony screen. If you have more than one colony in the system, you see the one you last viewed. a + 6
Music: is a sliding volume control for the game music. Position the mouse pointer over the slide, then click and drag the volume bar to the setting you prefer.
Show Relocation Lines controls the appearance of travel lines for those ships being automatically relocated between star systems. (You set up your Relocation orders on the Fleet Operations console.) If you’d rather not clutter up the galaxy with them, turn this option off. a+7
Sound Fx: is a sliding volume control for the sound in the game. Position the mouse pointer over the slide, then click and drag the volume bar to the setting you prefer.
Show GNN Reports determines whether the Galactic News Network will inform you of random events and the standings of the various empires. If not, a bare message box notes these things instead. a + 8
Settings: opens a whole menu of options. Each of these has a toggle control, with which you can turn the option on or off. The Accept button puts your new settings into effect and closes the menu. You can also toggle most of these options at the Galaxy Map using the appropriate keyboard shortcut.
Auto Delete Trade Goods/Housing sets the Build Queue to automatically remove either of these settings from the list if any project is inserted after them in the queue. Auto Save Game: toggles the automatic save game feature on and off. Return: closes the Game panel and takes you back to your game.
MANAGEMENT BUTTONS
As we mentioned earlier, there’s a button bar running along the bottom of the Galaxy Map. The biggest buttons on this bar are the six Management buttons, which you can use to take care of the details of running your empire. Any one you click takes you away from the map. Each one also has a keyboard shortcut associated with it. Rather than clicking on the button, you can simply press this key instead.
Along the right side of the Galaxy Map are several extremely important and useful indicators. These act as an overall summary of the status of your empire’s function. At the top is the Star Date indicator. This notes the current turn in Galactic Standard Years. The Treasury indicator tells you not only how much money you have in your reserve, but also your net income or loss per turn. Income is primarily from taxes, the sale of excess food, and production of Trade Goods. Outgo is mostly maintenance on buildings, ships, and leaders. You can click on the Treasury box to change your empire’s overall Tax Rate—and the amount you collect every turn. (Remember, higher taxes cause lower production.)
STATUS INDICATORS
Colonies C BUY BUTTONS
The Command box summarises your current Command Rating. This rating represents the communications and command infrastructure and resources at your disposal. Every Star Base, Star Fortress, and Battle Station you build adds points to this rating. Every ship you build uses some of those points for support. Your net rating is listed first, followed by your total rating in parentheses. If your Command Rating is negative, you make up the difference by paying maintenance on the unsupported ships. You can click on this indicator to see a more detailed listing of the sources and uses of your command points. The Food listing is a summary of your net harvest per turn. If this number is negative, somewhere your population is starving. If it’s positive, you’re selling excess food each turn (though people might still be starving if your freighter system is below par). A net harvest of zero means that agricultural production and demand are perfectly balanced throughout your empire. (Clicking on this box doesn’t do anything.) The Freighters indicator notes how many freighters you have in service (in parentheses) and how that compares to the number you need to keep up the necessary flow of foodstuffs throughout your empire. If your net freighter supply—the number on the left—is negative, you haven’t enough to transport as much food as your agriculturally lacking colonies presently need. Starvation is the result. You can click on this indicator to scrap (sell) any Freighter Fleets you no longer need. The Research box follows the progress toward your next scientific goal. At the bottom, this indicator lists the total number of research points your empire is generating each turn. Above that is an estimate (not an exact one, either) of how long you must wait until your present research bears fruit. If your scientists are feeling especially confident, they post a completion percentage above that. You can click on this indicator if you decide to change the direction of their labours. (If you do so, all the points spent toward the former research goal are miraculously applied to the new goal.)
PLANETARY INFO
EMPIRE SUMMARY
SORT BAR PRODUCTION INFO
MINI MAP
The first button in the row is the Colonies button. As you might have guessed, this one gets you where you need to be to manage the various colonies that make up your empire. That is, the Colonial Overview. Here, you manipulate your colonies and empire in a broad sense. For precise control over a specific colony, you’re better off using the Colony screen for that colony.


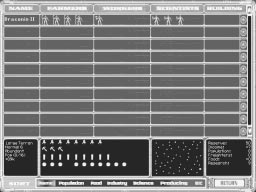
You might have noticed, as you were moving colonists around, that the numbers around the screen kept changing. That’s because all the information is recalculated and updated immediately whenever you make a change. That’s reflected most in the bottom right corner, in the Empire Summary. This handy info box displays an overview of your empire as a whole—much like the Status Indicators on the Galaxy Map do. It lists:
- Lots of info. Position the mouse cursor over the name of a colony.
- the Reserve left in your Treasury
- your current Income per turn
- the total Population of your empire
- the number of spare Freighters you have available
- your empire’s overall net Food production
- the number of Research points your empire is producing every turn
Now take a look at the boxes below the colony list. The one on the far left is the Planetary Info box; it notes what you need to know about the planet and its environment. The next one over is Production Info; this is a graphic representation of what that colony is making and its current morale. Past that is the Mini Map, which shows you where in the galaxy the colony sits. (We’ll get to the rightmost box a little further on.)
- Access to colonies. Click on the name of a colony to go directly to the Colony screen for that planet. How you use the Colony screen is described later on, under Managing a Colony, but you should at least know that it’s great for examining and manipulating a specific colony.
- Order people around. Click on any population unit to pick it up. Notice that all units of the same type (race and assimilation status) in the same box to the right of that unit come with it. You’ve just removed those colonists from duty. Now, move the mouse pointer to a different assignment in the same colony and click again. You’ve just reassigned them. You can do this as often as you want to, to as many colonies as you care to. You can even move population from colony to colony—just move them over there—if you have enough freighters available to carry them. Colonists in transit neither produce nor consume anything; they’re effectively in stasis.
- Change production. Click on the box that shows what the colony is working on to go directly to the Construction Orders screen for that colony. Exactly how you use the queue to assign production orders to your colonies is described later. Suffice to say that you can give your colonists enough work to keep them busy for a long, long time.
- Buy things. At the far right of each colony listing is a Buy button. If it’s highlighted, you can click on it to purchase outright the rest of the work necessary to complete the item in production. (Once you verify your decision, the button lights up blue to note that you’ve bought the item.) If the button is dark, forget it; your entire treasury won’t cover the cost—yet. Be careful: hurried production is more expensive than you might think.
The bulk of the overview is a convenient listing of every colony you control. (They’re in alphabetical order by name until you decide to change that.) Each listing notes—reading from right to left—the name of the colony, the population units assigned to farming, industry, and research, and what that colony is currently labouring to produce. Why is this so convenient? Several reasons:
Lowest, but not least, is the Sort Bar, located at the very bottom of the display. Using this, you determine in what order the colonies in the listing are listed. Click on one of the settings along the bar to have your colonies sorted by that criterion, as follows: Name: Lists colonies alphabetically according to the name of the planet the colony is on. Population: Orders the listings by number of residents, from the most populous colony to the least. Food: Sorts the colonies in descending order according to how much food each produces. Industry: Arranges the listings in descending order according to the amount of industrial production being done there. Science: Lists colonies by how many research points each is producing, from most to least. Producing: Sorts the listings according to what the colony is currently building. This sort order is somewhat unconventional. Items under construction (and the listings for the colonies building them) are arranged like this: 1) Ships, in order from largest to smallest (Colony Ships, Transports and Outpost Ships count as Small ships) 2) Freighter Fleets 3) Colony Improvements, in order according to total construction cost 4) Non-combat units (spies and androids), in alphabetical order 5) Housing and Trade Goods, in that order
BC: Orders your colonies by the income they produce for you, from highest to lowest. Clicking on the Return button takes you back to the Galactic Command Interface—the Galaxy Map.
Planets P MINI MAP
SORT OPTIONS RESTRICTIONS
Colonised and outpost systems are displayed in the colour of the empire that controls the planet. If you position the mouse cursor over any of the listings, the location of that planet is noted in the Mini Map in the top right corner of the screen. If there are more planets than will fit on the screen, you can use the scroll bar to the right of the listings to move up and down the list.
Inside these general categories, items are arranged by construction cost, with the most expensive first. If two or more items in the same category have the exact same cost, they’re listed alphabetically. If you’re working on the exact same thing in more than one city, those items are listed according to the remaining build time; the one that will be finished first is listed last.
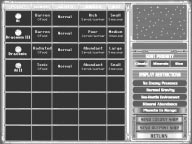
The list of planets is arranged in an order you determine. Just below the Mini Map are the three Sort Priority keys. Climate sorts the planets from most to least hospitable—Gaia and Terran down to Toxic and Radiated. Minerals arranges them from most to least productive—Ultra Rich through Ultra Poor. Size puts the worlds in order according to the maximum population each can support, from highest to lowest. Click on the one you prefer to activate it. Of course, you won’t always need to review the entire list of planets. The Display Restriction keys are there (below the sort keys) to help you focus your efforts. When you set a restriction on the list, it filters out of the display any planets which do not fit the parameter you specified. Click on any restriction to activate (or deactivate) it. Active restrictions are lit up. The possible restrictions are: No Enemy Presence removes from the list any planet in a system where a space monster or enemy fleet is presently known to be lurking. This also removes planets that are home to a colony or outpost of another empire. Normal Gravity shows only these worlds on which your race has no gravity penalty.
The Planets button gives you access to one of your imperial databases. This one keeps track of every inhabitable planet you have discovered. (For an omniscient race, that means every non-gas giant planet in the galaxy.) The majority of the database display is taken up by the planet listing itself. This notes all the pertinent information about each world for you.
- First is the Name of the planet and a nice picture of it, followed by a listing of any known enemy presence in that star system (in parentheses). Any System Specials are listed above the picture.
- Next is the type of Climate that world enjoys (or endures); the amount of Food produced by an average population unit of farmers in that environment is noted.
- Third comes the Gravity rating, under which are noted the production
penalties or bonuses that would be assessed to a race from a Normal-G home world.
- Mineral Status is fourth. Since this affects the amount of industrial
production each unit of working population can produce, the typical number is noted.
- The Size of the planet determines how many units of population can inhabit that world. Both are listed in the final box.
Non-Hostile Environment makes sure that any planet with an environment worse for colonists than Desert does not appear on the list. Mineral Abundance filters the list to include only those planets that are Abundant, Rich, or Ultra-Rich in minerals. Planets in Range de-lists any planet that orbits in a system that is presently out of range of your existing ships. In the lower right corner of this database display are two more handy buttons. These don’t change what’s listed or how it’s arranged. Rather, they give you the ability to send Colony or Outpost ships to planets on the displayed list. To begin, click on the button appropriate to the type of ship you want to send. Unless you have at least one of that type of ship built and waiting, nothing happens. If you do have a ship ready, however, the mouse pointer changes shape. Whenever you move it over the listing of a planet that is within that ship’s travel range, it becomes a planet icon. At that time, you can click to send a ship to the world over which the cursor is positioned. Be careful! You can always change the orders you’ve given a ship once you return to the Galaxy Map if the ship is not yet en route, but once it’s on its way, only advanced technology might allow you to rescind your orders. Clicking on the Return button takes you back to the Galaxy Map.
MAP
SHIP CONTROL
All: Selects all of the ships in the fleet to prepare to receive orders. (If all the ships are already selected, this deselects them instead.) Relocate: Allows you to leave standing orders for all ships produced in a particular system. The mouse pointer changes shape; click on a system in which you have a colony to select it as the source for the ships to be relocated. Next, click on another system you’ve a colony in to make it those ships’ destination. As soon as they’re complete, all ships built in the source system immediately move to the destination system. Scrap: Orders all the selected ships in this fleet decommissioned and sold for scrap.
INFO BOX
Scrapping is a good way to wring a last few BC out of a totally obsolete, seriously damaged, or otherwise worthless ship. Sometimes, refitting isn’t the most cost- and time-effective option. Scrapping a captured ship not only provides a few BC, but if it’s done in a system where you have a colony, it also allows your scientists to get their hands on the ship. (A system you have an outpost in isn’t good enough.) If any technologies you don’t already possess were used in the building of that ship, there’s a good chance that a working model like this will enable them to figure it out.
Click on the Fleets button to gain access to the Fleet Operations console. At this station, you can view any fleet within your scanner range, whether it’s one of yours, one of theirs, or a space monster. You also have a great deal of control over your imperial fleets from here. Your first stop is a miniature version of the Galaxy Map, with enlarged fleet icons. Naturally, only those fleets you know the location of are displayed. To get a closer look at a specific fleet, click on it. The ships in that fleet appear in the Ship Control window. (If the fleet is large enough, you might have to use the scroll bar to see all the ships.) Note the lit buttons below this window. When Support is bright, nonmilitary ships—Transports, Colony Ships, and such—are included in the display. Click on this button if you want to remove them. When the button is dimmed, you can click again to restore the support ships to the window. The Combat button performs the same function for military vessels. The button marked Leaders takes you to the Assignment console. If the fleet you’re viewing is not under your control, that’s pretty much all you can do. If you own the fleet, however, you can click on any ship in the Ship Control window to get a detailed breakdown of its structure, equipment, and crew. This information is noted below the map. Clicking on a ship also selects it to receive your orders. You can deselect a ship by clicking on it again. There are three buttons between the Ship Control window and the lit buttons. You can use these to give orders to individual selected ships or to an entire fleet.
Fleets F
Clicking on the Return button takes you back to the Galaxy Map.
Leaders L From time to time, mercenary leaders approach you and offer to join your empire. (For the lowdown on these leaders, refer to Mercenary Leaders.) If you choose to hire a leader, he, she, or it goes into your Leader Pool. If not, the mercenary sticks around your systems for a while, in case you change your mind. Click the Leaders button when you want to give orders to your hired leaders. All those in your pool and still hanging around in your space respond. The left side of the Assignment console holds the communications screens that keep you in contact with these leaders. Since you might have more involved than will fit the display, the two buttons at the top let you choose which type of leader you want to deal with—Colony Leaders or Ship Officers. You can only deal with four of each type at any given time, and you can never hire more than four of each type. The main use of this console is assigning duties to the leaders you’ve hired. For each leader, the data that you need to make intelligent assignments is noted.
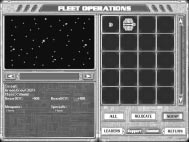
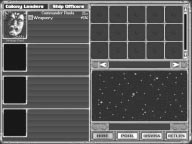
A smaller version of the Galaxy Map is in the lower right of the console. This map reflects the actual position of whatever is shown in the area above it. Since a leader assigned to a post must travel from your home world to that post, location affects the time it takes for him, her, or it to actually get on the job. To assign a leader you’ve already hired to a system or a ship, first make certain that the post is displayed on the console. Next, click on the leader. If you’re giving orders to a Colony Leader, that’s all there is to it. If you’re assigning a Ship Officer, you must click on the specific ship in the displayed fleet that you wish the leader to board and command. You must confirm the assignment. (If you decide to assign a post to a leader you haven’t yet hired, you must first hire that leader.) Once assigned, a leader will stay put until you say otherwise. There are two ways to do that—once you’ve clicked on a leader to highlight him, her, or it. The Pool button takes the leader from the present post and orders an immediate return to the Leader Pool. The Dismiss button sends the leader out of your employ entirely. It is possible that a dismissed mercenary might return in the future looking for work (at a higher price). It’s just as likely that that leader will be hired by one of your opponents. Keep this in mind when you decide that it’s time for dismissal. Clicking on the Return button takes you back to the previous display.
Races R
DIPLOMATIC STATUS
The different displays called up by the two buttons reflect their functions. When you’re dealing with Colony Leaders, the upper right side of the console shows the systems you’ve colonised, one at a time. If you’re giving orders to Ship Officers, the same area displays your fleets of ships. You can use the scroll arrows at the bottom of this area to cycle through all the possible assignments for the selected type of leader. On the fleet display, vertical scroll arrows let you view all the ships of larger fleets.
AMBASSADOR SPYING BONUSES
Beneath the info area are your spies who are assigned to that particular empire. Below them is the Espionage Assignment bar. There are three options here; click on one to give the spies just above the bar their orders. To move spies from one opponent’s empire to another, simply click and carry them as you would to move colonists to new duties. Espionage: Places your undercover operatives in data gathering mode. Sabotage: Assigns your agents to damage or destroy targets on the opponent’s colony worlds. Hide: Tells your spies to keep a low profile for a while, until the situation is less dangerous. In the lower right corner, your race’s current spying bonuses are listed for reference. Any spies assigned to defensive duty are represented below that. You can reassign these agents to other empires whenever you like. Below the defensive agents are a few buttons. After you click on any of the first three, you’re prompted to select an opponent emperor by clicking on the ambassador or the info area for that race.
Click the Races button to go to the Race Relations console. This gives you an overview of your diplomatic standing with every other race with which you’ve come into contact. When it becomes necessary or desirable to actually talk with one of your opponents, you request (or demand) an audience from this display. You also use this console to oversee and control your espionage and counterespionage agents.
Ignore: Instructs your aides to ignore all attempts at communication from the selected empire until further notice.
Each race you’ve met is represented by an ambassador, whose portrait marks the info area for that race. Next to the portrait is a summary of your relations with that race’s leader and the important information your agents have gathered about that opponent empire.
Declare War: bypasses Ignore orders and delivers a declaration of war to the selected emperor.
Report: Activates your underground communications net to gather reports from your agents assigned to the selected race. This updates the data in the info area.
Audience: Requests an audience with the emperor you selected. Clicking on the Return button takes you back to the Galaxy Map.
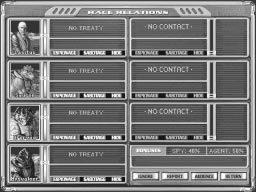
Info I Whenever you need or want statistical or general information about the progress of the game and your empire, use the Info button. The Info console is the result. Let’s begin the description with the few parts of the console display that don’t change.
- The present star date is noted in the upper left corner.
- In the lower left is a breakdown of your per turn budget. Overall income is balanced against the various types of maintenance payments to get your net income per turn.
THE POPULATION HISTORY GRAPH
- Between these two are the selectors that control what’s shown in the rest of the console display. Click on any one of these to view a different type of report on the game thus far.
History Graph: To check how you’re faring against the other races you’ve come into contact with, check out this display. The graph represents each race in a different colour, and you can choose (via the buttons along the bottom of the graph) to see histories based on Population, number of Buildings, Fleet strength, and Tech progress. Tech Review: To review the technology your empire has successfully researched, use the Tech Review button. The technology list is divided into four sections, accessible via the buttons along the bottom: General Achievements, Colony improvements, Weapons, and Ship Equipment. In each list, you can move the mouse cursor over any entry to see the long description of that technology. Race Statistics: This outlines the racial characteristics of every empire you’ve come into contact with. Turn Summary: This report keeps a copy of the latest turn summary. This is a useful record if you’ve got the End of Turn Summary option turned off and something odd happens—or you just need a reminder. Reference: The Reference display is the Help library for the game. In any of the displayed lists, you simply click on any category in which you’re interested, and the list of entries in that category are displayed. Move the mouse cursor over an entry to see a detailed rundown for that entry. The reference also includes How to instructions for common tasks. Clicking on the Return button takes you back to the Galaxy Map.
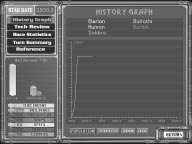
5. Star Systems
Yellow: Class G suns are calm, run-of-the-mill, young to middle-aged stars. They are neither especially hot nor notably cool. Yellow stars almost always have planets with moderate mineral resources and environments tolerant of, if not friendly to, life.
Once you start exploring the galaxy, you run into a beautiful array of star colours and a wide variety of types of planets. Not all of these worlds are suitable for colonization. Some are habitable, but not particularly amenable to your empire’s needs. You must be able to tell a planet you can put to immediate use from one that will need extensive support and much construction before it’s worthwhile. Your exploration vessels send back detailed reports, of course. This section is your guide to reading those reports intelligently.
Orange: K-class stars differ little from yellow stars, though they are usually older and cooler. These systems always include planets that are capable of supporting life, but are generally poor in mineral resources. Red: Class M red giants are mature, cooler stars. Few planets survive the expansion to giant size, and those that do rarely have abundant mineral resources or easily habitable environments. Brown: Brown dwarves are barely stars. These dim, cold suns have either burnt out almost all of their nuclear fuel or just never had the resources to shine in the first place. No planets orbit these extremely rare stars, but they’re more likely than other systems to have a system special.
YOUR HOME WORLD
One of the first things you need to do when you begin a new game is to familiarise yourself with your existing colony or colonies. Unless you’re playing an Advanced Civilization, you only have one to worry about—your home world. Find your home system on the Galaxy Map, and use it as an example as you read this section. Also, pay close attention to the other planets in the system with it. You want to know if any of them are suitable for colonization. Establishing a colony in a system where you already have one (using a Colony Base) is cheaper than sending a Colony Ship to some far-off system.
Of course, all this information applies to the system in which you begin, as well.
PLANETS
Planets come into two different categories: gas giants and habitable worlds. You can build a military outpost in a close orbit around a gas giant, but colonies can only survive on a solid planet. Every habitable world has several characteristics that determine how well a colony established there does.
STAR COLOUR
As any astronomer knows, the colour of a star says a lot about it. We’ll leave the particulars to the interested parties, but what the ruler of a budding galactic empire needs to know is summarised here. Blue-White: Class B are the hottest of all the stellar furnaces, emitting extreme amounts of radiation. Blue-white stars are typically young and bright. They have planets that are mineral rich, but the intense output of the star makes them an extremely difficult place to support life. White: Class F stars might be young, violent, low mass suns or ancient, withering dwarfs. In either case, they tend to have planets high in mineral resources, but barely able to support life.
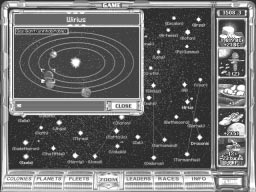
Size
Abundant: Despite what it sounds like, planets with “abundant” minerals are considered the norm in this galaxy. Though not bursting with ores, these worlds offer enough to fill the needs of an average colonial population. Base Industry per Unit: 3
The size of a planet determines how large a population it can support. A world’s mass also helps determine its gravity, though mass is less directly linked to size than you might think. Tiny: These planets normally measure no more than 5 thousand kilometres in diameter. Tiny planets are almost invariably Low-G, and thus have little or no atmosphere. Depending on the environment, each can support a maximum surface population of 1–5 units.
Rich: Better than abundant is a world with a lithosphere rich in minerals. Even the most primitive mining techniques can be profitable on these planets. Base Industry per Unit: 5
Medium: Planets in the medium range (10 to 20 thousand km) can support 4–15 units of surface population (based on environmental factors). They are most often Normal-G and rarely lack an atmosphere. Large: Those worlds with diameters of 20 to 50 thousand kilometres can support a maximum surface population of 5–20 units, depending on the environment. Though they range from Normal to Heavy-G, some have had their atmosphere blown away by an odd catastrophe.
Ultra-Rich: Though rare, the ultra-rich world is a miner’s paradise, overflowing with useful deposits. Some of them poke right up through the surface, and you can just forage around on the ground for minerals. Base Industry per Unit: 8
Gravity
(1 G). The disorientation and increased number of accidents this causes decrease the output of farmers, scientists, and workers by 25%.
- Normal gravity worlds have gravity very close to 1 G. Production rates The density and number of accessible mineral resources on a planet are the determining factors for how much production can be done there. The abundance of minerals on a planet increases or decreases the amount of work a labouring unit of population can accomplish each turn. In addition, the mineral richness of a planet (together with its size) determines its mass, and therefore the strength of its gravity. Ultra-Poor: These planets either have been mined to exhaustion by previous inhabitants or somehow formed without appreciable deposits of useful ores. Industrial production per population unit is minimal on ultra-poor worlds. Base Industry per Unit: 1 Poor: Poor worlds have some mineral content, but not enough to make them really attractive to industrious colonists. Base Industry per Unit: 2
The strength of a planet’s gravity is determined in part by its size and mineral density. Gravity, expressed in terms of the “G” force, affects the amount of food a colony can produce, the level of industry its workers can sustain, and the amount of research possible there.
- Low-G planets have a gravitational pull less than half that of the Earth
Huge: These behemoth planets have diameters of more than 50 thousand km, and are unlikely to be less than Heavy-G. Each one can hold 6–30 units of surface population (how many is modified by the environment) and is almost guaranteed to have an atmosphere.
Mineral Richness
Small: Ranging from 5 to 10 thousand kilometres in diameter, small worlds normally have enough gravity to hold an appreciable atmosphere. These planets can support a maximum surface population of 2–10 units, depending on the environment.
on these planets are unaffected by gravity.
- Heavy-G planets put more than 1.5 G on their inhabitants. All three types of production are reduced by 50%.
Climate
Any type of life can support itself without artificial aids only on planets that meet certain environmental specifications. On hostile or less than perfect worlds, a significant percentage of the population’s efforts go toward life support, rather than breeding or industry. On top of that, some environments are so vicious that even buildings require more than the usual upkeep. Here are the types of planetary conditions you’re likely to encounter. Radiated: Some planets (Mercury is a good example) have no natural protection against the cosmic radiation emitted by their primary star. This constant radiation causes rampant infertility and reduces the maximum possible population by 75%. Natural farming is impossible, and gradual but constant deterioration increases the maintenance cost of all buildings by 25%. Base Food per Unit: 0
Toxic: There exist planets that have atmospheres so corrosive and hot (Venus, for instance) that they constantly eat away at even the toughest building materials. All structures erected on these planets have +50% maintenance costs. Farming is impossible. Base Food per Unit: 0
SYSTEM SPECIALS
Desert: Desert planets have scarce, mostly underground water supplies and are constantly plagued by violent sandstorms. (Did someone mention Mars?) This perpetual weathering increases the maintenance cost of buildings by 25%. Base Food per Unit: 1 Tundra: Permafrost covers the surface of a tundra planet throughout the year. Crops must be artificially warmed, and many farmers fall prey to otherwise minor accidents in the dangerous freezing conditions. Base Food per Unit: 1 Ocean: Water covers almost the entirety of an ocean planet. Colonies must be built underwater, and limits to the size and number of workable waterproof habitats keep the populations of these worlds relatively small. Base Food per Unit: 2 Swamp: Swamp worlds have very little dry land. The surface is heavily layered with thick, wild vegetation and decomposing organic matter. Though these treacherous conditions are relatively fertile, the soggy heat promotes virulent organisms, which keep populations small. Base Food per Unit: 2 Arid: Arid worlds are nothing but rugged, rocky terrain, which is difficult to clear for farming. However, these planets offer lots of elbowroom. Base Food per Unit: 1 Terran: Except for the configuration of continents, most Terran worlds differ only slightly from the Earth. For most races, no special equipment is necessary to survive on the surface. Base Food per Unit: 2 Gaia: On some rare worlds, the ecosphere of the planet has evolved into a harmony so efficient and well balanced that it seems to function as one immense organism. These Gaia worlds are paradises for almost every type of being. Base Food per Unit: 3
Barren: The surfaces of barren planets are covered by solid and pulverised rock (like Earth’s moon). There is no soil, no surface water, and thus no potential for natural farming. Base Food per Unit: 0
AN EXAMPLE OF A SYSTEM SPECIAL
Whenever you explore a star’s vicinity for the first time, there is a chance you’ll discover something unusual about that system. These random oddities are called System Specials, and they might be beneficial or disastrous. Some affect the system as a whole and some only a specific planet in the system. Specials can also be one-time effects. Except for Space Monsters, no system will have more than one special; a system with a monster will always have another special—that’s usually what drew the monster there in the first place. Artifacts: An extremely advanced civilization once inhabited a world in the system, but has long since disappeared. Relics left behind add 2 to the amount of research generated by each scientist on that planet. Furthermore, the first empire to discover these artifacts and colonise the planet gets an immediate scientific breakthrough. Cache: Your exploration vessel stumbles on a hidden cache of pirates’ booty, which is added to your treasury. Debris: You find the valuable remnants of a wrecked ship floating aimlessly in the system. Enterprising crewmen manage to make a profit from it, which is added to your treasury.
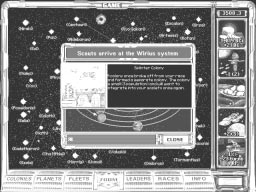
Gems: One planet in the system has extensive gem deposits. Any colony established on that planet generates lots of extra tax revenue every turn. Gold: A planet in the system is riddled with gold deposits. Any colony established on that planet generates extra tax revenue every turn.
Hero: A mercenary leader has been marooned on one of the planets in the system for some time. In gratitude for the rescue, this leader offers to join your empire for no hiring cost. You are still expected to pay maintenance, however. Monster: A space monster resides in the system and immediately attacks any fleet that attempts to enter. The space monster can only be destroyed in combat. Natives: Humanoid life has evolved on a planet in the system. If you colonise this world, the natives are integrated into the population of your colony. They work only as farmers (at a +2 food production advantage) and refuse to ever leave their home world. Natives do not take on your racial advantages or disadvantages. Splinter: Long-lost space travellers from your race crash-landed and formed a colony on a planet in the system. The colony is small, but the population is glad to be reunited with the rest of your empire. Wormhole: A stable twist in the fabric of hyperspace greatly accelerates travel between this system and another. Travel time between the two connected stars is reduced to 1 turn.
6. Managing a Colony
Once you discover a planet that looks like a good place to establish a colony, the next step is actually landing colonists on it. After that, you’re responsible for the management of that world throughout the rest of the game (hopefully). Though every step you take in the administration of your colonies has complex ramifications, the tools you use in the process of managing are fairly simple.
Industry per worker is the base amount of production that each unit of population assigned to work would produce on this world. This is primarily a function of mineral abundance. Research per scientist is the base number of research points each unit of population you assign to science would produce at this colony. Maintenance penalty is the extra you would pay each turn for upkeep on every building in the colony that has a maintenance cost. This is based on the environment. Worker penalty is the additional production cost you would pay for everything you build in the colony. This is based on environment.
You don’t create your first colony; it’s just there. Every colony after that, however, is placed where you decide. There are a few methods you can use to create a new colony. (You can also capture enemy colonies, but that’s a separate topic.)
If you decide after all to establish a colony on this planet, click Yes. Otherwise, click No. An affirmative answer unloads the colonial population and takes you directly to the Colony screen.
- A Colony Base establishes a new site in the same system as the colony that built the base in the first place.
- A Colony Ship can establish a colonial foothold on any uncolonized
THE COLONY SCREEN
planet in its range, as long as all space monsters and enemy ships have been cleared from that planet’s system.
WORK
FOOD
INCOME
- A Splinter Colony is discovered, not created. You take it as is and do Whenever you complete a Colony Base or a Colony Ship arrives in a system with at least one habitable, uncolonized planet, the System window opens and prompts you to select a world to colonise. Click on the planet of your choice. If you do not want a new colony in this system, you can close the System window instead. This instructs a Colony Ship to await further instructions, but destroys a Colony Base. When you’re prompted to select a world for a Colony Base, you must do so or else lose the Colony Base (and all the production that went toward building it). A Colony Base is a “use it or lose it” proposition. An unused Colony Base is scrapped for half its build cost in BCs. When you select a world to colonise, you’re given one last chance to change your mind. The Colonial Statistics box gives you the rundown on the proposed colony and lets you decline or confirm your choice. Most of these statistics are selfexplanatory, but it never hurts to review. (These numbers assume that the population on the planet will be of your race, and they take racial bonuses and penalties into account.)
LAST CHANCE TO CHANGE YOUR MIND
Food per farmer is the base amount of food that each unit of population you assign to farming would produce on this planet. This is a function of the environment.
MORALE
NOW BUILDING POPULATION
the best with what you get.
CREATION
FARMERS SYSTEM
WORKERS
OVERVIEW
SCIENTISTS
COLONY VIEW
GROUND TROOPS A WELL ESTABLISHED COLONY You can do quite a lot of colony management from the Colonial Overview (described earlier, under Management Buttons), but for real hands-on administration, good emperors always end up at the Colony screen. Among its other uses, this is the only screen at which you can sell off buildings. This screen appears whenever you:
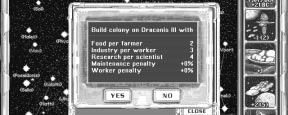
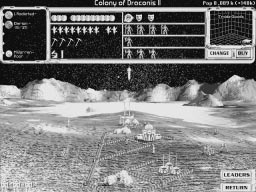
Food harvested each turn is shown in the top row of the lower box. Each corn stalk counts for 1 unit of food, while grain bags represent 5 units each. As with income, the left portion shows the food used by the residents of this colony. The right side holds the colony’s contribution or import need; bright is excess, dark is shortfall imported from elsewhere, and outlined food icons denote unfilled need—starvation. Unlike BCs, food cannot move from planet to planet electronically. Freighters carry food to balance shortfalls with excess.
For your convenience, the name, primary function, and total population of the displayed colony are listed along the top of the Colony screen. (The number in parentheses is the population growth rate for this colony.) The rest of the screen includes several sections, each of which provides information and most of which also give you control over a different facet of your colony. Let’s take them one at a time.
Industry appears in the centre row of the lower box. Each right-leaning pickaxe represents 1 production unit. A left-leaning pickaxe with a pile of dirt next to it counts as 10 units. There is no such thing as an excess or shortfall in production, but industry does produce Pollution. Units of pollution appear as barrels of toxic waste. Dim barrels are 1 unit, and bright barrels are 10. For each unit of pollution, the colony must spend one unit of production in cleanup efforts. Thus, for every colony there is an optimum production level, beyond which pollution causes diminishing returns.
The small box in the upper left corner is a summary of what you know about the planets in this system, including the one the displayed colony sits on. The ownership of each world is noted, along with the current and potential populations. The planet icons are colour-coded according to environment, as follows:
Research done in this colony is indicated in the bottom row of the lower box. Single research points appear as beakers, while tens of points appear as microscopes.
System Overview
Gas Giant Striped Orange Radiated Gold Toxic Red Barren Grey Tundra Silver Desert Brown
Arid Dark Brown Ocean Blue Swamp Orange Terran Dark Green Gaia Bright Green
Yield Immediately to the right of the System Overview box are two boxes that, taken together, denote the entire production yield of the colony. These are for information only; you cannot manipulate them directly. Income is represented in the narrow upper box. Each BC appears as 1 coin; a stack of coins represents 10 BCs. The coins grouped to the left are those spent toward maintenance in this colony. Those on the right are what this world contributes to or takes from the imperial treasury each turn. If the coins on the right are bright, they represent a profit; if they’re dark, they indicate a shortfall. Excess income from profitable colonies is used to offset maintenance shortfalls on other worlds.
- click on a colonised planet in the System window
- click on a colony name in the Colonial Overview
- establish a new colony
- capture an enemy colony
- respond to a colony’s request for your attention on an urgent matter
Population The four narrow boxes to the right of the Yield boxes constitute the Population section of the display. Taken together, they tell you everything you really need to know about the colonists on this world. In addition, you can use the lower 3 boxes to give your colonists orders. Morale is in the top box. The first icon is special; it’s your imperial seal, a reminder of the type of government you run. Otherwise, this box can contain happy and sad face icons. Each smile represents a 10% bonus to all production (food, industry, research, and income); each frown denotes a 10% penalty to all production. Farmers are represented in the second box. Each icon denotes 1 unit of population engaged in agricultural pursuits. Their output is shown immediately to their left. Each unit produces at least 1 food, no matter what the planet is like (as long as farming is possible there, of course). Workers show up in the third box. These units are busy producing industrial output—and pollution. Each unit produces at least 1 production, no matter what the situation. Scientists are relegated to the bottom box. Each unit produces at least 1 RP, no matter what the situation.
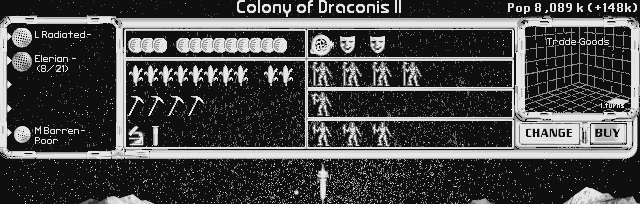
The rightmost box along the top of the Colony screen shows you the status of the colony’s current construction project. A picture and the name of what they’re building takes up the centre of this display. To the right of the picture is a graph noting the schedule for the project. The graph gives you a rough estimate of how much of the construction is complete. Below the graph, the actual time to completion is listed. If you change the number of units of population in the Industry box, the graph is recalculated immediately to reflect the new schedule.
If you have more than one colony, there’s another option. When you pick up a unit of population, a fifth box appears below the scientists. It’s labelled Transport Colonists, and you can place colonists here to send them to another colony. You’ll have to choose their destination, of course, and those units provide no yield at all until they arrive at their new home.
Click on the Change button to switch to the Construction Orders screen. Here, you can change the current construction project or place other projects in line behind the present one. Use of the queue is described later in this section, under Building Stuff.
One thing to be careful of is overloading a planet. If you transport colonists to a world that has already reached its maximum population, the planet cannot support the immigrants. The moved colonists simply die when they reach their destination. You are warned, but this warning does not take growth into consideration or other colonists already en route. In addition to the usual population icons, there are a few special icons that might show up in your Population boxes. They are: Natives appear in any colony built on a planet that had the Natives system special (oddly enough). The natives work for you in your colony, but under a couple of restrictions. They work only as farmers and never leave their planet of origin. Aliens appear in an enemy’s colony that you’ve conquered, representing the population left there by the former owner. At first, all aliens are uncooperative. Until they are integrated into your empire, each alien unit produces only half what it normally would. Keep in mind that there is a 20% morale penalty on any multi-racial planet without an Alien Management Centre. If you take over a planet, the colony there might benefit (or suffer) from the effects of its leftover population’s racial abilities. These effects are not shared, though. For example, if the Mrrshans take a Psilon planet, then the captured Psilon population on that planet still produce two additional research points per scientist. Any new Mrrshan scientists, however, do not. The Mrrshan empire does not become Creative, and other Mrrshan planets produce only their normal research. If the Psilons are moved to another planet, they take their bonus with them. Special Note: Unassimilated alien population units in colonies without an Alien Management Centre sometimes revolt. If they manage to overcome your defending Marines, you could lose the colony.
Now Building
You can move colonist units from one occupation to another just as you do on the Colonial Overview. To do so, click on any unit. That picks up the unit and all the ones to the right of it in the same box. Next, carry the units to the occupation row you want them assigned to and click again. This places them. Any change in the yield is displayed immediately in the Yield boxes. You can do this as often as you like, and it has no effect on morale. (You are the emperor, after all.)
As has always been the case, spending more drastically speeds up any construction process. If you’re willing to spend enough, any construction project is completed in 1 turn. If the Buy button is dim, you do not have enough BCs in your treasury to complete the displayed project. If it’s not dim, however, you can click on it to purchase the job outright. When you’re notified of the cost, you have a chance to back out of the decision and continue on the normal production schedule.
Colony View The entire display below the information boxes is taken up by a view of the colony itself. Of course, this is a representation; the colony spans an entire planet, and it would hardly be possible to fit a view of the whole thing into a display this size. The important things that you’ve had built here are all represented. If this colony is your imperial capital, your capital building is here. Any improvements you’ve made and buildings you’ve had erected are also shown. Any satellites you’ve placed in orbit hover over the landscape in the background. There are two things you can do in this part of the view.
- Place the mouse pointer over any structure to find out the name of that building.
- Click on any structure to sell it off for scrap. This nets you a few BCs, but nowhere near what you paid to have it built. Along the bottom left of the view are icons representing all the Marine and Armour units stationed in defense of this planet. Defensive units scramble into battle whenever an enemy lands troops on the world. For the details on ground combat, refer to Invading a Colony under Combat.
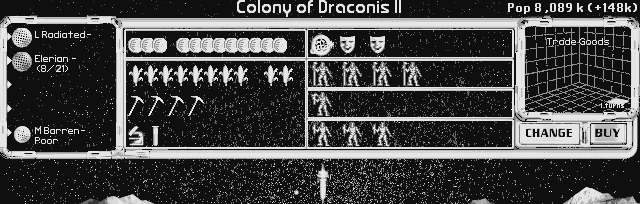
If you have assigned a leader to this system, a portrait of that leader sits in the lower right as a reminder. Also in the lower right are two buttons. Leaders: Lets you change the assignments of the mercenary leaders you’ve hired. This functions in exactly the same way as the Leaders button on the Galaxy Map.
Trade Goods instructs the colonists to make items for sale to other colonies. The taxes on these transactions add to the income generated by this colony. Every 2 industry converts to 1 BC.
BUILDING STUFF IMAGE
Return: Takes you from the Colony screen back to the console or display from which you gained access to it.
Buildings: Running down the left side of the display is an alphabetical list of all the improvements you can make to this particular colony. Whenever your research makes a new building possible, it is added to the list immediately. If a building or process would have no effect here (Soil Enrichment on a Radiated world, for example), it is not listed. The top two items are not in order. These are settings; they are ongoing processes, not projects that can be completed. Both settings deserve a little explanation.
Housing orders the workers to build additional living space. This increases the population growth rate of the colony slightly.
COSTS
Ships & Spies: Along the right side of the screen is a similar list. This one has three sections.
BUILDINGS
SUPPORT
MILITARY SHIPS DATA ANDROIDS AND SPIES
PRODUCTION QUEUE
Support is the top list. It includes all the non-military ships you are currently able to build, plus the Colony Base if there is a habitable, uncolonized planet in the same system as this colony. They’re not in any particular order. Military is the centre list. The ship templates that are designed and ready to build are all included. These start out in order by hull size, but if you decide to design a small ship in the last slot, there’s nothing to stop you. Androids and Spies is last. Training a spy is unlike constructing a building or a ship, but it takes quite a lot of work and the dedication of many people to do correctly. Item Info: Between the two lists is a large area. Whenever you place the mouse pointer over an item in one of the lists, detailed information about that item appears in this area.
CONSTRUCTION ORDERS SCREEN
One of the most vital services your colonies provide is the construction of things. Colonists build all your military and support ships, buildings, satellites, trade goods, androids, and even spies. (Okay, spies are trained, not built, but you get the idea.) They’ll only build what you tell them to, however. You can get to the Construction Orders screen for a colony from either the Colonial Overview or any of the individual Colony screens.
An Image of the item is displayed in the upper left box. The Name of the item, the Cost of building it at this time and in this colony, and the Build Time involved (in turns) appear in the box to the right of the image. All Data pertaining to the item are listed in the lower, larger box.
The Construction Orders screen has several sections.
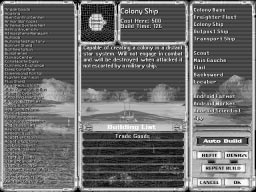
Build Queue: When you click on any of the items listed in either list (Buildings or Ships & Spies), that project is placed in the bottom centre box. This is the Build Queue. There are seven slots in the queue, and you can put a project in every slot. The worker colonists toil only on the first item in the list, but when that’s finished, they move on immediately to the next. (If there is no next item, they contact you for new orders.) There are two ways you can manipulate the projects in this list. If you wish to remove an item from the list, click twice (not doubleclick) on that item in the queue. (If the item is in the Buildings list, you can also click on it there to remove it.) To rearrange the list, click on a project, then on the slot you want that project listed in. You can move as many projects as you want in this way. In the bottom right-hand corner of the display are a number of useful buttons. Like everything else, let’s take them one at a time. The Auto Build button doesn’t exactly look like a button. When it’s dark, it’s “off.” Click on it to light it up and turn on the automatic building function. What this does is set the colonists loose to build whatever they think is best. You can click on this again at any time to retake control. The Refit button allows you to select any of the ships currently stationed in the system and change what systems are installed on it. (For the lowdown on how to do that, read the Ships section.) You cannot change the hull size, but everything else is fair game. The Design button changes the mouse pointer. Position this new cursor over one of the military ship slots in the list—one you’d like to redesign—then click. This takes you to the Design Dock console. Here, you can design a new standard ship for your colonies to build. (The details on designing a ship are in the Ships section, too.) The Repeat Build button is a convenience. Once you click on it, the mouse pointer changes. Move this new cursor over an item that you want to build several of, then click. This orders your workers to continue building the same item over and over until further notice. (Since Trade Goods and Housing are settings, not projects, you can’t use Repeat Build on them.) Click Cancel to undo all of the changes you’ve made since you entered the Construction Orders screen and return to the previous screen. When you’re done and satisfied with your changes, use OK to return to the display from whence you came.
7. Research and Development

As anyone who has played the original Master of Orion or any of the Civilization games will tell you, ignoring research is a sure path to defeat. Your opponents are racing to gain the new technologies that basic science brings. If you don’t, you’re going to get squashed.
Even though you can only research one application in any advanced field, that doesn’t mean that they are lost to you forever. There are several ways to gain technological applications from the efforts of other empires. Some of them are even nice.
CATEGORIES
All of the fields of research available in Master of Orion II are split into eight categories:
- Biology
- Chemistry
- Construction
- Computers
- Physics
- Power
- Sociology
- Force Fields
At the end of the first turn, your Research Director invites you into the lab and asks you in what direction you want to focus your race’s research efforts. You get to pick from several categories, in each of which one field is listed. Each field includes multiple potential applications. When you choose to research the earliest fields, you’ll notice that you gain every application that field allows. That state of affairs doesn’t last. In the more advanced fields, research becomes so expensive and difficult that your scientists must focus on only one application per field. Choose wisely, for you are not able to research the other applications in that field.
DIRECTING RESEARCH
Within each category are a number of fields, which you can research sequentially. Each field includes from one to four possible applications of that research (unless you’re playing an Uncreative race). For a few of these fields—the most basic and most general—you actually research the entire field. After that, however, the science gets more specific, and you can only research one technological application in any particular field (unless you’re the leader of a Creative race, that is). To select an application (or a field) for research, click on it. To successfully research a field, your empire must accumulate a certain amount of Research Points (RPs). Population assigned to science and some improvements you can make to colonies generate RPs each turn. As in real life, however, research in Master of Orion II is subject to the vagaries of coincidence, accident, and serendipity. When the amount of RPs you’ve accumulated passes the Base Cost of an advance (the cost listed in the research selection box), there is a good chance every turn that your scientists will make the breakthrough. (Under no circumstances will any research cost more than twice the listed RPs.) Those applications that you choose not to pursue (or cannot seek because they do not appear on your research list) can be had through other means. You might acquire missing applications through conquest, trade, or espionage. For the howto on these alternatives, refer to Combat and Diplomacy.
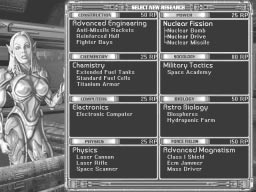
THE BIG LIST
APPLICATION TYPES
The following is a brief introduction to the fields in each category and the applications in each field. This is an overview; the details are in the research itself. Those fields in which research normally imparts knowledge of all applications are denoted as “General” fields. The type of each application is noted in parentheses after the application name.
Achievement: These benefit your entire empire. Once the research succeeds, the benefits of an achievement apply to all your colonies without further effort—there are neither construction nor maintenance costs.
SUCCESS!
Satellite: Once built, satellites go into orbit around a single colonised planet. They serve a range of functions from environmental control to defense. Satellites sometimes benefit only the colony they orbit, and sometimes the entire system that colony is in. They require both an initial construction cost and an ongoing maintenance cost. Building: These serve a specific function for the colony in which each is built. All buildings have both an initial construction cost and an ongoing maintenance cost. Android: Androids are artificial beings built to increase the productivity of the colony at which each is located. These have an initial construction cost and require 1 unit of minerals as maintenance. Equipment: This includes the weapons, personal shields, armour, and battle suits you can develop to better equip the ground forces at your colonies. All of your troops are automatically equipped with the best equipment you have developed. Equipment requires no construction or maintenance costs. Ship: Building ships becomes possible once certain applications are researched. In addition, some applications are automatically applied to every ship you build. Some of these ships are military, while others serve as the infrastructure that holds your empire together. Every ship must be built (construction cost) and requires Command Rating or BCs as maintenance cost. System: Systems include all the optional add-ons to your military ships. Not surprisingly, most Systems are combat oriented. The construction cost of each system is added to the cost of the ship in which it is installed, and there is no separate maintenance cost.
Construction
Once you’ve actually finished (or stolen) the research, you can build the application. Each application affects a specific aspect of your empire. Thus, they are broken down by type:
ENGINEERING (GENERAL) Colony Base (Special) The Colony Base creates another colony on a planet in the same star system as the colony that builds the base. When the Colony Base is complete, the new colony is established with one unit of population. (The building colony supplies this unit, but does not lose one of its own.) A Colony Base must be used on the turn it is completed.
Star Base (Satellite) The Star Base is an armed orbital platform used to build and service military spacecraft. This base has an extensive array of your most up-t0date weaponry. Placing the planet’s scanners in orbit, away from atmospheric disturbances, adds 2 parsecs to their range. The Star Base drydock automatically repairs all damaged friendly ships that spend time in the same system. A planet without a Star Base cannot build ships larger than medium size. A Star Base requires 2 BC per turn to maintain and adds 2 to your Command Rating.
Marine Barracks (Building) Marine Barracks allow a colony to train and maintain ground troops to protect the colony from enemy invasions. When first built, a Marine Barracks immediately generates 4 Marine units. The barracks train 1 new unit of ground troops every 5 turns, up to a maximum equal to half the current population of the colony or half the base maximum population of that size planet, whichever is less. These Marines always have the best available equipment. Under certain types of government, having a Marine Barracks in a colony removes an innate morale penalty. A Marine Barracks costs 1 BC in maintenance each turn.
Researching Hyper-Advanced fields serves to increase the miniaturisation levels of all applications in that category and is worth +5 points to your total score.
ADVANCED ENGINEERING
Anti-Missile Rockets are designed to intercept and destroy incoming missiles and fighters. Each rocket has a maximum range of 15 squares. Depending on how far away the target missile is, rockets have up to an 85% chance of hitting it. Missiles hit are destroyed. Each turn of combat, if the anti-missile rockets have not been fired, they fire automatically to destroy missiles that are about to strike the ship. Anti-missile rockets can target only missiles.
Fighter Bays (System) Fighter bays allow a ship to carry a squadron of Interceptors, short-range fighters launched during combat. These fighters are grouped and move as a squadron of 4. Each Interceptor is equipped with one of the best point defense beam weapon you have, your best armour and best computer system. They move at speed 14 and can take 3 damage (before armour is taken into account). Interceptors fly directly to their target and fire 4 times at point-blank range. They then return to the carrier for repair, rearming, and refuelling. When attacking, Interceptors always strike the weakest shield.
Reinforced Hull (System) A Reinforced Hull triples the amount of structural damage a ship can sustain before being destroyed.
ADVANCED CONSTRUCTION
Automated Factories (Building)
Troop Pods house additional detachments of space marines, doubling the number of Marines on board a ship. The additional marines both defend the ship and can board enemy ships.
Survival Pods (System) Survival Pods can sustain living beings for an indefinite period. If a ship is destroyed but at least one ship in the same fleet survives, Survival Pods allow any officers on board to survive and be rescued by the escaped ships. If more officers are saved in this way than there are ships to rescue them, the excess officers return to the Leader Pool.
ASTRO ENGINEERING
Space Port (Building) A Space Port provides an excellent site for commercial transactions, increasing the BC generated in the colony (from all sources) by 50%. A Space Port costs 1 BC in maintenance each turn.
Armour Barracks (Building) Armour Barracks allow a colony to train and maintain tank battalions to defend the colony during ground invasions. When first built, an Armour Barracks immediately produces 2 armour battalions, then another tank battalion every 10 turns, up to a maximum equal to one-quarter the current population of the colony or a quarter of the base maximum population of that size planet, whichever is less. Under certain types of government, Armour Barracks serve to remove an innate morale penalty.
Automated factories aid workers, increasing the output of each industrial unit of population by +1 production each turn and giving the colony +5 production.
An Armour Barracks costs 2 BC in maintenance each turn.
An Automated Factory costs 1 BC in maintenance each turn.
Fighter Garrisons are ground-based air installations. These house 24 Interceptor squadrons, 18 Bomber squadrons, or 12 Heavy Fighter squadrons, depending on the most advanced fighter technology you’ve discovered. (Note that Interceptors are available immediately.) All ground-based squadrons of fighter craft are totally renewed every 10 turns. Fighter Garrisons can only be destroyed by orbital bombardment.
Missile Base (Building) The planetary Missile Base is a defensive emplacement equipped with as many launchers full of the best missiles you have as will fit in 300 space. The base automatically fires to defend the planet against attacking ships. A Missile Base can only be destroyed by orbital bombardment. A Missile Base costs 2 BC in maintenance each turn.
Heavy Armour (System) Installing Heavy Armour adds 50% to the amount of damage the ship’s armour can sustain before damage gets through to the internal systems. This system also negates the Armour Piercing abilities of enemy weapons that hit the ship.
CAPSULE CONSTRUCTION
Battle Pods (System) Battle Pods are strap-on bays that add equipment space without increasing the hull size. For a substantial construction cost, these allow you to fit more systems in a ship.
Troop Pods (System)
Anti-Missile Rockets (System)
Fighter Garrison (Building)
A Fighter Garrison costs 2 BC in maintenance each turn.
ROBOTICS
Robo Mining Plant (Building) The robotic mining equipment in a Robo Mining Plant automates many difficult and dangerous tasks, dramatically increasing the productivity of industrial workers. The plant adds 2 production to the output of each population unit doing industrial work and 10 production to the colony as a whole. A Robo Mining Plant costs 2 BC in maintenance each turn.
Ground Batteries (Building)
The Battle Station is a more heavily armed version of the Star Base. It adds 4 parsecs to the range of planetary scanners and provides superior operations coordination between all ships staging around the planet— adding 10% to the Ship Attack of all ships in combat on the side of the station. The station’s drydock automatically repairs all damaged friendly ships that spend time in the same system. It replaces any Star Base in orbit around the same planet.
Ground Batteries are planet-based beam weapon installations. This building contains Heavy Mount and Point Defense versions of your best available beam weapons–as many as fit in 300 space. Ground Batteries can only be destroyed by orbital bombardment.
A Battle Station costs 3 BC in maintenance each turn and adds 3 to your Command Rating.
Powered Armour (Equipment) Powered armour provides ground troops with superior power and mobility by mechanically magnifying their natural strength. Troops equipped with powered armour have a bonus of 10 added to their combat rating and take 1 extra hit to kill.
SERVO MECHANICS
Fast Missile Racks (System) Fast Missile Racks allow a ship to fire two volleys of missiles in a single turn. However, if the ship does so, it cannot fire its missiles twice in 1 turn again until it has allowed them to remain unused for 1 turn, allowing time for reloading the fast racks.
Advanced Damage Control (Achievement) Advanced Damage Control becomes an integral part of the design of every ship as soon as you’ve finished researching it. The ADC unit repairs a ship completely after every battle.
Assault Shuttles (System) Assault Shuttles are fighters (like the Interceptors) that carry 1 Marine unit. These are designed for sending remote boarding parties to enemy ships. Shuttles are installed and launched in squadrons of 4. Each shuttle is equipped with your best armour and moves at speed 6. Once launched, Assault Shuttles fly to the target ship and drop off their Marines, which board and attempt capture. After the marines are dropped, unpiloted shuttles are set adrift to be picked up after the battle.
ASTRO CONSTRUCTION
Titan Construction (Ship) The Titan class of starship is gigantic in proportion to other ships, and requires advanced engineering techniques both to construct and to integrate the numerous ship systems. This technology allows your orbital platforms to build Titan size ships.
A Ground Battery costs 2 BC in maintenance each turn.
Battleoids (Equipment) Battleoids are giant robot fighting vehicles with power and mobility far beyond that of conventional tanks. This technology allows your Armour Barracks to build and support Battleoids. Battleoids have a ground combat rating 10 higher than a tank and take 3 hits to destroy. If you have not researched Armour Barracks, you get it automatically.
Battle Station (Satellite)
ADVANCED MANUFACTURING
Recyclotron (Building) The Recyclotron is the most advanced form of recycling; it allows complete reclamation and reuse of every form of scrap material. This not only reduces construction costs, but also involves the entire population in production efforts. Thus, each unit of population generates 1 industrial production, regardless of its assigned job. This increased production does not count toward the planetary pollution level, since all the materials used are recycled. A Recyclotron costs 3 BC in maintenance each turn.
Automated Repair Unit (System) The Automated Repair Unit repairs a ship during combat. Each combat turn, this system takes a number of points equal to 20% of the ship’s armour and structural damage and restores that number of points, first to the ship’s structure, then any leftover is applied to the armour. The unit also repairs 10% of the damage to the ship’s internal systems—engines, weapons, and shields—each turn of combat. In addition, any ship equipped with an Automated Repair Unit is completely repaired after every battle.
Artificial Planet Construction (Special) This technology allows a colony in the same system with an asteroid field or gas giant to assemble this otherwise useless planetary material into a complete artificial planet that can support a colony. This planet is Barren, Normal G, and mineral Abundant. Gas giants make Huge worlds, and asteroid belts make Large ones.
Titan class ships require 5 Command Rating points or 50 BCs in maintenance per turn.
ADVANCED ROBOTICS
Robotic Factory (Building) The Robotic Factory uses self-repairing robotic systems and generates its own replacement parts and machinery. The resulting efficiency boost adds to the colony’s output according to the minerals available: +5 on Ultra Poor worlds, +8 for Poor, +10 on Abundant planets, +15 for Rich, and +20 on Ultra Rich worlds.
Bomber Bays (System) Bombers are short-range fighters similar to Interceptors, except that these carry one bomb. Each bomber can attack either a planet or a ship. Bombers are installed and launched in squadrons of 4. Each bomber is equipped with the best bomb you have, the best armour, and the best computer. They move at speed 10 and can take 4 damage (plus what armour absorbs). Bombers fly to the target, drop their bomb at pointblank range, then return to the carrier for repair, rearming, and refuelling. When attacking a ship, Bombers always strike the weakest shield.
With advanced planning techniques, city designers can avoid many of the pitfalls of colony organisation and overbuilding. The improvements in organisation increase the maximum population limit for every planet in the empire by 5 population units.
Heavy Fighters (System) Heavy Fighter bays allow ships to carry Heavy Fighters. These are like two Interceptors and two Bombers in one little ship. Heavy Fighters are installed and launched in squadrons of 4. Each carries two of the best beam weapons you have that can be modified for Point Defense and two of the best bombs. Heavy Fighters have your best armour and computer, can take 5 damage (plus what the armour absorbs), and move at speed 12. In combat, these fly to the target, drop one bomb and fire both beams. They then hover around the target to drop the other bomb and fire the beams again. Afterwards, the fighters return to the carrier for repair, rearming, and refuelling. When attacking a ship, Heavy Fighters always strike the weakest shield.
A Robotic Factory costs 3 BC in maintenance each turn.
Advanced City Planning (Achievement)
PLANETOID CONSTRUCTION TECTONIC ENGINEERING
Doom Star Construction (Ship)
Deep Core Mine (Building)
Doom Stars are mobile planetoid bases the size of small moons. This is the largest class of ship possible and a military ship of incredible effectiveness.
Normal mining only extends into a planet’s crust. Advanced structural engineering techniques allow miners to build stable tunnels extending deep into the planet—sometimes even into the core. This increases the productivity of each worker unit by 3 production and the colony by 15. A Deep Core Mine costs 3 BC in maintenance each turn.
Core Waste Dumps (Building) Core Waste Dumps take man-made toxic and polluting agents and stash them deep within the planet. Since they’re so far below surface water supplies and often destroyed by the intense pressures and temperatures at the fringe of the molten core, this completely eliminates all pollution on the planet. A Core Waste Dump costs 8 BC in maintenance each turn.
A Doom Star requires 6 Command Rating points or 60 BC in maintenance each turn.
Artemis System Net (Satellite) The Artemis System Net is a gigantic spherical network of high-yield mines that surrounds an entire star system. Any enemy ship entering that system has a chance of being damaged based on its size: Small = 20%, Medium = 30%, Large = 40%, Huge = 50%, Titan = 80%, and Doom Star = 100%. When a mine is encountered, the ship involved suffers 150–550 damage— absorbed by armour and internal systems, in that order. Shields do not mitigate or absorb Artemis damage at all. An Artemis System Net costs 5 BC in maintenance each turn.
SUPERSCALAR CONSTRUCTION
Star Fortress (Satellite)
HYPER-ADVANCED ENGINEERING
The Star Fortress is the leviathan of orbital platforms. It’s much better armed than a Battle Station, and it adds 6 parsecs to the range of planetary scanners and 20% to the Ship Attack of all friendly ships in combat with it. The fortress drydock automatically repairs all damaged friendly ships that spend time in the same system. The fortress replaces any Battle Station or Star Base in orbit around the same planet.
None
A Star Fortress costs 4 BC in maintenance each turn.
Power
Transport (Ship)
NUCLEAR FISSION (GENERAL) Nuclear Drive (Ship) The Nuclear Drive is the slowest of the faster than light (FTL) propulsion systems. It relies on the inefficient fission of heavy nuclei to move a ship between the stars at a rate of 2 parsecs per turn. Nuclear bombs are high-yield explosive devices engineered to destroy ground forces, colony installations, and ships. They inflict 3–12 points of damage.
COLD FUSION (GENERAL)
A Transport Ship requires 1 Command Rating point or 10 BC in maintenance each turn.
Colony Ship (Ship) The Colony Ship is a long-range mobile version of the Colony Base. This ship is the only way you have of establishing a new colony in another star system. When the ship is built, a new unit of population is gathered to board the ship; the planet that builds the ship does not suffer any loss of population. Colony Ships move at the capability of the best drive you’ve developed. They have no weapons at all, no shields or armour, and Colony Ships never engage in combat. If a Colony Ship is travelling with a fleet and that fleet is destroyed, the Colony Ship retreats. A Colony Ship requires 1 Command Rating point or 10 BC in maintenance each turn until it is dismantled to build a colony.
Freighters (Ship) Freighters are your chief means of transporting food and colonists between colonies. Each time you build a Freighter Fleet, you gain a group of 5 ships that automatically transports goods as needed between your worlds. Each ship can transport 1 unit of food, and a fleet of 5 ships can transport a unit of population. Each Freighter requires 1/2 BC in maintenance each turn it is in use. Unused Freighters cost nothing to maintain.
Outpost Ship (Ship) An Outpost Ship is similar to a Colony Ship, except that it is used to establish a military outpost in a system, rather than a new colony. A military outpost extends the reach of your scanners and the range of your ships, but produces nothing. Since there are no full-time residents, an outpost does not need to be established on a habitable world; you can put them on gas giants and in asteroid belts. An Outpost Ship requires 1 Command Rating point or 10 BC in maintenance each turn until it is dismantled to build an outpost.
Nuclear Bomb (System)
The Transport Ship is a troop transport capable of carrying both troops and armour to other worlds. As a Transport Ship is built, 4 new Marine units are created to fill it. These ships have the best FTL drive you have researched, but have no weapons or shields and do not participate in combat. Transport ships are for one-time use; when the Marines are offloaded, they dismantle the ship to build fortifications and other equipment. If the Marines survive the attack, they will rebuild the ship and get back on board. You can also offload troops on a friendly planet, but the ship is still dismantled. Transports can only be built on planets that already have a Marine Barracks.
ADVANCED FUSION
Fusion Drive (Ship) The Fusion Drive is the next step forward for interstellar drive capability. The efficient fusion of light nuclei moves a ship 3 parsecs a turn. This drive is added to all your ships as soon as you complete your research.
Fusion Bomb (System) The Fusion Bomb creates a more efficient explosion than the Nuclear Bomb. This device delivers 4–24 points of damage to its target.
Augmented Engines (System) This is simply a larger, more powerful version of the standard engines used for sub-light movement. Augmented Engines increase the combat speed of a ship by +5.
ION FISSION
Ion Drive (Ship) The Ion Drive is something of an advancement and a step backward in interstellar travel. Taking advantage of a quirk in the physics of fission reactions, this engine system moves a ship 4 parsecs per turn, but it’s an inefficient reaction that spews toxic byproducts into space. This drive is added to all your ships as soon as you complete your research.
Ion Pulse Cannon (System) The Ion Pulse Cannon discharges a violent wave of charged particles designed to overload ship shields and control systems, disabling them. The cannon inflicts 2–14 points of damage to shields and internal systems, but does not affect armour and structural integrity. This weapon has no effect on monsters and Antarans.

Energy Absorber (System)
The Shield Capacitor triples the recharge rate of a ship’s shields. This means that recharge equal to the maximum strength of a single shield facing is distributed evenly between all the damaged shields, rather than the usual one-third.
ANTI-MATTER FISSION
One-quarter of all the potential damage that reaches a ship is diverted to and stored in the Energy Absorber. During that ship’s next combat round, it can then fire this stored energy at an enemy ship—automatically hitting it. (Damage done by an energy absorber is reduced by range like that of a beam weapon.) The damage energy is stored for only one combat turn; if the ship doesn’t use it, it is lost.
Anti-Matter Drive (Ship)
Megafluxers (Achievement)
Harnessing the total annihilation reaction between equal particles of matter and anti-matter, this drive is capable of moving a ship 5 parsecs per turn. This drive is added to all your ships as soon as you complete your research.
Megafluxers conduct and magnify energy transmission in considerably less space than that required by conventional equipment. All your ships have Megafluxers installed automatically, and thus use less space for energy conduits and transmission and switching devices, leaving more space for other equipment. Megafluxers increase the amount of space on each ship by 25%.
Anti-Matter Torpedoes (System) Anti-Matter Torpedoes are tiny lumps of anti-matter contained in a magnetic plasma. On contact with a target, this magnetic shell collapses, releasing the anti-matter to inflict 25 points of damage. Torpedoes do not miss unless distracted by jamming systems, but can only fire once every second turn. The anti-matter type travels at speed 20.
Anti-Matter Bomb (System) The Anti-Matter Bomb is essentially a torpedo modified to survive atmospheric reentry. These unguided projectiles do 5–40 points of damage apiece.
MATTER-ENERGY CONVERSION
Transporters (System) Transporters allow a ship to send Marines onto an enemy ship from a range of 12 squares—if the shield facing the attacking ship is disabled. These Marines can then attempt to capture or sabotage the target ship. Furthermore, transporters extend the range at which a ship can drop bombs on a planet to 12 squares from the normal 3.
Food Replicators (Building) Food Replicators alter the molecular structure of inorganic material, remaking it into edible foodstuffs. Having this facility in a colony allows you to convert industrial production into food on a two-for-one basis, as needed. A Food Replicator costs 10 BC in maintenance each turn.
HIGH ENERGY DISTRIBUTION
High Energy Focus (System) A High Energy Focus allows a ship to channel the fire of its beam weapons more efficiently, increasing the damage each of these weapons inflicts by 50%. It does not improve the chances of hitting a target at a greater distance, nor does it prevent the normal drop-off of damage over range.
Shield Capacitor (System)
HYPER-DIMENSIONAL FISSION
Proton Torpedo (System) The Proton Torpedo is a powerful energy projectile that travels at light speed, striking the target instantly. These torpedoes have a maximum range of 24 squares, and they inflict 40 points of damage. Like all torps, they only fire every other turn and are susceptible to jamming.
Hyper Drive (Ship) The Hyper Drive creates a tiny, folded hyperspace bubble in which the energy from a typical matter/anti-matter reaction is collimated and multiplied. Though no one is entirely sure where the extra energy comes from, the drive works, moving ships 6 parsecs a turn. This drive is added to all your ships as soon as you complete your research.
Hyper-X Capacitors (System) Hyper-X Capacitors use the peculiar characteristics of folded hyperspace to store up vast amounts of power for fast energy discharges. This allows a ship’s beam weapons to fire twice in a single turn. After firing twice, these weapons cannot be fired twice in a turn again until they have spent at least 1 full turn unused. It takes this turn to recharge the capacitor.
INTERPHASED FISSION
Interphased Drive (Ship) The Interphased Drive further manipulates the folded hyperspace bubble, phasing it (and the matter/anti-matter reaction going on inside) in and out of normal space several hundred times a second. The incredible energies produced by this process move a ship 7 parsecs a turn. This drive is added to all your ships as soon as you complete your research.
Tritanium Armour (Ship)
The plasma torpedo is a viciously unstable projectile—a protostellar plasma barely confined in a guidance shell that delivers 120 points of damage on impact. Unfortunately, the energy bleed-off necessary to keep the warhead from destabilising completely saps 5 points of this damage strength for each square the torpedo travels to reach its target. The plasma torpedo travels at speed 24.
Alloyed Tritanium Armour increases the structural integrity of ships and fighters by 100% and absorbs more damage than Titanium Armour. Furthermore, Tritanium alloy used in other equipment adds 10 to all ground troop combat strengths and increases the amount of damage that armoured missiles can sustain before being destroyed.
Neutronium Bomb (System)
ADVANCED CHEMISTRY
The Neutronium Bomb releases degenerate matter on the surface of its target, instantly inflicting 10–60 points of damage from gravitic implosion effects and the resulting explosive decompression of the neutronium itself.
Merculite Missile (System)
HYPER-ADVANCED POWER None
Chemistry CHEMISTRY (GENERAL) Nuclear Missile (System) Each Nuclear Missile carries a warhead that inflicts 8 points of damage on the target ship. The standard guidance system in every missile assures a hit, unless the missile is destroyed en route or deflected by a jamming system.
Standard Fuel Cells (Ship) The Standard Fuel Cell supplies sufficient energy to propel a ship 4 parsecs and back before refuelling.
The Merculite Missile carries a powerful, chemical explosive warhead capable of delivering 14 points of damage on impact. Missiles do not miss unless destroyed or jammed.
Pollution Processor (Building) The Pollution Processor is an ungainly but effective system. Closely controlled chemical reactions process factory waste, eliminating most of the toxic byproducts. This facility can process the waste from fully half of the colony’s production and reduces the pollution accordingly. A Pollution Processor costs 1 BC in maintenance each turn.
MOLECULAR COMPRESSION
Pulson Missile A Pulson Missile explodes a compressed molecular soup to deliver an explosive energy pulse that does 20 points of damage to its target. The missile itself travels at speed 14 (14 squares per turn).
Atmospheric Renewer (Building)
Extended fuel tanks increase the overall range of a ship by 50%, but at the cost of a considerable amount of space.
An Atmospheric Renewer eliminates most of the dangerous and irritating particles from the atmosphere of a planet. This effectively cuts out the pollution produced by three-quarters of the industry at a colony. This effect is cumulative with that of the Pollution Processor; if both are in place, only one-eighth of the industry produces pollution.
Titanium Armour (Ship)
An Atmospheric Renewer costs 3 BC in maintenance each turn.
Titanium alloy is standard armour for FTL ships. Without it, interstellar travel is not possible
Iridium Fuel Cells (Ship)
Extended Fuel Tanks (System)
ADVANCED METALLURGY
Plasma Torpedo (System)
The Iridium Fuel Cell supplies sufficient energy to propel a ship 9 parsecs (and back) before refuelling. These cells are added to all your ships as soon as you complete your research.
Deuterium Fuel Cells (Ship) The Deuterium Fuel Cell relies on light elements to supply sufficient energy to propel a ship up to 6 parsecs (and back) before refuelling. These cells are added to all your ships as soon as you complete your research.
NANO TECHNOLOGY
Nano Disassemblers (Achievement) Nano Disassemblers are microscopic machines designed to seek out and break down environmental contaminants with amazing speed and precision. The introduction of the Nano Disassemblers into your colonial environments doubles the planet’s inherent tolerance to pollution.

Microlite Construction (Achievement) Microlite Construction proceeds using microscopic nano-machines to construct buildings and ships. This results in the use of less material overall, but the same strength and durability of structures. This achievement increases the output of all your empire’s industrial workers by 1 production per turn each. Zortrium Armour is engineered using nano-precision instruments to build composite alloys of a complexity not possible by ordinary means. This armour increases the structural integrity of ships and fighters by 300% and can absorb much more damage than Tritanium. Furthermore, Zortrium body armour adds 15 to the combat strength of all ground troops. Applied to missiles and other systems, this armour increases the amount of damage necessary to destroy the protected device.
MOLECULAR MANIPULATION
Zeon Missile (System) The Zeon Missile carries an explosive warhead based on the bizarre properties of the only transuranic “noble” element ever discovered. This unlikely “inert” gas is so reactive that these simple chemical missiles inflict 30 points of damage. Zeon Missiles travel 16 squares per turn.
MILITARY TACTICS
Space Academy (Building) The Space Academy trains ship crews (Marines), giving them experience before they ever engage in actual combat. The crew starting level of ships built by this colony is increased by 1 (i.e., Recruits become Regulars, Regulars become Veterans, etc.). Finally, the crews of all ships stationed in a system with a Space Academy gain 1 extra experience point each turn. A Space Academy costs 1 BC in maintenance each turn.
XENO RELATIONS
Xeno Psychology (Achievement) Xeno Psychology focuses on understanding the motivations and values of the other races in the galaxy, in an attempt to formulate deals that are more appealing. The overall effect is to permanently add 30 diplomatic points to your dealings with every opponent empire.
Alien Management Centre (Building)
Ultra-dense Neutronium Armour boosts the structural hits of ships and fighters by 500%. Naturally, it absorbs more damage than Zortrium Armour, even when installed on missiles. Furthermore, Neutronium-laced armour and shields add 20 to all ground troop combat strengths.
The Alien Management Centre is used to control the alien population of an occupied colony. This facility assimilates conquered populations at the rate of 1 per 2 turns, regardless of government. The adjustment for a Charismatic or Repulsive race is applied to this base rate. This building also removes the 20% morale penalty from multi-racial colonies, and it halves the unrest of the assimilated populations, decreasing the chance of revolt.
Uridium Fuel Cells (Ship)
An Alien Management Centre costs 1 BC in maintenance each turn.
Neutronium Armour (Ship)
Uridium, the only known element more reactive than Zeon, powers the Uridium Fuel Cell to supply the energy to propel a ship 12 parsecs (and back) before refuelling. These cells are added to all your ships as soon as you complete your research.
MOLECULAR CONTROL
Thorium Fuel Cells (Ship) The nearly miraculous Thorium Fuel Cells are self-regenerating. These provide unlimited range to your ships. These cells are added to all your ships as soon as you complete your research.
Adamantium Armour (Ship) Adamantium Armour is the strongest available. It increases the structural hits of ships and fighters by 700% and absorbs an incredible amount of damage. Adamantium-based systems add 25 to the combat strength of all ground troops.
Zortrium Armour (Ship)
Sociology
MACRO ECONOMICS
Planetary Stock Exchange (Building) The establishment of a Planetary Stock Exchange increases the revenues earned on a single planet by 100%. A Planetary Stock Exchange costs 2 BC in maintenance each turn.
TEACHING METHODS
Astro University (Building) The Astro University (A.U.) uses the most advanced teaching methods available to provide for the training of farmers, workers, and scientists. Each unit of this educated population produces 1 more of everything (food, research, and industry) per turn. An Astro University costs 4 BC in maintenance each turn.
HYPER-ADVANCED CHEMISTRY None

ADVANCED GOVERNMENT
Computers
Imperium (Achievement)
ELECTRONICS (GENERAL) Electronic Computer (Ship) The basic Electronic Computer directs all starship beam weapons fire. These computers are automatically equipped on all ships and increase the chance a beam weapon will hit by +25. Should the computer be damaged or destroyed, the ship will lose this bonus.
Confederation (Achievement) The Confederation is a more stable, structured form of the Feudal government. In a Confederation, the nobility are more effectively unified, which eliminates the automatic assimilation problem on worlds conquered by your enemies. Furthermore, Confederation reduces the production cost of building ships to 1/3 the normal cost.
Federation (Achievement) The Federation is the advanced form of a Democracy. All research and income is increased by 75%. Conquered populations assimilate at a rate of 1 unit every 2 turns.
Galactic Unification (Achievement) Galactic Unification elevates a merely “hive-minded” Unification government to the status of a true, fully interconnected, collective consciousness. Each and every member of the race acts in total harmony with the rest. All populations produce twice as much food and industry as before. Conquered populations are assimilated at a rate of 1 unit every 15 turns.
GALACTIC ECONOMICS
Galactic Currency Exchange (Achievement) A galaxy-wide, central currency exchange totally eliminates the need for hard currency, replacing it with a system of instantaneous computerised exchanges. The ease of transfer creates an ideal environment for commercial transactions and increases the income generated by all colonies (from all sources) by 50%.
HYPER-ADVANCED SOCIOLOGY None
The Imperium replaces the Dictatorship as the ultimate in total control government. The colonial morale penalty still applies and barracks still remove it. Your empire gets a 50% boost in Command Rating from the new government. Assimilation time is reduced to 4 turns per unit. In addition, internal security in an Imperium is outstanding. This increases the effectiveness of all defensive agents by 15 points.
OPTRONICS
Research Laboratory (Building) The Research Laboratory houses state-of-the-art computer equipment, creating a superior research environment and allowing each scientist population unit to produce 1 additional research point per turn. In addition, automated research generates 5 research points. A Research Laboratory costs 1 BC in maintenance each turn.
Optronic Computer (Ship) The Optronic Computer incorporates optical switching technologies to speed the processing of all functions. This bonus to efficiency allows more complex AI and adds 50 to the accuracy of beam weapons. If the computer is destroyed, the ship will lose this targeting bonus.
Dauntless Guidance System (System) The Dauntless Guidance System uses a variant supercomputer design to provide in-flight friend-or-foe recognition for projectile (missile and torpedo) weapons. If a weapon’s original target is destroyed or phasecloaked before impact, that weapon automatically scans and acquires the nearest enemy ship as its new target.
ARTIFICIAL INTELLIGENCE
Neural Scanner (Achievement) With improved data processing methods, the pathways of the brain can be mapped and analysed in situ. The development of the Neural Scanner provides a nearly perfect lie detector. This device is used by spies to elicit information, adding 10 to all spy rolls.
Scout Lab (System) The Scout Lab is a computer-assisted laboratory that you can install on ships. This system generates research points each turn; the number depends on the size of the ship: Small=1, Medium=2, Large=4, Huge=8, Titan=16, and Doom Star=32. In addition, the lab allows a fleet in combat with a space monster, an Antaran fleet, or the Guardian of Orion to analyse the opponent’s biology or structure and seek out weaknesses. This significantly increases the targeting accuracy of the beam weapons on all ships in the fleet during that combat.

Security Stations (System)
CYBERTRONICS
Security Stations monitor vital sections of a military ship and attack intruders with computer-controlled weapons. Stations add 20 to the combat rolls of the Marines defending against enemy boarding parties.
Cybertronic Computer (Ship)
POSITRONICS
The Positronic Computer takes advantage of the properties of electrons’ anti-matter counterparts to accelerate processing. This system adds 75 to beam weapons’ chances to hit.
Autolab (Building) The Autolab is a completely automated research facility that operates under computer control, generating 30 research points per turn.
Planetary Supercomputer (Building)
An Autolab costs 3 BC in maintenance each turn.
The Planetary Supercomputer supplies researchers with a vastly improved ability to coordinate and analyse immense amounts of information, and provides a superior means of communication between researchers. This increases the research points each scientist generates by 2 per turn and adds 10 to the colony’s total.
Structural Analyser (System)
A Planetary Supercomputer costs 2 BC in maintenance each turn.
Holo Simulator (Building) The Holo Simulator facility creates realistic 3-D images using holographic projectors. This gives overworked populations the chance to experience relaxing and fantastic environments and interactions. The Holo Simulator increases a planet’s morale by 20%. A Holo Simulator costs 1 BC in maintenance each turn.
ARTIFICIAL CONSCIOUSNESS
Emissions Guidance System (System) Emissions guidance allows missiles to track and target the waste energy from a vehicle’s drive. If such a missile penetrates the ship’s shields to inflict damage, it does all its damage directly to the target’s engines.
Rangemaster Targeting Unit (System) The Rangemaster Targeting Unit corrects for long-range targeting inaccuracies in beam weapons, reducing the absolute range (which is used to compute accuracy and to hit penalties) to one-third of the actual range. Note that the dissipation of damage potential is not affected by this system.
Cyber Security Link (Achievement) The Cyber Security Link provides your populations with a direct mental link to their computers. This device allows your spies to circumvent enemy automated security systems, adding 10 to all spy success rolls.
Positronic Computer (Ship)
The Cybertronic Computer uses a neural net similar to a biological brain. It is capable of quickly learning and adapting. These computer systems give a ship a +100 chance to hit with each beam weapon. Should it be damaged or destroyed, the ship would lose this bonus.
The Structural Analyser links the ship’s weapons array to a powerful computer that chooses target points on an enemy vessel where the structure is weakest. As a result, the damage done by beam weapons that penetrate an enemy ship’s shields is doubled.
CYBERTECHNICS
Android Farmers (Android) Android farmers are designed specifically for farming careers. They do not receive any racial bonuses, but they do have an inherent +3 food production bonus. They require no food, but must be maintained with 1 unit of production each. Androids are unaffected by morale, do not generate income, and cannot be taxed. As a “race,” they are Tolerant of hostile environments. An Android Farmer costs 1 production in maintenance each turn.
Android Workers (Android) Android workers are designed specifically for factory careers. They do not receive any racial bonuses, but generate 3 more production per turn than a unit of biological population would on the same planet. They require no food, but must be maintained with 1 unit of production. Androids are unaffected by morale, do not generate income, and cannot be taxed. As a “race,” they are Tolerant of hostile environments. An Android Worker costs 1 production in maintenance each turn.
Android Scientists (Android) Android scientists are designed specifically for research careers. They do not receive any racial bonuses, but generate 3 more research per turn than a unit of biological population would on the same planet. They require no food, but must be maintained with 1 unit of production each turn. Androids are unaffected by morale, do not generate income, and cannot be taxed. As a “race,” they are Tolerant of hostile environments. An Android Scientist costs 1 production in maintenance each turn.
GALACTIC NETWORKING
Virtual Reality Network (Achievement) The Virtual Reality Network creates an empire-wide web of communications through which individuals can tap into computergenerated alternate realities. The existence of this network increases morale by 20% in every colony throughout the entire empire. Nearly instantaneous galaxy-wide communications allow the accelerated exchange of information and ideas, greatly enhancing the research capabilities of scientists who have access to the Galactic Cybernet. The research point output of all scientist population units in the colony is increased by 3 and that of the colony as a whole by 15. A Galactic Cybernet costs 3 BC in maintenance each turn.
ASTRO BIOLOGY
Hydroponic Farm (Building) The Hydroponic Farm is an automated, sealed environment in which food is grown, even on otherwise lifeless worlds. The Farm increases the food output of a colony by 2. A Hydroponic Farm costs 2 BC in maintenance each turn.
Galactic Cybernet (Building)
Genetics
Biospheres (Building) Biospheres allow colonies to better control the environmental conditions under which they live, allowing the population to use the less tolerable areas of a planet. This increases the maximum population a planet can hold by 2 units. A Biosphere costs 1 BC in maintenance each turn.
MOLECULARTRONICS
Pleasure Dome (Building)
ADVANCED BIOLOGY
A Pleasure Dome is the ultimate in virtual holographic entertainment, creating completely immersive environments. A Pleasure Dome increases colony morale by 30%.
Cloning Centre (Building)
A Pleasure Dome costs 3 BC in maintenance each turn.
Moleculartronic Computer (Ship) The Moleculartronic Computer stores information in the form of arrays of forced quantum electron states inside custom-built molecules. Thanks to the nature of quantum interactions, even the most complex processing task is almost instantaneous. This system adds 125 to the accuracy of beam weapons.
Achilles Targeting Unit (System) This targeting analysis tool quick-searches scanner data to find weak points in an enemy ship’s structure. It triples the chance of any weapon hit that passes the target’s shields and striking essential weapon and shield systems. All weapons ignore the target’s armour completely.
Cloning Centres allow doctors to easily replace failing or damaged organs with fresh ones grown via stem cells cultured from the patient’s own body. The resulting increase in life span boosts population growth in the colony, (by 100,000 people per turn), until the population reaches the planet’s maximum population limit, of course. A Cloning Centre costs 2 BC in maintenance each turn.
Soil Enrichment (Special) Widespread use of nano-machinery allows planetary engineers to alter the chemical make-up of the colony’s topsoil. This “fertilisation” process increases the food output of each farming unit of population by 1. For different reasons, Soil Enrichment does not work in hostile climates. Barren worlds have no topsoil to work on, while ongoing chemical processes in the soils of Radiated and Toxic planets undo the fertilisation as fast as it is done.
Death Spores (System)
HYPER-ADVANCED COMPUTERS None
Death Spores are genetically engineered, rapidly mutating viruses that relentlessly attack organic life forms. They are so contagious and deadly that invading ships must introduce them into the target planet’s atmosphere by orbital bombardment. Each spore pod launched has a 10% chance to kill one unit of colonist population. The use of biological weapons causes extreme revulsion in all other races in the game, and your diplomatic status suffers accordingly.

Psionics (Achievement)
Telepathic Training allows your empire to develop the talents of the naturally telepathic members of your race. As a result, your counterintelligence and espionage forces gain an effectiveness never before possible. This achievement adds 5 to all your spying rolls.
Psionics results from a combination of advanced genetic engineering and research into the biological basis of telepathy. It allows your empire to selectively create beings with immense psychic power. These new telepaths can read the mind of any being and, sometimes, even kill with thought. All your empire’s spying bonuses are raised by 10. Furthermore, morale is raised by 10% throughout the empire if your government is a Dictatorship, Imperium, Feudalism, or Confederation.
Microbiotics (Achievement) Microbiotics enable your scientists to develop genetically engineered microorganisms. The first application of this technology is the creation of entirely new families of disease-fighting compounds that actively attack both infections and tumours directly. Microbiotics increases the population growth rate of all your colonies by 25% and cuts the effectiveness of Death Spores and Bio Terminators dropped on your populations in half.
GENETIC MUTATIONS
Terraforming (Special) Terraforming is a slow process of altering the environmental characteristics of a planet until they closely resemble Terran norms. This changes weather patterns, stabilises extreme temperature fluctuations, and adjusts the abundance of surface water. Terraforming will only work on planets that have hospitable environments already. Barren worlds become Desert or Tundra, Desert environments become Arid, Tundra planets become Swamp worlds, and Ocean, Arid, and Swamp become Terran. You can terraform a planet several times, but each application has an increased production cost.
MACRO GENETICS
Subterranean Farms (Building) The Subterranean Farms are an underground cavern system filled with automated agricultural facilities. This increases the food output of a world by 4. Subterranean Farms cost 4 BC in maintenance each turn.
Weather Controller (Building) A Weather Controller modifies a planet’s weather patterns to form a more stable, fecund farming climate. Food production is increased by 2 per farmer. A Weather Controller costs 3 BC in maintenance each turn.
EVOLUTIONARY GENETICS
Telepathic Training (Achievement)
index
GENETIC ENGINEERING
Heightened Intelligence (Achievement) Through genetic engineering and voluntary selective breeding programs, the average intelligence of your entire race is substantially improved, increasing the research output of all scientists by 1.
ARTIFICIAL LIFE
Bio Terminator (System) The Bio Terminator is the most advanced and loathsome biochemical weapon ever devised. Its effects are best left to the imagination. Suffice to say that each B-T pod launched has a 20% chance of killing one unit of population. The use of biological weapons is considered a transgression of the unwritten laws of civilized behaviour, and does serious damage to your diplomatic standing with every race in the galaxy.
Universal Antidote (Achievement) The Universal Antidote represents a tremendous breakthrough in immunology. It increases the population growth rate of all colonies by 50% and quarters the effects of both Death Spores and Bio Terminators. These bonuses supplant those provided by Microbiotics; the two are not cumulative.
TRANS GENETICS
Biomorphic Fungi (Achievement) Biomorphic Fungi is a highly adaptive, edible plant that can extract nearly any form of energy from its environment in order to grow. It flourishes in any environment, including hard vacuum and radiated worlds, and increases the food output of all planets by 1 food per farmer. On worlds where farming is impossible, it makes farming possible!
Gaia Transformation (Special) The Gaia Transformation introduces genetically engineered microorganisms into a world to create an environment perfectly suited to both plant and animal growth. The transformation can be applied to Terran environments. Afterward, the planet becomes a Gaia class world.
Evolutionary Mutation (Achievement)
TACHYON PHYSICS
Advances in genetic engineering allow you to intentionally direct and accelerate the natural mutation of your race, altering your abilities. When evolutionary genetics is discovered, you may choose 4 Picks worth of racial specials to add to your racial characteristics. You may not change your type of government, choose additional penalties, or reduce any of your established bonuses.
Tachyon Communications (Achievement)
None
PHYSICS (GENERAL) Laser Cannon (System)
Tachyon Scanners detect the disturbances in the gravitic characteristics of normal space caused by the passage of ships travelling through hyperspace. These scanners have a base detection range (for Small ships) of 3 parsecs. The differences in detection range caused by ship size still apply. Tachyon Scanners installed in ships also reduce the effectiveness of enemy missile jamming systems, lowering the target’s Missile Evasion by 20 points.
Laser Cannons deliver highly focused, coherent beams of light that deliver 1–4 points of damage. This is the most basic beam weapon available.
Battle Scanner (System)
Physics
Laser Rifle (Equipment) The Laser Rifle is a hand-held weapon that increases the combat rating of ground troops and armour by 5. This bonus is replaced by, not cumulative with, those from more advanced rifles.
Space Scanner (Achievement) Space Scanners are used by all your colonies, outposts, and ships to detect enemy ships in nearby volumes of hyperspace. The standard scanner can detect a Small ship at a range of 2 parsecs. Ships create hyperspace wakes according to their size, and thus larger ships can be detected from farther away: Medium +1 parsec, Large +2, Huge +3, Titan +4, and Doom Star +5.
FUSION PHYSICS
Fusion Beam (System) The Fusion Beam harnesses the radioactive output of a hyper-stimulated breeder reactor to project a collimated stream of charged particles, inflicting 2–6 points of damage.
Fusion Rifle (Equipment) The Fusion Rifle is a hand-held weapon that increases the combat rating of ground troops and armour by 10. This bonus is replaced by, not cumulative with, those from more advanced rifles.
Tachyon Scanner (Achievement)
HYPER-ADVANCED BIOLOGY
Tachyon relay stations are integrated into every Star Base, Battle Station, Star Fortress, and Doom Star. These emit coherent signals capable of penetrating a short distance into hyperspace. Tachyon Communications allows you to issue orders to ships travelling through hyperspace within 3 parsecs of a relay station, and add 1 Command Rating point for each orbital base.
The Battle Scanner involves a complex scanning array linked to a ship’s targeting computers. The scanner increases the ship’s chance to hit with beam weapons by 50. Furthermore, ships equipped with Battle Scanners have a scanning range 2 parsecs greater when in normal or hyperspace (outside of combat).
NEUTRINO PHYSICS
Neutron Blaster (System) The Neutron Blaster fires an intense beam of lethal radiation. It inflicts 3–12 points of damage per hit. The hard radiation from Neutron Blaster shots that penetrate the target ship kills one Marine for every 5 points of internal damage done.
Neutron Scanner (Achievement) Neutron Scanners analyse disturbances in the galaxy’s background neutrino radiation caused by the passage of ships travelling through hyperspace. These scanners have a base detection range (for Small ships) of 5 parsecs. The differences in detection range caused by ship size still apply. Neutron Scanners installed in ships also reduce the effectiveness of enemy missile jamming systems, lowering the target’s Missile Evasion by 40 points.

ARTIFICIAL GRAVITY
The Tractor Beam projects a powerful, localised gravitic field capable of slowing a single enemy ship or holding it in place. Each beam can trap a Small ship or slow a larger one—in proportion to its size—up to the maximum range of 12 squares away. The effect of multiple Tractor Beams on a single target is cumulative. (Thus, for example, 6 beams would immobilise a Doom Star.) A slowed or trapped ship can move or turn only according to its new speed, and any speed-related defensive bonuses are lessened. All ships attacking an immobile ship receive an additional 20% bonus to hit with beam weapons. Any motionless ship can be boarded by an adjacent ship.
Graviton Beam (System) The Graviton Beam fires a series of artificially generated gravity waves that simultaneously push and pull at the target ship with immense force, literally tearing it apart with tidal flux. The beam inflicts 3–15 points of damage. Any damage that penetrates the ship’s armour is apportioned as usual, then an additional 50% of that total is done directly to the structure of the target.
Planetary Gravity Generator (Building) Planetary Gravity Generators create artificial gravity to normalise a planet’s pull within the Normal-G gravity range. The generators eliminate any negative effects of Low- and Heavy-G planetary environments. A Planetary Gravity Generator costs 2 BC in maintenance each turn.
SUBSPACE PHYSICS
Subspace Communications (Achievement) Subspace Communications are a substantial improvement over tachyon relays. This upgrade to all your relay stations gives you the ability to issue orders to any friendly ship within 6 parsecs. This replaces the +1 Command Rating points given to orbital bases by the old tachyon system with a +2 bonus.
Jump Gate (Achievement) The Jump Gate forms a temporary, controlled wormhole terminus in each system in which you have at least one colony. This weakening of the fabric of space-time increases the speed of your ships travelling between two of your colony systems by 3 parsecs a turn.
Phasor Rifle (Equipment) The Phasor Rifle is a powerful hand-held weapon that practically disintegrates opponents. This increases the combat rating of ground troops and armour by 20. This bonus is replaced by, not cumulative with, those from more advanced rifles.
Multi-Phased Shields (System) Multi-Phased Shields allow a ship to constantly change the frequency and phase of its shields, increasing the maximum amount of damage that they can absorb by 50%.
Tractor Beam (System)
PLASMA PHYSICS
Plasma Cannon (System) The Plasma Cannon fires a tremendous blast of plasma energy that inflicts 6–30 points of damage, enveloping and striking the ship from all four sides. Unfortunately, this volatile beam has poor cohesion and dissipates rapidly, resulting in double range penalties for damage.
Plasma Rifle (Equipment) The Plasma Rifle is the most powerful hand-held weapon known. It increases the combat rating of ground troops and armour by 30. This bonus replaces those from less advanced rifles.
Plasma Web (System) The Plasma Web launches an energy projectile that ensnares and clings to the target ship. When the projectile first strikes the ship, the web does 5–25 points of enveloping damage (applied to all four shield facings). This amount of damage is considered the web’s “strength.” Each turn afterward, the web loses 5 points of strength, then inflicts its strength in enveloping damage to the webbed ship. This continues until the web reaches zero strength and dissipates. If a single target is struck by multiple plasma webs, the webs’ strengths are cumulative. The Plasma Web only fires every other turn and has a maximum range of 15 squares.
MULTI-DIMENSIONAL PHYSICS
Disruptor Cannon (System) The Disruptor Cannon fires intense bolts of energy phased in such a way as to disrupt the molecular cohesion of the target, inflicting 40 points of damage. The beam’s cohesion is so great that this damage is not reduced by range penalties.
Dimensional Portal (Satellite)
MULTI-PHASED PHYSICS
Phasors (System) The Phasor fires a trans-light beam of phased energy that actually exists in several dimensions simultaneously, inflicting 5–20 points of damage.
A Dimensional Portal gives your fleets in the same system the ability to cross into the dimension from which the Antarans stage their attacks. To use this, select a fleet in the same system as the portal, then click the Attack Antarans button instead of selecting a destination. A Dimensional Portal costs 2 BC in maintenance each turn.
HYPER-DIMENSIONAL PHYSICS
Hyperspace Communications (Achievement) Hyperspace Communications allow you to communicate with and give orders to any of your ships in hyperspace, no matter what its distance from your relay stations. This also replaces any Command Rating bonus to orbital bases given by Tachyon or Subspace Communications with a +3 bonus. Sensors provide extremely accurate scans and analysis of disturbances in both normal and hyperspace, and thus are capable of detecting ships at great distances. They have a base detection range (for Small ships) of 8 parsecs. The detection range effects of ship size still apply. Sensors installed in ships also reduce the effectiveness of enemy missile jamming systems, lowering the target’s Missile Evasion by 70 points.
ADVANCED MAGNETISM
Class I Shield (Ship) Class I shields protect a ship from physical and energy attacks, absorbing up to 5 times the ship’s size in damage before failing. Shields normally regenerate one-third of the total strength of the strongest facing, spread equally over all the damaged facings, each combat round.
Sensors (Achievement)
Force Fields
Mass Driver (System) The Mass Driver is an electromagnetic rail gun that fires hypervelocity projectiles, inflicting 6 points of damage for each that hits. Though the Mass Driver’s accuracy is calculated like that of beam weapon attacks, its damage is not reduced by range.
Mauler Device (System)
ECM Jammer (System)
The mauler is a brute force energy projector that fires a massive bolt of unrestrained destruction with a wide area of effect. The mauler always strikes its target (no chance of missing) and can do a maximum of 100 points of damage. However, damage loss due to range is double for this device.
The ECM Jammer generates magnetic pulses that confuse both weapons targeting systems and missile guidance units. The effect is a 70 chance that any missile or torpedo targeting the ship goes astray.
GRAVITIC FIELDS
Anti-Grav Harness (Equipment)
TEMPORAL PHYSICS
Time Warp Facilitator (System) A Time Warp Facilitator allows a ship to momentarily blink out of and back into the space-time continuum. Any ship equipped with this bizarre device is able to overlap itself for a brief moment in time and gain an additional round of activity at the end of its every active combat round. In essence, the ship gets two combat turns for every one that normal ships get.
Stellar Converter (Building/System) The Stellar Converter is a tremendous plasma cannon powered by a nearperfectly efficient matter to energy conversion system. It fires a plasma blast that, if it strikes the target ship, inflicts 400 points of damage to each of the four shields of a ship—1,600 total damage—regardless of range. The ship system version of the Stellar Converter destroys an entire planet—turns it into an asteroid belt—when fired from orbit (outside of combat). A planet-based Stellar Converter costs 6 BC in maintenance each turn.
Star Gate (Achievement)
The Anti-Grav Harness allows ground troops and armour to fly, substantially increasing their mobility and defense and adding 10 to their ground combat rating.
Inertial Stabiliser (System) The Inertial Stabiliser creates an incomplete hyperspace travel field that operates in normal space. This vastly improves the ship’s mobility and makes it considerably harder to target. The result is a +50 addition to the ship’s beam defense and a halving of the movement cost for turning the ship in place.
Gyro Destabiliser (System) The Gyro Destabiliser is a remote spinoff of the same technology that makes the Inertial Stabiliser possible. This system creates a hyperspatial rift that interacts with the target ship’s own, idling hyperspace field generator. A region of inertial chaos is the result. As the chaotic region seeks equilibrium, the ship inside it is spun like a dervish. This uncontrolled twirl causes 3–7 points of structural damage multiplied by the size class of the ship. Shields and armour are no protection and are not damaged. The destabiliser has a range of 15 squares.
A Star Gate forms a stable, controlled wormhole terminus in each system in which you have a colony. This fold in the fabric of space-time allows instantaneous (1 turn) travel between any two of your systems.
HYPER-ADVANCED PHYSICS None

MAGNETO GRAVITICS
Warp Field Interdictor (Building)
Class III Shield (Ship)
The Warp Field Interdictor creates a tremendous destabilising field around the entire star system in which it is built. The interdictor field is similar to the natural field created by nebulae, and it has a radius of 2 full parsecs. This field slows all enemy ships to a speed of 1 parsec per turn.
Class III shields absorb up to 15 times the ship’s size in damage before failing. They regenerate as normal. The Planetary Radiation Shield reduces solar and cosmic bombardment to tolerable limits, so that life forms can comfortably move about the planet’s surface. Radiated worlds become Barren as long as the shield remains in place. The shield also provides a colony with some defense from orbital bombardment, reducing bombardment damage by 5 points. A Planetary Radiation Shield costs 1 BC in maintenance each turn.
A Warp Field Interdictor costs 3 BC in maintenance each turn.
Lightning Field (System) The Lightning Field surrounds a ship throughout combat with an ionized particle field capable of overloading the targeting system of any missile or torpedo passing through it. The field has a 50% chance of automatically destroying each missile, torpedo, or fighter attempting to strike the equipped ship.
Planetary Radiation Shield (Building)
Warp Dissipater (System) The Warp Dissipater creates a system-wide interference field around a ship in combat. This field prevents any enemy ship from entering hyperspace while it’s active. Thus, ships cannot retreat from combat while the dissipater is functioning.
SUBSPACE FIELDS
ELECTROMAGNETIC REFRACTION
Multi-Wave ECM Jammer (System)
Stealth Field (System) The Stealth Field reduces the emissions of hyperspace drives and baffles much of the turbulence they cause in normal space. These ships cannot be discovered by normal sensing equipment; they are completely invisible on the Galaxy Map.
The Multi-Wave ECM Jammer is similar to the primitive ECM Jammer, except that it spreads its jamming broadcast across the entire spectrum of targeting frequencies. Ships equipped with Multi-Wave ECM Jammers have a 100% chance of misdirecting any incoming missile or torpedo. It is not possible to use both this and the ECM Jammer on the same ship.
Personal Shield (Equipment)
Gauss Cannon (System)
Personal Shields deflect both physical and energy attacks. They offer protection against most ground troop attacks, increasing the combat rating of Marines and armour by 20.
Class V Shields (Ship) Class V shields absorb up to 25 times the ship’s size in damage before failing. They regenerate normally.
The Gauss Cannon is an extremely powerful linear accelerator which hurls a massive burst of tiny projectiles at near light speed. Gauss bursts inflict 18 points of damage, regardless of range. They are treated as beam weapons for accuracy purposes.
Stealth Suit (Achievement) The Stealth Suit allows its wearer to blend easily into any background, rendering that person virtually invisible. The suit adds 10 all your spy rolls.
WARP FIELDS
Pulsar (System) The Pulsar weapon emits a harmonic resonance field around a ship that creates violent vibrations in all ships, missiles, and fighters within a 6-square radius. Any affected ship sustains damage in relation to its size—2–24 points per size class. Fighters and projectiles take damage as if they were size class one-half.
DISTORTION FIELDS
Cloaking Device (System) The Cloaking Device hides a ship from long-range scans—completely. In combat, as long as the ship does not attack, it has an 80% bonus to its defense against beam weapons. When a cloaked ship does attack, it loses this bonus. Once the ship has attacked, it must remain uncloaked until it spends one full turn without firing; then it can recloak.
TRANSWARP FIELDS
The Stasis Field generator ensnares the target ship in a temporal suspension bubble. While suspended, the ship cannot move, fire, recharge any of its weapons or shields, cloak, retreat, or be affected by any weapon. It is effectively removed from battle entirely. The field has a range of only 3 squares, and it remains in effect as long as the ship generating the field remains undestroyed and in combat or the generator is intentionally turned off (by clicking on the target ship). A ship can hold one target ship in stasis for each Stasis Field it has installed. Ships in stasis at the end of combat must be released and dealt with. Otherwise, the combat does not end.
Displacement Device (System)
Hard Shields (System)
The Inertial Nullifier creates a weakened hyperspace travel field that does not translate the ship out of normal space. This reduces the effective mass of a ship to almost zero, increasing its mobility and making it considerably harder to target. As a result, this adds 100 to the Ship Defense against beam weaponry. In addition, the ship can change direction (rotate in combat) without any movement cost at all.
Hard Shields are reinforced against the ravages of many forms of incidental radiation. This reduces the damage of each enemy attack—by 3 points—regardless of whether or not the shield in that quarter has collapsed. Hard Shields also allow ships to use their shields inside a nebula. If the Hard Shield generator is destroyed, its effects are eliminated. Hard Shields prevent enemies from using Transporters to send over Marines, even after the shields have failed.
QUANTUM FIELDS
Any weapon targeted on a ship equipped with a Displacement Device has a 30% chance of missing completely, regardless of any other equipment or considerations.
Subspace Teleporter (System) The Subspace Teleporter allows a ship to make an ultra-short hyperspace jump of up to 18 squares in combat without spending any movement. The jump does not change the direction the ship is facing.
Inertial Nullifier (System)
TEMPORAL FIELDS
Class X Shield (Ship)
Class VII Shield (Ship)
Class X shields absorb up to 50 times the ship’s size in damage before failing. These regenerate as usual.
Class VII shields absorb up to 35 times the ship’s size in damage before failing and regenerate as normal.
Planetary Barrier Shield (Building)
Planetary Flux Shield (Building) The Planetary Flux Shield encapsulates a planet in a protective energy field. This shield allows the colonists to regulate what wavelengths of energy reach their world. The existence of a flux shield converts Radiated climates to Barren. In addition, it reduces all damage done to the colony from orbit by 10 points per attack. A Planetary Flux Shield replaces any Planetary Radiation Shield already in existence on that world. A Planetary Flux Shield costs 3 BC in maintenance each turn.
Wide Area Jammer (System) The Wide Area Jammer generates a broad spectrum magnetic pulse that jams weapons targeting and tracking systems and missile guidance units. The effects cross the entire spectrum and spread out in a sphere. This has a 130% chance of preventing missiles and torpedoes from hitting the equipped ship, and disrupts the lock of 70% of the missiles and torpedoes aimed at all other ships in the same fleet. The Wide Area Jammer cannot be installed on the same ship with either an ECM Jammer or a Multi-Wave ECM Jammer.
Stasis Field (System)
A Planetary Barrier Shield seals a planet in a nearly impenetrable energy field. This shield converts Radiated climates into Barren by reducing solar radiation. It also protects the colony from orbital bombardment, reducing all damage against a planet by 20 points per attack. As long as the barrier shield is in place, neither ground troops nor biological weapons can enter the planet’s atmosphere. A Planetary Barrier Shield costs 5 BC in maintenance each turn.
Phasing Cloak (System) The Phasing Cloak is a vast improvement over the Cloaking Device. It allows the ship to temporarily shift its hyperspatial harmonics—in a sense moving its atoms partially into another dimension—instead of just eliminating the evidence of its movements. This system hides the ship completely from all detection—scanners, combat sensors, and targeting systems. While cloaked, the ship cannot be attacked. After 10 turns in combat, side effects of the Phasing Cloak become a serious risk to the survival and sanity of the crew. Its effect must be tuned down, and thus it functions just like a Cloaking Device until the end of that combat.
HYPER-ADVANCED FIELDS None
When you begin the enjoyable task of designing and building your own military ships, you’ll find that choosing weapons and other ship equipment can be a complicated process. It can also be frustrating. The weapon you really want doesn’t always fit in the ship you want to put it in, or it doesn’t do exactly the job you wish it did. Well, there are two more issues that further complicate the design process, but both address one of the fundamental frustrations.
Through the march of technological progress, nearly every optional ship Miniaturisation system, whether it’s a weapon, a special device, or whatever, gets smaller over time. That’s right, the Laser Cannon that takes up 10 space in the hull today might take up only 5 space several turns in the future. This is primarily due to refinements in the design, the introduction of ever-tinier components, and lesser reliance on redundant systems. When your researchers make a particular ship system available for installation, that system comes at full size and cost. Every time you successfully complete another field of research in the same category as the technology that made that system possible, one result is the miniaturisation—by one level—of all the existing systems from that category. Each level of miniaturisation results in a 10 to 20% decrease in the space taken up by that system and a 5 to 25% decrease in the production cost. Miniaturisation is automatic. All you have to do is the research. However, not all systems can be miniaturised—Heavy Armour is a good example.
Modifications
Nearly every weapon could be enhanced in some way. In this galaxy, almost every weapon can be altered to increase its effectiveness in many ways. The how-to is in the next section, Ships. What follows is an introduction to the potential modifications available for the weapons you can install in your ships. You should note that every one adds to the size and cost of the weapon, and some are mutually exclusive—they cannot be used together on the same weapon. Otherwise, only space limits the number of suitable modifications you can apply. There are no modifications available for bombs or fighter craft.
AF: Auto-Fire allows a beam weapon to fire 3 separate times in rapid succession, each time with a 20% penalty to its accuracy. This modification increases the size and cost of the weapon by 50 and is not applicable until the intended weapon has undergone 2 levels of miniaturisation. AP: Armour Piercing beam weapons penetrate any type of armour except Xentronium. All of the damage done passes through as if there were no armour at all. AP adds 50% to the space and cost of a weapon and is not applicable until the intended weapon has undergone 1 level of miniaturisation. ARM: Heavily Armoured missiles are shielded with the empire’s best available armour, greatly increasing the amount of damage necessary to destroy the projectile. This modification increases the size and cost of the missile rack by 25% and is not applicable until the intended weapon has undergone 1 level of miniaturisation. CO: Continuous fire prevents a beam weapon from overheating as quickly, allowing it to fire over a longer duration. This gives the targeting computer time to adjust the aim during fire, increasing the weapon’s accuracy by 25. This modification increases the size and cost of the weapon by 50% and is not applicable until the intended weapon has undergone 1 level of miniaturisation.
WEAPONS UPGRADES
ECCM: Electronic Counter-Counter-Measures halve the chance of a missile or torpedo being diverted by enemy jamming devices. ECCM increases the size and cost of the weapon by 25% and is not applicable until the intended weapon has undergone 1 level of miniaturisation. ENV: Enveloping weapons, whether beams or torpedoes, surround the target at impact and strike all four shield quarters simultaneously. This effectively quadruples the damage done by the hit. This modification increases the size and cost of the weapon by 100% and is not applicable until the intended weapon has undergone 2 levels of miniaturisation. FST: Fast missiles and torpedoes move 8 squares more per combat turn than ordinary guided projectiles. There is a corresponding increase in the missile’s defense. This modification increases the size and cost of the weapon by 25% and is not applicable until the intended weapon has undergone 1 level of miniaturisation. HV: Heavy Mount beam weapons are large-platform versions that cause 150% of the normal amount of damage. In addition, the increased strength of the beam cuts the range penalties (for accuracy and dissipation of damage) in half. This modification increases the size and cost of the weapon by 100%. The Heavy Mount and Point Defense modifications are mutually exclusive.

MV: MIRV (Multiple Independently targetable Reentry Vehicle) missiles each carry 4 individual, full strength warheads. These separate from each other moments before impact, effectively multiplying the damage done by a factor of 4. This modification increases the size and cost of the weapon by 100% and is not applicable until the intended weapon has undergone 2 levels of miniaturisation. Despite the reentry in the name, this modification does not allow missiles to be used for planetary bombardment. NR: No Range Dissipation affects those beam weapons that diminish in strength (potential damage) over distance. Using an independent collimation beam and continual chaotic feedback analysis, this device focuses the beam and totally eliminates the decrease in damage. This modification increases the size and cost of the weapon by 25% and is not applicable until the intended weapon has undergone 1 level of miniaturisation. NR: Not Reduced By Range is the torpedo version of No Range Dissipation. This device allows for more stable confinement in plasma-based torpedoes, preventing loss of warhead strength over distance. This modification increases the size and cost of the torpedo by 25% and is not applicable until the intended weapon has undergone 1 level of miniaturisation. OVR: Overloaded torpedoes have payloads that exceed the engineering safety limits of their construction. This increases the strength of the warhead by 50%, but creates the necessity for increased fail-safe equipment in the areas of the automated loaders and torpedo tubes. Overloading increases the size and cost of the whole torpedo system by 25% and is not applicable until the intended weapon has undergone 2 levels of miniaturisation. PD: Point Defense weapons are small, precise copies of a beam weapon used to target missiles and fighter craft. They inflict only half the damage of a full-size beam, but have a 25% greater accuracy. Since these are intended only as short-range defensive batteries, the range penalties to dissipation and accuracy are double. All available (nonfired) Point Defense beams fire automatically at any incoming target in the same square as the ship. This modification decreases the size and cost of the weapon by half (50%). The Point Defense and Heavy Mount modifications are mutually exclusive. SP: Shield Piercing weapons ignore the target’s shields completely, passing through as if there were no shields. This modification increases the size and cost of the weapon by 50% and is not applicable until the intended weapon has undergone 1 level of miniaturisation.
8. Ships
Without the ships that ply the vacuum seas between stars, your empire would always remain as it began. Exploration, expansion, and even selfdefense would be impossible without them. Your fleets are as important to the well-being of your race as the colonies themselves.
BUILDING SHIPS
There are two different types of ship in Master of Orion II: military and support. Support ships include all those used to expand and manage your empire. They do not fight, but are destroyed if an enemy military fleet chooses to engage them in combat. The types of support ship are:
DESIGN SLOTS
Freighters transport food and colonists (units of population) between colonies. Note that Freighters do not appear on the Galaxy Map.
Colony Ships establish new colonies on habitable worlds. There can be only one colony per planet.
DESIGN BUTTON
Outpost Ships each build a military outpost on a single planet. These outposts act as scanning stations and as refuelling stops for fleets.
Transports carry Marines and Armour to enemy colonies for invasion purposes (ground combat). Transports can also ferry Marines to reinforce a friendly colony.
MAKING MORAYS
BUILD QUEUE
If you’ve read the Managing a Colony section, you already know how to build a ship, but here’s a quick review:
- Go to the Construction Orders screen for the colony where you want to build the ship.
Anything that isn’t a support ship is a military ship. Fleets of military ships can engage in combat with space monsters, other empire’s fleets, orbital bases, and planets. They’re also good for exploration, defense, and dealing with some of the random events that can occur.
- Click on the name of the type of ship you want to add to the Build Queue.
- Make sure that there is some industrial work going on at that colony.
- Wait for the job to be done, or pay for accelerated production. That’s it. Of course, doing this gets you one of the standard, predesigned ships. That’s fine if those ship designs suit your needs—or you’re playing with Tactical Combat turned off—but sooner or later, most emperors like to take an active hand in designing their military ships. (Support ships only come in one flavour each; there’s no designing to be done.)



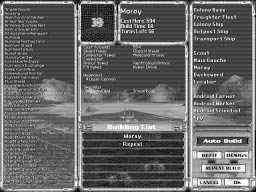
Designing Your Own
- Immediately below the name are the Icon and Hull Size boxes. To The discussion of the Construction Orders screen gives brief mention to the Design button. When you decide to try your hand at ship design, go to that screen and use that button. The mouse pointer changes. Move the new cursor to one of the existing ship design slots (the names of the military ships). Now click on it.
HULL SIZE
AUTOMATICS
NAME
establish the size of hull you want to use as the basis for your design, click on any of the classes listed. (The current class is highlighted.) Note that the amount of equipment already selected for installation might cause the smaller classes to be unavailable—until you free up enough space, that is. When you select a class, the default icon for that ship size appears in the Icon box, along with a notation of the total amount of space available in that hull size. Click on the arrows at either side of the icon to cycle through the available pictures until you find one you like. The one you settle on is what the ship will look like when it’s built.
- To the right of the Hull Size box are the Automatics. These two boxes
WEAPONS AREA
SPECIALS AREA COST COUNTERS
- The large area in the centre of the screen is the Weapons Area. This THE DESIGN DOCK
list all of the ship essentials—the engines, shields, armour, fuel cells, and computer. For each of these, the best that you have available is automatically installed in every ship you build or refit. (You can click on the shield or computer to install a lesser system and save on the build cost.) Drives and fuel cells get updated on all your existing ships without the hassle of refitting! Don’t worry, the engines, armour, and fuel cells do not take up space that might be used for optional systems. At the end of this info listing, the ship’s base Beam Attack (Ship Attack plus bonuses), Beam Defense (Ship Defense plus bonuses), and Missile Evasion ratings are noted. As you add optional systems, these numbers might change. lists all the optional weapons systems slated for installation in a ship built on this template. From left to right, each weapon listing includes: Number: How many emplacements of this weapon are to be installed. The display shifts to the Design Dock console. You have just removed the current design from the slot you clicked on, and now you can create your own ship template to put in its place. Don’t worry: if you change your mind, you can get the old design back by clicking on the Cancel button. Also changing a design has no effect at all on any existing ships or on partially built ships in any Build Queue. In the future, however, you simply will not be able to build any more of that particular design of ship (unless you design one just like it, of course).
Dmg: The amount of damage each emplacement is capable of inflicting per hit. Arc: The arc of effective fire is the portion of the area surrounding the ship in which a weapon can target an enemy ship, base, or missile. This is explained in a little more detail in the Weapons subsection.
When you first see the Design Dock, it’s filled in with the current design for the ship slot you chose. This is meant as a convenience. If you want to make modifications to this design, rather than starting fresh with an empty hull, you can. Before you start tinkering with things, though, take a good look at the console.
Cost: The production cost (in units of industry) each emplacement adds to the total cost of building the ship.
- Right at the top, in the left corner, is the name of this ship template.
Modifications: All of the modifications you have chosen to add to these weapon emplacements. These are explained in a little more detail in the Weapons subsection.
Every ship you build from this design has the same name. Click anywhere in this box if you want to change the name. Use B to erase the current name, then type whatever you want in its place. (Space is limited.)
Weapon Name: The name of the weapon.
Space: The amount of space inside the hull that each emplacement takes up.
How you use this area to install and remove weapons systems is covered next, in the Weapons subsection.
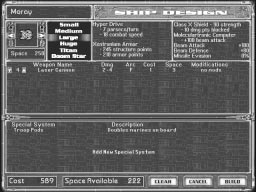
- The similar area immediately below the Weapons Area is the Specials Area. This lists all the optional special systems slated for installation in ships built from this design. Each listing includes the name of the system and a brief description of its effects. How you use this area to install and remove special systems is covered in the Specials subsection.
- At the bottom left of the console are the two Cost Counters. These keep track of the two most important numbers in ship construction: the total production Cost of the current design and the remaining Space Available in the hull. As you add and remove systems, these change to keep up.
- To the right of the counters are three buttons. Clear removes all
Now you’re ready to get into the meat of ship design—the optional systems. All the systems themselves are described in the Research and Development section (and briefly on the Design Dock console itself). What follows are introductions to the how-to of installing and removing weapons and special systems. Weapons When you’re ready to place weapons (or remove them), you click in the Weapons Area, but where you should click depends on what you want to do.
- To add a new weapon, click in any blank spot in the area.
- To remove or replace a weapon that’s already listed, click on the listing for that weapon. In both cases, the Weapon Selection console appears. If you clicked on an existing weapon, the cost and space required by that weapon are subtracted from the totals.
IN THE GUN SHOP
The top section of this console is little more than a list of all the weapons you have available. For each weapons system, the listing includes its name, damage potential, production cost, the space it requires, and any supplementary information that might be helpful. Weapons that will fit into the hull (under the current configuration) are highlighted. Those that won’t fit are dimmed. To select a weapon for installation in the design, just click on it.
- Beam adds to the list those weapons considered “beam weapons” (though not all of them are actually energy beams). These reach the target immediately and generally have a range of potential damage. Beam weapons’ chances of hitting a target depend on the Beam Attack of the firing ship and the Beam Defense of the target.
- Missile controls the inclusion in the display of missiles and torpedoes. Projectile weapons take time to travel to the target, but generally do a predictable, set amount of damage. Barring enemy action, missiles and torpedoes never miss. Both, however, can be diverted from their target by electronic countermeasures (ECM)—jamming equipment. Missiles, in addition, can be destroyed en route by beam weapon fire.
- Bomb includes unguided projectiles and biological weapons in the list. Bombs installed in a ship are only useful against planetary targets (though the Bomber special weapon does use bombs against enemy ships). You cannot bombard a colony unless at least one ship in the invading fleet has bombs installed. Bombs do not miss, but the target of their damage is chosen at random.
- Special determines whether those weapons systems that don’t fit any of the other categories are included. This batch includes fighter squadrons and all the really nifty weapons.
optional systems from the displayed design template, allowing you to start with a clean slate. Cancel throws away any changes you’ve made and puts the previous template back into that design slot; it also returns you to the Construction Orders screen. Build signals that you’re satisfied with the design as it stands. Clicking this places your completed design into the slot you chose on the Construction Orders screen, then returns you to that screen. You can begin building ships from the new template immediately if you wish.
Below the list are the inclusion options. These can help you find exactly the weapon you’re looking for.
If you’re simply removing a weapon, click on the top option—No Weapon—then click the Accept button. Once you select a weapon from the list, the lower area of the console (below the inclusion options) becomes active. This is the Modifications catalogue. What options are available here depends on the type of weapon you chose and your level of technology. One thing is always true, though: the smaller box on the left holds the Firing Arc selector. The selector is applied primarily to beam weapons, but every weapons system has a firing arc. Essentially, this is a wedge-shaped area (determined according to the way the ship is facing) in which an enemy must be for the weapon to target that enemy. The selector indicates the default arc for whatever weapon you’ve chosen. If that weapon has an adjustable arc, you can click on any one of the arc options to determine the arc you want installed. Forward: allows targeting in a 120-degree wedge centred on the front of the ship. Forward Ext: is an extended version of the Forward arc that covers a 240-degree wedge. Back Ext: is an extended version of the Back arc that covers a 240-degree wedge.
Back: restricts targeting to a 120-degree wedge centred on the rear of the ship.
If you’re simply removing a special system, click on the top option— No Special.
360: allows the weapon to target an enemy in any direction.
Unlike weapons, there is no need to adjust anything else. Specials have no firing arcs or modifications. You cannot install multiple copies of the same special systems, nor would the extras have any effect if you did.
The larger part of this catalogue lists the modifications appropriate to the weapon you selected. To add one of these to the system, click on it; your selected mods are highlighted. The possible modifications to beam, missile, and torpedo weapons are covered in the Weapons Upgrades subsection of Research and Development. As you modify your weapons systems, keep in mind that any modifications, including extended firing arcs, increase the required space and production cost of the system— sometimes quite a bit. When you’re satisfied with the weapon and any modifications you’ve chosen, click the Accept button to complete the process. (If you change your mind, use the Cancel button.)
Now you’re ready to install the next weapon or system. Specials Placing special systems is quite similar to selecting weapons, but much less complicated. When you’re ready to place specials (or remove them), click in the Specials Area, but where you should click depends on what you want to do.
- To add a new special system, click in any blank spot in the area.
- To remove or replace a special that’s already listed, click on the listing for that system.
THE NIFTY STUFF
In both cases, the Special Selection console appears. If you clicked on an existing system, the cost and space required by that special are subtracted from the totals. This console is a list of all the special systems you have available. For each system, the listing includes its name, the space it requires, what it adds to the production cost, and a brief description of its effects. Specials that will fit into the hull (under the current configuration) are highlighted. Those that won’t fit are dimmed. To select a special for installation in the design, just click on it.
In time, every ship becomes obsolete. You gain new technologies and ship systems, and the early models are simply outclassed by their newer cousins. Luckily, anywhere you can build a ship, you can refit a ship. (Which means, you’ll remember, that you cannot refit Large ships or anything bigger at a colony that doesn’t have a Star Base or better as an orbital dock.) To refit a ship, go to the Construction Orders screen for a colony in the same system as the ship in question. Once there, click the Refit button. A graphic display allows you to pick from all the ships in the system; click on the one you want refitted. Having chosen a ship, you go directly to the Design Dock console—the same place you designed the ship in the first place. There’s only one difference in the way this console works during a refit; you cannot change the hull size of the ship. Otherwise, it works exactly as during the design process.
Now, you can determine the number of emplacements of that weapon you want installed in the ship. To adjust this number, use the up and down arrows on either side of the weapon number. (You can also click and hold for accelerated adjustment.)
Refitting Obsolete Ones
When you’ve finished at the Design Dock, the refit job is placed in the Build Queue. When the job is done, the ship is returned to orbit, but until then it is as if that ship did not exist. Refit jobs have one serious limitation: You cannot remove a refit from the Build Queue without destroying the ship.
NOTES ON CONTROLLING FLEETS
All of your ships that happen to be in the same system are coordinated into a single fleet. (This makes command and communications during a defensive action much simpler.) If you send any of these ships elsewhere, they move together as a fleet. In fact, a single ship sitting all alone is considered a fleet. Instructions on how to move a fleet (or a portion thereof) are in the section on The Galactic Command Interface, under The Fleet Window. You can break any fleet into smaller fleets when you give the ships travel orders, but not when you choose to engage them in combat. All the military ships in a fleet always enter combat as a group. You cannot, for example, order half the fleet to attack one planet and half to attack another. If there are ships you wish to protect, you can have them retreat once the combat has begun, but you cannot prevent the gung-ho crews from attempting to join in the fight.
Once a fleet is in hyperspace, on its way from one system to the next, you can no longer contact it to give orders. (There are technologies that allow you to do so, but they’re not available until you successfully research them.) Normally, you must wait until the fleet reaches its destination before you can change its mission. No fleet can travel any farther from one of your colonies or outposts than the shortest range of any ship in that fleet. The fleet also travels at the speed of its slowest ship. A word of caution: if, somehow, a fleet that is not out of range suddenly becomes out of range, that fleet immediately retreats to the nearest friendly colony.
CREW (SHIP’S MARINES)
Every ship needs a crew. The crew of Marines for each of your military ships—and the complement on a Transport—is assembled while the vessel is built. (This has no effect on the population or the ground complement of the colony that builds the ship.) Except during combat, there’s no reason for you to pay any attention to a ship’s crew. They go about their business as efficiently as could be expected. During combat, however, the crew takes on a new dimension—they become Marines in fact as well as in name. If you or your enemy attempts a boarding action (details in the Combat section), the Marines do the fighting. When one of your ships is boarded, the Marines on board rally to the defense. If you’re doing the boarding, the boarding party forms from your ship’s Marines. As a ship takes damage, however, the crew might take casualties. The result is a lessened ability to take part in and defend against boarding actions. All troops, both ground and shipboard, start out as green rookies. For experience purposes, they’re considered Recruits (unless they’re in service with a race that has the Warlord characteristic). As time goes by and these Marines take part in battles, their experience level rises. Each turn in space counts for 1 experience point, and every enemy ship destroyed or captured in combat adds 2 more. When the crew gains sufficient experience, they advance to the next rank and their ship gains combat bonuses, as follows. Points Level Ship Attack Ship Defense Boarding *
Recruit Regular Veteran Elite Ultra-Elite
Normal +15 +30 +50 +75
Normal +15 +30 +50 +75
Normal +5 +10 +15 +20
* This level is only attainable by crews in the service of a Warlord race.
As to why these attack and defense bonuses are important, refer to the Combat section.
9. Mercenary Leaders
Researcher: Generates research points every turn, based on the leader’s experience level.
When a mercenary asks for work, the window in which the communication appears provides all the information you need about that particular leader: his, her, or its qualifications (the effects that leader causes), experience level, and hiring price. Most leaders also have a maintenance cost every turn, too. (It’s usually small.)
Telepath: Increases the effectiveness of all your agents defending against alien espionage and negates the effects of any enemy’s telepathy at the leader’s location.
Use the Reject or Hire button to announce your decision to the applicant. If you reject a mercenary, you have a few turns to change your mind. If you hire one, the hiring price disappears from your treasury and the leader appears in your Leader Pool. For the details on assigning leaders to their posts (a ship or colony), please refer to Leaders under The Galactic Command Interface. Rejected leaders often pop up again later, so if you can’t afford someone whose talents seem to match your needs, don’t let it bother you too much. Every mercenary leader has an individual mix of abilities and effects. What follows are brief descriptions of the possible abilities.
Tech Knowledge: Reveals the secret of at least one unknown technology when hired.
Trader: Increases the income you receive from trade agreements with other empires.
COMMAND ABILITIES
These abilities enhance the combat effectiveness of the ship or fleet to which you assign the officer. Engineer: Increases the restoration rate of the ship’s shields and helps repair damage during combat. In addition, an Engineer repairs all structural and internal systems damage after each battle. Helmsman: Increases the Ship Defense of every ship in the fleet. Fighter Pilot: Increases the defense and the beam weapon damage of all fighter craft used by the officer’s fleet.
GENERAL ABILITIES
Some abilities have broad effects on your empire as a whole. Assassin: Has a chance of assassinating an enemy spy each turn.
Spy Master: Increases the effectiveness of all your spies operating in alien empires.
WOULD YOU HIRE THIS ALIEN?
During the game, odd individuals occasionally show up on your imperial doorstep, offering their services for hire. These are mercenary leaders. Some focus on helping you run the colonies in a single system (Colony Leaders), and some lend their leadership support to one of your ships or fleets (Ship Officers). All of them have positive effects to lend your empire—for a price.
Galactic Lore: Reveals the location and characteristics of every planet in the galaxy and increases both the fleet’s Ship Attack and Ship Defense when fighting space monsters or Antarans.
Commando: Increases the ground combat strength of all troops in the same system as the leader, both on planets and ships in orbit.
Navigator: Allows a fleet to ignore the movement restrictions caused by nebulae and black holes. In addition, a navigator increases the speed of the fleet by at least 1 parsec per turn.
Diplomat: Has a positive effect on your diplomatic status with all other empires.
Operations: Adds to your Command Rating, thus reducing or eliminating the maintenance cost of ships in your fleets.
Famous: Increases the chance of other mercenaries applying and decreases their hiring cost.
Ordnance: Increases the maximum potential damage of the ship’s attacks.
Megawealth: This leader is independently wealthy, and not only requires no maintenance cost, but also contributes income to your empire each turn.
Security: Increases the combat strength of the ship’s Marines when defending against an enemy boarding party. Weaponry: Increases the Ship Attack of the officer’s ship.
ADMINISTRATION ABILITIES
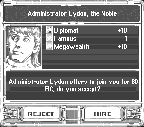
These abilities enhance the productivity or morale of the colonies in the system to which the leader is assigned. Environmentalist: Reduces the pollution produced by industry in the system to which the leader is assigned. Farming Leader: Increases the amount of food grown on the colonies in the system. Financial Leader: Increases the income generated by colonies in the system. Instructor: Boosts the number of experience points earned each turn by all Marines and leaders in your empire. Labour Leader: Increases the productivity of workers in the system.
Science Leader: Increases the research points generated by each colony in the system.
Spiritual Leader: Raises the morale of all colonial populations in the system. Medicine: Increases the population growth rate of all colonies in the system. Tactics: Improves the coordination of the military forces in the system, adding to the Ship Attack and the strength of ground troops.
10. Combat

As you explore the galaxy and colonise the planets you find appealing, sooner or later you’re going to run into a space monster or one of the other races. No matter how nice a person you are or how benevolent an emperor, in a galaxy as competitive as this, combat is unavoidable.
GETTING INTO A FIGHT
If one of your fleets encounters a space monster or an Antaran fleet, battle begins right away; communication is impossible in these cases. Space monsters are not intelligent enough to negotiate with, and the Antarans consider you no more appealing than a cockroach in their salad. The situation is similar when a hostile fleet invades one of your systems. If the enemy fleet chooses to attack, your defending fleet (any and all of your ships in the system at the time of the attack) scramble to meet the challenge.
If you do not wish to engage in combat, click on the Close button. This orders your fleet not to attack anything in the system, but does not prevent other fleets from attacking you as if you were an unwelcome intruder (which you probably are). If you want to attack something in the system, click on your intended target. There’s one restriction on your possible choices. That is, you cannot attack an enemy fleet directly if the empire that owns that fleet has a colony or outpost in the same system. Rather, you must select the ground target, and the fleet will rush to its defense. This assures that the planetary defenses are able to aid the defending fleet in combat. If the opposing empire does not have a ground installation in the system, you can attack its fleet directly. Remember, if any fleet that includes no military ships ends up engaged, there is no combat. The support fleet is defenseless, and the opposing fleet destroys it out of hand.
STRATEGIC COMBAT COLONIZED WORLD
The combat takes place without requiring your input or attention, and the result is announced immediately thereafter. The losing side suffers 100% casualties. The winning fleet might also be damaged, but at least one ship (or monster) always survives.
YOUR FLEET
If, when you set up the game, you chose to play with the Tactical Combat option turned off, you needn’t worry about the rest of this section. Once circumstances or your decision determines the players for a battle, the rest is automatic.
THIS ONE GOES TO THE HUMANS CHOOSE A COLONY AND THE FLEET (IF ANY) DEFENDS IT AUTOMATICALLY When one of your fleets enters a system occupied by a fleet, outpost, or colony of another race, the circumstances are different. In these cases, you have a choice of actions. A window similar to the System window appears. This is the Combat Selection window. Of the planets in the system, those which have a colony or outpost are noted. If you move the mouse pointer over each, an intelligence report of the defenses there (orbital bases and ground defenses) appears. At the bottom of the window, both your fleet and any other fleets in the system are represented. Move the pointer over each of these to see a summary of the fleet’s composition.
TACTICAL COMBAT
If you did not choose to turn off the Tactical Combat option, then you control every ship in your fleet throughout the battle in Tactical Combat. It would be extremely foolish (not to mention impossible) for the emperor to physically take part in every space combat in the galaxy. Thus, your control over a fleet in ship-to-ship combat takes the form of a twodimensional representation of the fighting space called the Battle Map.
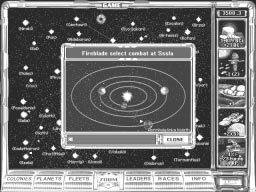

The Battle Map
- The Active is surrounded by a modest halo. The Active is that vessel (ship, base, or planet) to which an emperor is currently giving orders.
- The range of potential movement of the Active is shown (if the option is
FIGHTER CRAFT
enabled) by a shading of the space around it.
- The shield arcs of the Active are displayed (if the option is enabled) as
ACTIVE SHIP
green lines.
MISSILE
- The movement grid used to calculate ranges to targets and movement is shown (if the option is enabled) by a lattice of thin lines.
SHIELD ARCS
PLANET
- Damage done to any target is displayed briefly (at the time of the hit) as a number floating near the affected target.
BUTTONS SYSTEMS
INFO/ TARGET
ACTIVE
TACTICAL MAP COMBAT NEAR A PLANET
Active: The leftmost readout on the Command Console shows a schematic scan of the Active. Its identity is listed at the top, the strength of each of the four shield facings (if the Active has shields) is represented graphically around the schematic, and its damage status (if applicable) is shown at the bottom. If you control the Active, you can right-click on this readout to view a detailed report on its design. Damage status is represented as follows:
- The left-hand, red portion of the lower bar represents the remaining
Everything relevant to the combat taking place is represented on the Battle Map display. In addition, there are several smaller readouts that tell you more than visual scan would reveal, and there are tools that allow you to give commands to your ships’ captains. The map itself takes up most of the display. Below the map is the Command Console. The Map: This is a visual representation of actual combat events, with certain extra information overlaid. You can control the appearance of many of these overlays via the Options console (described further on).
- Ships, orbital bases, monsters, and planets are represented by fairly obvious icons. Your fleet always appears at the left. The icons are not sized to a real scale, but rather a relative scale—larger objects are pictured using larger icons than those of smaller objects, but not as much larger as the objects are themselves.
- A mouse pointer enables you to direct ship movement and weapons targeting.
- Missiles, torpedoes, fighter craft, and other projectiles far too small to spot visually are represented by tiny icons.
- Beam weapons fire and the effect vectors of special weapons, though totally invisible in vacuum, are represented as if they were travelling through an atmosphere.
- The right-hand, yellow portion of the lower bar represents the remaining internal systems hits.
- Armour appears as the upper, blue bar. Normally, the armour absorbs damage before internal systems and structure, but it is possible for the lower bar to have damage while there is still armour left intact.
structural hits.
Note that planets have neither armor, nor shields, nor structure points. For the rundown on attacking planets from orbit, see Attacking a Planet, later in this section. Systems: To the right of the Active readout is a related listing, the Systems readout. You can click on either of the filter buttons at the top of this readout. What appears in the display depends on which of the two filters you have activated.
- Weapons lists all of the weapons systems in or on the Active, along with the number of each type installed. Each listed weapon has its state of readiness denoted by its colour, as follows. If the Active is under your control, you can manually cycle the status of a weapon through its possible states by clicking on the listing. Weapons Armed to fire are highlighted (bright green). The weapon is ready, and the target the mouse pointer is currently over is in range and inside the firing arc of the weapon.
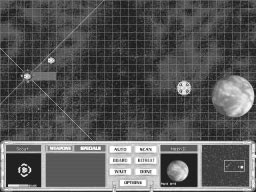
Ready weapons are listed normally (dimmer green). You can fire the weapon this round if you find an appropriate target. Weapons on Standby—used already this round or deselected—are listed in yellow. The weapon can not fire this round, but becomes Ready in time for the next salvo. Those that are Out—damaged beyond use, destroyed, or switched off— are red. The weapon is unavailable until you change its state. Functioning Point Defense weapons which are Out still fire at missiles and fighter craft, but not enemy ships.
- Specials lists all of the non-weapon special systems installed on the Active. Working systems are highlighted, and those damaged beyond utility are dimmed. This readout is for information only; you cannot turn special systems on or off manually. Buttons: In the centre of the Command Console are several buttons. They function like this:
- Auto turns control of your entire fleet over to the captains on the scene.
- Scan activates the scanning equipment on the Active. The mouse pointer changes form. Place this pointer over anything on the battle map and click to scan it. A scan gives you expanded data on the object. You can scan as many objects as you wish. When you’re finished scanning, click the Scan button again to switch the scanning equipment off.
- Board instructs the Marines on board an Active under your control to attempt a boarding action against an enemy ship or orbital base. (Marines cannot board planets.) The mouse pointer changes. Use the new pointer to select a target for the boarding action. The details on how boarding is conducted are a little further on, in Boarding Actions.
- Retreat commands an Active ship under your control to leave combat at its next opportunity. That opportunity comes at the beginning of its next turn as Active. The ship shifts into hyperspace and sets course for the nearest system in which you have a colony or outpost. There is no way to rescind a retreat order. For obvious reasons, orbital bases and planets can not retreat.
combat round. Any unused beam weapons (except Heavy Mount) and movement points are reserved for defensive use. When you send the Done signal to the last thing under your control, the enemy’s combat round begins.
- Options opens a miniature console of combat control options. Click on any of these toggles to switch it on or off. The options are: Options closes the options console. Self Destruct orders an Active under your control to destroy itself. This causes an explosion that does some damage to everything close to it. (No, planets cannot self destruct.) Missile Warning causes a brief impact siren to sound whenever a missile or torpedo is about to strike a ship or orbital base under your control. This gives you manual control over some of the possible countermeasures. Fast Animations speeds up the display of ship, beam, and projectile movements. Show Legal Moves overlays the Active’s range of possible movement on the Battle Map. Show Shield Arcs overlays the defensive arcs of the Active’s shield facings on the Battle Map. Display Grid overlays the lattice used to calculate ranges to targets and movement on the Battle Map. Info/Target: The readout immediately to the right of the centre buttons has two functions. When the mouse pointer is over empty space, this readout contains further information about the Active—the types of drive, shields, armour, fuel cell, and computer used in its construction. When the mouse pointer is over any object, this readout displays targeting data for that object. This info is essentially the same as that shown in the Active readout when the target is the Active. Since enemy Actives flash through the readout quickly, this can be a useful way to quick-scan the enemy fleet.
Combat proceeds without your guidance, unless you click on this button again. Even when you request that control be returned, the captains are rarely able to respond immediately, but do so as soon as they safely can.
- Done signals the Active that you have finished giving it orders for this
Tactical Map: The rightmost readout is a long-range overview of the entire Battle Map. The area currently shown in the full map is outlined. Click anywhere on this mini-map to centre the full Battle Map on the chosen spot.
- Wait orders an Active under your control to await further orders until you have finished giving orders to the rest of the fleet. You can give the wait command to any Active that still has unused weapons or movement points, and you can order as many vessels to wait as you wish.
Moving Ships
Using Weapons
When you’re ready to fire the weapons installed on the Active, move the mouse pointer over your intended target. If your target is a valid target, the mouse pointer changes to cross hairs. Now click. All of the Ready weapons for which that target is in range fire at it. (If the ship’s computer determines that firing only some of the weapons will unquestionably destroy the target, then only that number fire.) That’s all there is to it. Beams Beam weapons are not necessarily high-powered, collimated, narrowly focused emissions from violent, subatomic reactions, but most of them are. A few are actually projectile weapons, but the bits of matter involved are accelerated to such incredible velocity that they’re delivered to the target at nearly beam speeds. Here are the essential characteristics of all beam weapons.
BOX
- Beams target only objects within their defined firing arc.
- Shots reach the target immediately.
- The accuracy of a beam depends on the Beam Attack of the firing ship, THE BOX AROUND THE POINTER MEANS THE MOVE IS VALID
THE PHASOR
the Beam Defense of the target, and the distance the beam must cover to reach its target. Beams are more accurate at closer range.
- Most beams lose coherence over distance, thereby losing potential to
Orbital bases cannot change position intentionally, though some special systems transport them from place to place. Every combat round, however, an orbital base uses all its movement points to rotate a full 45 degrees. This automatic action is intended to always keep the strongest shield facing the enemy.
Missiles and Torpedoes Missile weapons and Torpedoes are quite similar. Both are pre-targeted, guided projectiles that explode on impact, destroying themselves in the process of causing damage to a target.
When a ship is the Active, you can use the mouse cursor to explore the limits of its range of movement. Whenever the cursor is in a place to which that ship can move during this round, a box approximately the size of the ship appears around the cursor. You can use the pointer for this, or you can turn on the Show Legal Moves option. Either way, when the mouse pointer is where you would like the ship to move, click on that spot. The Active ship moves immediately. (Note that any enemy projectiles targeting the moving ship move at the same time it does.) If you want to rotate the Active ship, move the cursor to the area you want the ship to face, then right-click. The ship turns as far toward that direction as it can, given the movement points remaining. The cost in movement points of rotating is 2 points per 22.5 degrees of rotation (one-16th of a full circle), regardless of the size of the ship.
damage done is based on the accuracy of each shot.
The type of drive each ship has (and some special systems) determine its speed in combat. This speed is the number of movement points that ship has to spend each combat turn—both for moving from place to place and rotating to face in a different direction.
do damage. Range lowers both the minimum and maximum possible damage that a beam can inflict on a target.
- Each beam does damage within a predetermined range. The actual
- Guided projectile weapons have an unlimited targeting range. Range has no effect on either the accuracy or damage of missiles and torpedoes.
- Guided projectiles take time to travel to the target. The speed of the missile or torpedo determines how far it moves each combat turn. This speed also adds to the defense rating of the projectile.
- Barring interference, guided projectiles always hit their target. Possible types of interference include the effects of jamming equipment. Missiles also face the prospect of being shot down by beams or anti-missile rockets.
- Beam weapons and anti-missile rockets can destroy enemy missiles in flight. It is not possible to destroy torpedoes in this way.
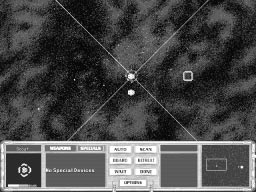

- With the exception of Interceptors, fighter craft cannot engage one
- Ships protect their missiles with the best armour their empire has
another in dogfights; they only target enemy ships, bases, and planets. Interceptors can attack enemy fighter craft of all types.
available. Enemy weapons must destroy the armour before they can damage or destroy the missile itself.
- Most missiles and torpedoes do a set amount of damage when they strike. Neither range nor damage to the projectile alters this damage. Proton Torpedoes are an exception to most of these rules. These projectiles act more like beam weapons, hitting the target instantly (“direct fire”) when launched. In other ways, including damage, Proton Torpedoes are treated as normal torpedoes.
Bombs Bombs are unguided projectiles designed for atmospheric penetration. This includes both explosive devices and biological weapons.
- Ships equipped with bombs can only use those bombs against a planetary target.
- Bombers (a type of fighter craft) can use bombs against both ships and planets.
- Bombs never miss, but you cannot choose a specific target when
- Ship bombs have a maximum range of 3 combat squares. Bombers always drop their payloads at a range of 1 square. Fighter Craft Single-pilot ships launched from a larger ship (the carrier) are all considered fighter craft. There are four types, each with its own weapon and specific use.
- All fighter craft are installed in ships and launched to a target in squadrons of four. You cannot separate the fighters in a squadron to direct them at multiple targets.
- Fighter craft fly to their target, use whatever weapons they have at point-blank range, then attempt to return to their carrier. Once safely back, any surviving fighters rearm, refuel, get repairs, and return to the same target (if it still exists). Once their primary target is no longer valid, fighters select a new target unless one is specified for them.
- Fighter craft always attack from the direction of their target’s weakest shield facing.
- Like missiles, fighter craft are vulnerable to beam weapons (though not to jamming). Fighter crafts’ speed and armour (the best available, as for missiles) both contribute to their defense.
Damage
When any weapon successfully hits an enemy, it does damage.* The way that this damage is absorbed by the various defensive portions of the target and what happens to damage that gets through these defenses deserves a little explanation. Note that this section does not apply to planets, only to ships and orbital bases. * It’s true that there are several special systems and even one or two weapons systems that do no damage, but have other effects detrimental to the enemy. For the sake of a clearer explanation, the existence of those systems is temporarily ignored for the purposes of discussing damage. 1) Shields are the first line of defense against damage. If the target has shields, whichever shield facing is hit absorbs as much damage as possible. The current strength of that shield facing determines how much damage it is possible for that shield to absorb before falling. Once the shield strength reaches zero, that shield falls (at least for the rest of that combat round) and the remaining damage continues on. Note that if combat takes place in a nebula, all shields become inoperative, except for those on ships equipped with Hard Shields.
causing damage to a planet.
THE SPATIAL COMPRESSOR
Other Special Weapons Each special weapon has its own, particular effects and characteristics. Please refer to the Research and Development section for the details on these systems.
2) Armour is the second line of defense. A layer of ultra-tough alloy coats the entire hull and absorbs damage that might otherwise breach the hull and destroy vital internal systems. Armour also strengthens the structure of the ship (or orbital base). When damage penetrates the shields, the armour absorbs as much as it can. (Generally speaking, a ship’s armour can absorb an amount of damage equal to the structural strength of the ship.) Armour, once damaged, does not regenerate. Cybernetic races, some ship systems, and some leaders make it possible to repair armour during combat. 3) Structure is what holds ships and orbital bases together. Any damage that gets past both the shields and armour has a good chance of hurting the target’s structural integrity. Any such damage lessens the structural strength of the vessel. When this reaches zero, the target explodes.


- Missile Bases can fire missiles throughout combat.
- Planetary shields absorb a set amount of damage from every attack
4) Internal Systems are the basic functional parts of the vessel: the drive, targeting computer, shield generator, weapons, and special devices. Any damage that passes the shields and armour and does not do structural injury hits the internal systems. Which system suffers the damage is somewhat random, but larger systems tend to get hit more often, due to their size. When any system takes enough damage, it is destroyed. The remaining damage moves on to the next internal system, until all of the damage has been applied.
and can only be destroyed, never weakened or damaged.
- Due to atmospheric reentry effects, all ship weapons except bombs and missiles do only half damage to planets.
- Ships can bomb planets directly, but other ships only indirectly, via bombers.
- Losing the computer eliminates any targeting bonus that system provided.
Targeting a planet with most weapons is no different than targeting anything else. A ship can only drop bombs on a planet from within a 4-square range. When enough damage has accrued against a planet, that damage is applied to and destroys one of the defensive installations. When all of these installations are gone (and the other defenders have been defeated or routed, too), combat ends. That’s when the other ways of hurting a planet become possible.
- Destruction of the shield generator takes away the vessel’s shields.
- If the drive is damaged, the ship’s ability to move is compromised. When a drive is destroyed, the vessel undergoes an uncontrolled drive reaction. The resulting explosion destroys that target and damages everything within the radius of the blast.
Boarding Actions Shooting at enemy ships is not the only way to remove them from a battle. You can also damage or even capture enemy ships through boarding actions. The Marines at your disposal are as effective at attacking an enemy ship as they are at defending yours from boarders. There are two methods of boarding a ship.
Attacking a Planet Although the distinction is blurred in places, attacking a planet is not the same thing as attempting to conquer a colony. There are three things that you as an invader can do to a world and the colony on it. The one discussed here is doing damage to the military installations on the surface during ship to ship combat. The other two, bombing an undefended planet and conquering through ground combat, happen outside of ship to ship combat and are covered in Invading a Colony.
YOU MUST BE CLOSE TO DROP BOMBS ON A PLANET
Planets often have defensive installations in place: Missile Bases and Ground Batteries. These can target your ships, and your ships can target the planet. The differences between planets and ships—for the purposes of combat, that is—are few.
- Planets don’t move or retreat.
- Planetary weapons never run out of ammunition and always have
THE RESULTS OF A BOARDING ATTEMPT
Immobility: Any ship that is no longer able to move—its drive has been damaged, or some special system holds it still and allows attacks on it—is a valid target for a boarding action. Once an opponent’s ship moves into a square immediately adjacent to the immobile ship, that attacker can send over a boarding party of ship’s Marines (using the Board button). The emperor in command of these Marines decides how many to send and whether they are attempting to capture or raid the ship.
5) Crew on duty inside a ship take certain risks. One is the chance to be killed by the consequential effects of damage to the ship. In addition to damaging the ship, each point of damage that penetrates both the shields and armour has a 2% chance of killing a crew member (Marine).
Transporters: Any ship equipped with Transporters can send Marines into any enemy ship within a 12-square range—if the shield facing the attacking ship has fallen. The emperor in command uses the Board button, sets the number of attackers, then instructs the Marines to either raid or capture the ship. Shuttles: Any ship equipped with Assault Shuttles can send them to attack a target ship and attempt a boarding action. Marines on Assault Shuttles always try to capture the target ship.
360-degree firing arcs.
The Marines boarding the ship and those defending the ship fight it out in the same way as ground troops do when a colony is invaded.
Destroy: If one or more of the ships in your fleet are equipped with a Stellar Converter, you have the option to destroy the planet outright.
When Marines attempt to capture a ship, their object is to kill off the entire defending crew. If they are successful, ownership of that ship changes. If the race that gained ownership is Telepathic, that emperor can use the ship immediately—in the same combat. If not, the side that captured the ship must win the combat in order to retain the prize. After combat is finished, the new owner gets complete control of the captured ship.
Drop All: Orders your fleet to let loose with all their bombs at once, rather than in sequence. This bypasses the bomb-by-bomb report on the progress of your attack and goes directly to the wrap-up. Halt: Stops the bombardment of the planet and returns the Bombard and Invade options to the window. You cannot, of course, undo bomb damage already done.
When Marines raid a ship, their goal is to damage internal systems. (Marines cannot do damage directly to the shields, armour, or structure of a target ship.) Rather than killing defenders, any damage the attackers do destroys one internal system. Smaller systems are more likely to be destroyed. For this reason, raids are often suicide missions.
Invade: Orders all the ground troops transported by this fleet to make planetfall and attempt to conquer the colony. Once you click on the Invade option, you give up the chance for any further orbital assault on this planet this turn. Mind Control: If your race is Telepathic and there is at least one ship of size Large or bigger in the attacking fleet, you might have the option to use mind control techniques against the colony. This guarantees a bloodless conquest without the necessity for an invasion. (You don’t even need Transports.) You cannot mind control another telepathic race.
INVADING A COLONY
Orbital Assault The first decision that comes your way is expressed in the Orbital Combat Selection window. From the safety of space, you can attack the colony without fear of retaliation. The complement of ground forces and number of buildings on the planet’s surface are noted on the left. The number of bomb hits your fleet is expected to inflict and the invasion troops you have available are noted on the right. Use this information to decide what your next step is, then click on the option you choose. Depending on the make-up of your fleet and the weapons installed on the ships in it, a few different options might appear.
SOFTEN UP THE DEFENSES BEFORE DROPPING TROOPS
Bombard: This button begins the orbital bombardment of the planet. Once the bombing begins, the Bombard and Invade options are replaced by Drop All and Halt.
If your orbital attacks eliminate the entire population of the colony, the planet returns to uninhabited status. To establish a colony here, you’ll need to fall back on the usual techniques. However, as long as there is at least one unit of colonial population, you can still invade.
Ground Combat
Once you click on the Invade option, there’s nothing more you can do. The Marines drop to the planet’s surface and assault the colony. As emperor, your action now is limited to watching the invasion on the Ground Combat screen.
If you win the combat that results from attacking an enemy’s colony world, your fleet gains control of the orbital space around the planet. This gives you the opportunity to assault the colony itself. (This is also true if you attack a colonised planet that has no defending fleet.)
Near the top of this screen, your advisors note the important statistics on both the defensive (right) and offensive (left) forces. Each is coloured to match the banner of the corresponding empire. Any advanced weapons technology, armour, and equipment gives ground forces a better chance of winning the battle, and thus is listed here. Next to the icon for each type of ground force are two bits of information. The number denotes how many of that type of troop is taking part in this fight; the heart icons represent the number of times each unit of this type must be hit to be killed. At the bottom, the actual firefight is shown. You cannot give orders to ground troops during an invasion; this is a win or lose situation. Retreat is not an option.
Close: Ends your attack on this planet and closes the window. If you do not wish to attack the colony at all, use this option first.
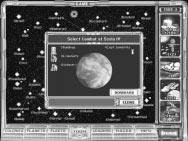
When the fighting is over, the outcome is noted at the top of the screen. If the invasion failed, the planet remains in the hands of its current emperor. A successful invasion transfers control of the world, the colony, and the remaining population to the attacking empire.
OFFENSE
DEFENSE
INVADERS
DEFENDERS
BATTLE FOR THE PLANET OF THE SAKKRA
Assimilate or Be Destroyed Having conquered one of the colonies of an enemy empire, you have a choice to make. (Note that some forms of government don’t allow you this choice.) You can begin having the existing colonists—the captured population—exterminated, or you can attempt to incorporate them into your empire. If you choose the former, your troops will comply, though your relations with all other races in the galaxy will suffer. If you decide on the latter, it takes time for the conquered colonists to fit themselves into your culture. How long depends on a few factors. Until they become assimilated, the conquered units of population produce at half their normal rate. In addition to being less than productive, unassimilated populations remain a threat to your hold on the colony. Unless there is an Alien Management Centre in the colony, there is a chance each turn that the conquered aliens will attempt to revolt. (The more unassimilated aliens, the larger the chance.) If they do so, they fight it out with your ground troops for control of the planet. A loss for you is a gain for the world’s old ruler—the colony reverts back.

11. Managing an Empire
One colony is an empire, but keeping tabs on a single world doesn’t compare to the complexity of managing an interstellar empire that spans many planets spread over several star systems. The more colonies you have, the greater your resources—and your imperial responsibilities. A growing empire must at some point come into contact with its neighbours. When you do, two new complications—or opportunities, depending on how you look at it—enter the picture: diplomacy and espionage. How you handle diplomatic relations with other races can accelerate or seriously hamper the expansion of your empire. Meanwhile, behind the scenes, both your spies and theirs are skulking about.
The list of forces and circumstances that can affect your empire is immense, but few have more immediate and drastic consequences than internal factors. Starvation, low morale, and an empty treasury are only a few of the possible problems you might suffer. Controlling your empire with a steady hand and a balanced grip is necessary if you want it strong enough to meet outside forces and survive.
Government Once you’ve chosen a race, there’s not much you can do about the type of government except learn to get the most out of its advantages and minimise the negative effects of its disadvantages. One research goal, Advanced Government, improves the overall effect of the government, but otherwise you’re stuck with what you begin with. The details are in the Race Selection section, and here’s a brief review (in alphabetical order). Confederation (Advanced Feudalism) Morale -20% at colonies without Barracks. Assimilation takes 4 turns. Ship production costs are 1/3 galactic normal. Lost populations no longer assimilate instantly. Capture of the capital means anarchy until a new capital is built. Morale takes a 50% penalty during this anarchy. Research produced by scientists is half normal. Democracy Defensive spies operate at -10%. Research and Income are +50% at all colonies. Assimilation of a unit of conquered population takes 4 turns. Eradication of populations is not allowed. Capture of the capital causes a 20% morale penalty until a new one is built.
Federation (Advanced Democracy) Defensive spies operate at -10%. Research and Income are +75% at all colonies. Assimilation of a unit of conquered population takes 2 turns. Eradication of populations is not allowed. Capture of the capital results in a 35% morale penalty until a new one is built. Feudal Morale -20% at colonies without Barracks. Assimilation of a unit of conquered population takes 8 turns. Populations in lost colonies assimilate instantly. Ship production costs are 2/3 normal. Capture of the capital means anarchy until a new capital is built. Morale is -50% during this anarchy. Research produced by scientists is half normal. Galactic Unification (Advanced Unification) Defensive spies operate at +15%. The Morale of the race’s populations cannot be modified in any way. Things that boost or lower Morale have no effect. Food and Industrial production are +100%. Assimilation of a unit of conquered population takes 15 turns. Capture of the capital has no effect.
IMPERIAL POLICY
Dictatorship Defensive spies get a 10% bonus. Morale -20% at colonies without Barracks. Assimilation of a unit of conquered population takes 8 turns. Capture of the capital means -35% morale at all colonies until a new one is built.
Imperium (Advanced Dictatorship) Defensive spies operate at +20%. Morale -20% at colonies without Barracks. All colonies have a 20% Morale bonus. Assimilation of a unit of conquered population takes 4 turns. Capture of the capital means -35% morale at all colonies until a new one is built. Your command rating is increased by 50%. Unification Defensive spies operate at +15%. Things that boost or lower Morale have no effect. Food and Industrial production are +50%. Assimilation of a unit of conquered population takes 20 turns. Capture of the capital has no effect.
Taxes Income is crucial to the success of your empire. The production of Trade Goods and sale of excess food help, and treaties with other races can contribute, but your primary source of funding is taxation. To set your imperial tax rate, click on the Treasury box (on the Galaxy Map). Next, click on the rate you want. Your income per turn should rise accordingly.
SURE AS DEATH
Here’s the downside. Every rise in the tax rate causes a corresponding drop in production at every one of your colonies. So, for example, if your tax rate is an astronomical 50%, fully half your production potential goes toward taxes. Only the remaining half is available for building. It’s exactly analogous to having that percentage of your colonies producing Trade Goods. Taxes are a convenient way to produce income without focusing the loss of production on one colony, the way production of Trades Goods does. Still, a smart emperor is cautious.
You can also use freighters to move units of population from one colony to another. In this case, each unit moved requires the exclusive services of an entire fleet—5 freighters. These ships are unavailable for other use during the transfer period; before you transport colonists, make sure you still have enough spare freighters to carry the necessary foodstuffs. If you decide you have too many freighters, you can click on the Freighters indicator to scrap some or all of them. You get a few BCs out of it.
Command Rating
Contrary to what you might think, taxes have no effect on Morale.
Freighters Not every habitable planet is capable of producing food. That doesn’t mean you won’t put a colony there, of course, just that you must find an alternate way of feeding the population. There are buildings that add food production capabilities to even the most hostile worlds, but a well managed empire has ways of sharing the bounty of the more fertile planets. Freighter Fleets are the most efficient method. Every time you build one of these, you get 5 support ships, each of which is capable of transporting enough food each turn to feed an entire unit of population. This transfer, like the freighters themselves, is practically invisible. (Freighters never engage in combat or show up on scanners.) It’s entirely automatic. As long as you have freighters available, these ships are assigned to transport whatever food is needed from colonies with a surplus to those with a deficit. The key is to have enough freighters. Both the Freighters indicator (on the Galaxy Map) and the Empire Summary (on the Colonial Overview) show how many freighters you have and how many of those are still available. One thing that helps is that freighters do not use Command Rating points or BCs for maintenance—they’re worry free in that respect.
To see the breakdown on your Command Rating, click on the Command box on the Galaxy Map. Your rating is a number of points. Every orbital base (Star Base, Battle Station, and Star Fortress) you control adds to it. Those leaders you hire as ship officers also add to the rating. Every ship you build (except Freighter Fleets) uses points from this rating as a maintenance cost. The number of points a ship requires is the same as that ship’s size class (Small = 1, Medium = 2 , and so on). Support ships count as small ships for the purposes of maintenance. If you have enough Command Rating points to maintain your fleets, then everything runs smoothly. If you do not, everything still runs smoothly, but it costs you. For each rating point required by a ship that is not covered, 10 BCs come out of your income every turn. This makes building and managing efficient fleets nearly as vital as keeping your colonies on track.
Morale
Enormous fleets can be devastating in their power, but they’re also an immense drain on the resources of all but the largest interstellar empires. Maintenance on the ships themselves, salaries for their crews, and the support infrastructure necessary to keep a fleet operational are all vital. An emperor, of course, should not be required to deal with the day to day, minute details of running the military arm of the empire. Rather, all of these minutiae are summarised for you in one overarching statstic: the Command Rating.
Though morale is in some senses a colony by colony issue, its effects are felt throughout your empire. The colonists in every colony share an overall mood, which is expressed for your imperial review on the Colony screen for each colony. The morale of the colony as a whole is represented by a number of smiling or frowning face icons. No colony will have both at once, so you can quickly judge the status of that planet’s morale.
Why should you, as emperor, care whether your subjects approve of your method of rule? You hold the power of both the military and economic underpinnings of their livelihood, and any uprising would certainly bring instant starvation and doom. Thus, no colony (except captured ones) ever revolts. Yet there are less blatant ways for them to express their dissatisfaction—and their happiness. Every morale icon on the Colony screen represents a change of 10% in the total production output of the colony. Populations with high morale work harder, adding to the food, industry, science, and income of a world. Unhappy colonists get careless or slack off, and production drops drastically. There are ways to intentionally change colonial morale. You can’t do much about your form of government, but many buildings and some leaders raise morale for a single colony or a whole system. All the details are covered in the relevant sections.
Audiences The status of relations between two empires (and sometimes their racial characteristics) determines what diplomatic options are available at any given time. When you are granted an audience with the ruler of another empire, you might see any or all of these: Propose Treaty: Select this to offer your hand, claw, or whatever in one of several forms of friendship. The possible treaty types are covered below.
DIPLOMACY
Even if you’re the type of emperor who shoots first and never talks, you’re still going to receive communications from the leaders of the galaxy’s other empires. Before you invade a particular race’s space, you might consider reviewing what you know about them. Most of the time, it’s prudent to avoid being at war with more than one other empire at a time (or two if you’re ambitious). If you’re not a slavering warlord, the art of diplomacy is even more important. All your diplomatic efforts are conducted via the Race Relations console, described way back in Management Buttons. Essentially, you can get a status report on any race you have come into contact with, and you can send an emissary to demand an audience with a particular leader. Diplomacy begins whenever your ships become capable of reaching one of a race’s colonies—or theirs can reach yours. When you first meet a new race, the flavour of the diplomatic contact depends entirely on their emperor’s personality. Most leaders act tough at first, even (or perhaps especially) when they perceive themselves to be negotiating from a position of weakness. How you react, what you do during your usual activities, and what you ask or offer during audiences determines the ongoing status of your relations. This status is measured on a sliding scale (the one next to the portrait of the other empire’s ambassador).
For the most part, the diplomatic effects of your actions are exactly what you’d expect. Attacking a colony has a negative effect, for example, and a gift of technology a positive one. There are, however, a few things you can do during an audience that warrant explanation.
Break Treaty: This terminates one of the treaties your currently hold with this emperor. Keep in mind that breaking a treaty is not the same as a declaration of war, though it often leads to one. Demand: If you want to make a demand or ask a favour of the other emperor, use this option. You can ask for one of these:
- Declare War On asks the other emperor to recognise a common enemy and aid you in a war against that race.
- Make Peace With asks that the other race end a war with some third
Note that both android populations and those under a Unification government do not experience high or low morale; in a sense, they are always merely content.
One thing to keep in mind is that other emperors are just as busy as you are. Repeated audiences encourage impatience, and even the most friendly ally eventually refuses to meet with you. If this happens, wait a few turns. Time restores your opponent’s willingness to communicate.
party for the sake of your friendship.
- Break Alliance With asks that the empire terminate an alliance with a specified third party. This allows you to go to war with one of the allies without drawing in the other.
- 5% Annual Tribute demands payment of a significant part of the empire’s income per turn to forestall your aggression.
- 10% Annual Tribute demands an unreasonable portion of the empire’s income. Unless you’ve got some incredible leverage, don’t get your hopes up on this one.
- Stop Spying demands that this opponent recall all of the spies sent into your empire. You can verify compliance by checking a report on that emperor.
- Tech demands a technology as the cost of sufferance.
- Surrender (System) demands an entire star system as payment for continuing peace (or at least a pause in the carnage). You choose the system you want, then the other emperor decides whether to accede to your demand.
- Remove Fleet From My System demands that an encroaching fleet leave your space at once. It doesn’t matter whether the fleet in question is blockading the system.
- Cancel asks for nothing and takes you back to the previous list. Offer Gift: Choose this if you want to try buttering up the other emperor. You can give away money, technology, or even one of your systems. If your goal is to demonstrate lasting subservience, you can also sign up to pay 5 or 10% of your income every turn.
Declare War: This option is self-explanatory. Once you enter a state of war with another empire, all treaties between you are cancelled. Fleets, outposts, and colonies are fair game for attack. Any fleet of one warring empire that sits unchallenged in a system colonised by the other combatant blockades that system. A blockaded system neither sends nor receives goods via Freighter, and all production in the system is halved. A war ends when a peace treaty is signed or when one side is defeated utterly or surrenders. Surrender: At the end of your current turn, you surrender everything you have to this opponent: colonies, ships, money, and all. Your reign (and your participation in the game) ends then and there. Since this is such a momentous decision, you must confirm it. Good Bye: This brings the audience to an end. Generally, emperors are busy and impatient beings. Even the most charitably disposed negotiator tires after three or four of the items on your agenda have been addressed. It might require several audiences to complete what you want to get done, but each one tends to be shorter and shorter. The more time you allow to pass between audiences, the more likely it becomes that an ambassador is available to meet with you.
You can propose a treaty to any opponent, no matter what the status of relations between you. (This status might affect what kinds of treaty you can offer, though.) Of course, the other emperor is under no obligation to accept the treaty. Note that each type of treaty is independent of the other; none is a prerequisite or requirement for any other. In theory, you can go directly from a state of war into an alliance (and vice versa, naturally). Trade Treaty: This is an agreement to allow commerce to pass over the borders between the two empires. This results in a short-term loss of income points for both sides as trade routes are financed, but a longterm benefit. Normally, it takes about 5 turns to reach the break-even point of a trade treaty. After that, both empires profit every turn as long as the treaty holds. Research Treaty: Science knows no borders, except when they’re enforced. As soon as you allow them to, your researchers gladly share basic information, techniques, and data (though not full-fledged technologies) with those of another empire. This results in a shortterm loss of income as you pay for lines of communication to be established, but a long-term benefit. Generally, it takes approximately 5 turns to reach the break-even point of a research treaty. After that, the cost is eliminated and both empires get extra research points each turn as long as the treaty holds. Peace Treaty: A peace treaty is simply an agreement to end the current state of war between your two empires. One of the terms is that neither race will attack the other for a set number of turns. If either side violates this, the negative effect on further relations is severe. Note that a peace treaty negates those two empires’ ability to blockade each other’s colonies.
Exchange Tech: Use this to invite the emperor to a technology swap. This is always a one-for-one trade.
Treaties
Non-Aggression: The pact of non-aggression is more than a peace treaty, but less than an alliance. Both sides agree not to attack one another, and relations between the two empires slowly grow positive as long as the pact stands. Alliance: An alliance is the strongest treaty between two empires, and the one that causes the most diplomatic damage if it is broken violently. In essence, this is a non-aggression pact with a greater positive effect on relations between the two empires. The longer the alliance holds, the warmer the friendship grows. Empires that have alliances with one another can use each other’s colonies and outposts for refuelling, thus significantly increasing the range of their fleets.
Tech Exchanges When you offer to exchange technologies with another empire, or some opponent requests the same from you, it’s often a chance to make substantial progress with minimal cost. However, the consequences for handing over the wrong technology to an enemy can be devastating. In essence, a technology exchange is a one-for-one proposition. The race proposing the trade names an advance or offers a list of them from which to choose. The other emperor decides whether any of the techs involved are attractive, then offers another tech in exchange. (Note that there is no opportunity to retract an offer once it has been made.) If both parties agree, the trade takes place immediately. Otherwise, you’re both free to try again.
Outside of research, conquest, and espionage, this is the only way to gain technologies you choose not to research, not to mention those that don’t appear on your research selection list at all.
ESPIONAGE
In this ultra-civilized, highly advanced galaxy, espionage is universally recognised as the natural and vital part of the art of diplomacy that it has always been. That doesn’t mean, however, that your attempts at spying and sabotage are appreciated by your opponents. Every Spy you train and use can fulfil one of two functions. As an Agent, your spy goes off into the colonies of another race (of your choice, naturally). Undercover as one of them, the agent gathers information, tries to steal technologies you have yet to gain, or attempts to destroy some valuable piece of enemy property. As a Counter-agent, your operative roams inside your empire, ferreting out enemy agents and eliminating them. All your opponents have the same two types of spy. The invisible wars that go on between your agents and enemy counteragents and between your counter-agents and enemy agents are both deadly and silent. Every agent dutifully attempts to fulfil the assigned mission every turn. Most of the time, they simply fail. Sometimes, they are killed by counter-agents. In unusual instances, an agent might be killed and fulfil its mission. There is also a chance every turn that an agent will kill a counter-agent or succeed in doing the job. Whatever the case, the results appear quietly on your end of turn summary. The rate of attrition for spies is high, and you should replace the eliminated ones regularly if you expect to have any success in the espionage game. Any agent’s success is noticed by the target race, and this invariably has an adverse effect on relations between the two empires.
12. The End of the Game

- The last and possibly most complicated method is to win an election of
Your long struggle against the hostile forces of the rest of the galaxy can only end in triumph or ignominy. If your last colony is destroyed or conquered, your empire no longer exists. In this case, your personal fate as an ex-emperor is something better left unmentioned.
the Galactic Council. When nearly the entire galaxy has been settled, the threat of war over competition for the habitable planets becomes too great. The extant races gather and form the Galactic Council to prevent future war. The Council’s only order of business is to select a leader to rule the entire galaxy. Based on the size of each empire, the leader of every race is assigned a number of votes. Two contenders are chosen—those whose empires wield the most votes. How each race votes is determined on the basis of current diplomatic relations. If one of the nominees receives a full two-thirds majority of the votes, that leader becomes ruler of the galaxy and the game is over. Clearly, your intention is to prevent others from being elected until you can yourself be elected to hold sway over all of known space. Of course, there’s no way the council can force you to accept a decision you don’t agree with.
On the other hand, you might win.
WINNING
The only way to win at Master of Orion II is to become supreme ruler of the entire galaxy. Of course, there’s more than one way to do that. In fact, there are three:
- Obviously, if yours is the only surviving race, as its emperor you rule the galaxy. Thus, you could win by conquering or destroying every colony of every other race—perhaps accepting an abject surrender or two.
SCORE
This involves travelling to the Antaran home world, which is not possible until you have the right technology and build a Dimensional Gate. Once you defeat the awe-inspiring Antarans, all the other races in the galaxy recognise your overwhelming superiority and quickly capitulate. (This strategy is not available if you disabled Antaran Attacks when setting up your game.)
VOTING ANNUNCIATOR
- An alternate method is to seek out and defeat the Antaran home fleet.
NOMINEES
FOR SOME, MAKING THIS LIST MEANS MORE THAN WINNING
For some players, winning is not everything—there’s also the matter of the score. Without further ado, here are the guidelines by which Master of Orion II calculates your final score.
THE GALAXY IMPROVEMENT ASSOCIATION

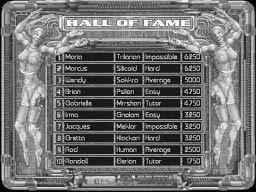
- The quicker you win, the higher your score; each turn the game takes subtracts from your total score.
- Playing in a larger galaxy results in a score increase.
- As the number of races involved in the struggle for galactic domination (not including the Antarans) goes up, so does your overall score.
- Every research success adds to your point total. Hyper-Advanced technologies are worth more points than normal ones.
- The total number of population units in all your colonies combined, including androids and captured colonists, is added to your score.
- You also get a premium for captured population units. This premium is higher in smaller galaxies, since there are fewer opportunities to capture colonies when there are fewer stars.
- Eliminating a race altogether results in a boost in your total. (If an empire is eliminated by a random event or by Antarans, the last player race to have attacked that empire gets this bonus.)
- The race that defeats the Guardian and captures Orion gets a big chunk
of points.
- If you win via a vote of the Galactic Council, it makes a substantial addition to your total score (not to mention, you win the game).
- Whichever empire defeats the Antarans at Antares gets the biggest point bonus of all (and wins, of course). Your overall score is the sum of all these factors.
13. Multiplayer Galaxies
The moment you select Multiplayer Game from the Universal Menu, you begin the short journey into a galaxy so much more vicious and underhanded than the usual Master of Orion II scenario that you might wonder if it’s the same game. That’s what you get when you introduce other human intelligences into the galaxy, each as emperor of one of the opponent races.
STARTING OUT
Null Modem: A null modem connection is a direct cable hookup between two machines that takes the place of a modem connection. If you’re using that type of communications, use this option. Before you start a null modem game, you should make sure that the Comm Info parameters are correct for your hardware. Hot Seat: A “hot seat” game is a multiplayer game in which all players use the same computer, taking turns. If that’s the type of game you intend to play, select this option. The right column holds all the options that actually cause something to happen immediately. Start New Game: begins the process of creating a new multiplayer game. This option takes you directly to the multiplayer version of the Game Setup screen. The only difference between this and the usual setup is that you can give a name to a network multiplayer game (so that other players might identify it). The name area is at the bottom centre of the screen. Click on it to type in a name for your network game.
Join Game: searches the network for Master of Orion II games in the process of beginning. If there are any in need of players, they appear on a list. Simply click on any of the games on the list to join that game.
SO IT BEGINS
Right away, you see the Multiplayer Setup screen. This is where you decide how you’re going to connect with the other players and set any of the necessary communications parameters. The left column includes options for selecting what communication method you want to use.
Comm Info: takes you to either the Modem Connect or Null Modem Connect screen, depending on whether Modem or Null Modem is selected. (If neither is lit, this option is unavailable.) At both these screens, you can customise the communications parameters to match what your hardware demands. Before we go any further, let’s go over the parameters on the Modem Connect and Null Modem Connect screens. Some of them are a bit technical, and you need to understand them if you’re playing over either type of connection.
Load Game: allows you to continue a saved game from the turn you left off. Any human players who do not return to take up the reins of their empires are replaced temporarily with computer AI emperors.
Network: Use this to play over a local area network (LAN) connection that Master of Orion II supports. To play this way, you must be connected and logged onto the network before you start the game. Modem: This option sets your game to play over a modem connection. Before you start a modem game, you should make sure that the Comm Info parameters are correct for your hardware.
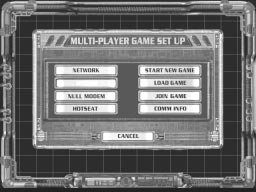
Once you start or join a multiplayer game, you need to wait until all of the required players show up and whoever started the game accepts them all. At that point, each of you goes through the race selection process. When everyone has finished that and the galaxy is built, the game begins in earnest.
THE SEQUENCE OF EVENTS
For the most part, a multiplayer game proceeds in the same way as any other. The few differences are important ones, however, and it helps to understand them.
Comm Port: is the communications port (usually abbreviated COM port) to which your modem or your end of the null modem cable is attached. If you don’t know what port it’s hooked to, check the modem setup for a communications program you know works—or look at the label on the port itself.
Once you signal that you’re done with your turn, the Turn Monitor screen appears. This display keeps track of which players have and have not completed their turns. (If you are the last one finished, you might only see the monitor briefly, if at all.) Until everyone is done, those of you who have finished can sit back and take a breather—or, if you prefer, take this opportunity to use the Chat window.
Baud Rate: is a measure of the amount of data per second transferred through the connection. Set this to the highest rate your modem will accept. For a null modem cable, set it at the highest setting. If you have communications problems when you play, lowering the baud rate will often help.
To chat with other human players, just type, then press E to send your message. Whatever you typed into this little text window appears in the Chat window of every human player who’s already done with the turn. There’s no private chat on this screen, with the exception that those who have not yet finished their turns cannot read messages.
Phone Number: is used only for a modem connection. This is the number to call to connect with the computer on which the other player is waiting.
As soon as everyone has clicked the Turn button, all of the decisions and activities take effect—all at exactly the same time. Now you can move on to the next turn, unless there’s combat to resolve. Part of what happens “between turns” is the movement of fleets. If any two fleets occupy the same system at the beginning of a new turn, or if a fleet of one empire is in a system colonised by another empire, the potential for combat exists. This must be dealt with before the more mundane aspects of the turn can begin.
Modem Strings: are commands the game must send to your modem in order to make it function. These three strings—Clear, Init, and Hang Up—are different for every brand and type of modem. Refer to the instruction manual that came with the modem to find out what these strings ought to be.
YIKES! TECH STUFF!
When a new turn begins, it’s almost as though you were playing alone. You make your decisions, give orders, and so on just as you would during any other game. Meanwhile, every other player is doing the same—all of you at the same time. The differences begins when you click the Turn button.
Tone Dial: tells the game what sort of dialling to use with your phone line. The only two options are Tone and Pulse. If you have touch-tone phone service, use the tone option. Otherwise, use pulse dialling.
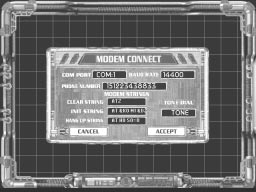
One at a time, each situation with the potential for battle is presented to the two emperors involved. (No combat in Master of Orion II can have more than two sides: offense and defense.) If the result of their decisions is combat, that combat takes place immediately and is resolved in the usual fashion. Any players not taking part must simply wait. When a fight is done, the game moves on to the next situation with combat potential. It is not until all of these empire-versus-empire interactions have been settled that players progress into the next turn.
REAL DIPLOMACY
The other major difference of concern for those of you involved in multiplayer games is the way diplomacy with non-computer emperors is handled. Unless you go out of your way to change things, human-tohuman negotiations take place in exactly the same way as do your talks with AI emperors. The usual diplomacy apparatus is in place.
Of course, non-computer players might not be satisfied with the limited negotiating options available through the diplomatic interface. If this is the case, you’ll have to find ways of communicating outside of the usual ambassadorial channels. One thing to keep in mind is that the betweenturns Chat window is a good place to handle free-form negotiations, though it’s not the place for private scheming.
Credits
- Design
- Steve Barcia
Ken Burd - Programming
- Ken Burd, Lead
Evan Axelrad
Eric Brown
Jim Cowlishaw
Russ Williams
William Ivey - Art
- Dave Lawell, Lead
Kevin Albers
Andrea Burden
Danny Garrett
Terry Greer
Shelly Hollen
Jim McIntyre
Patrick Owens
Judith Peterson - Libraries
- Steve Barcia
Rob Corell
Ronnie Gauny - Music
- Laura Barrett
- Sound
- John Henke
- Documentation
- John Possidente
Reiko Yamamoto
Jerome Paterno
Marisa Ong
Ted Paulsen - Quality Assurance
- Evan Birkby, Lead
Olivia Allende
Nieya Anjomi
Anthony P. Constantino XXVII
Paul Coppins
Chris Evans
Hans Hagberg
William Hom
Tim Jordan
Brian King
Vansouk Lianemany
Hoi Nguyen
Khoi Nguyen
Ron Pepper
Ken Schmidt
Larry Webber
Andy Mazurek
Mike Prendergast
Mike Richardson - Product Marketing
- April Souza (US)
Adrian Turner (UK) - Special Thanks
- Jenny Cowlishaw
Eric Hyman
Matt Kyle