
Remnants of the Precursors
Game Manual — written by Tom Chick
Credits
I would like to thank the following people for their invaluable assistance to the completion of this project:
- Artwork
- Petar Penev
- Graphic Design
- Kaitlin Lindsay
- Writing
- Jeff Colucci
- Game Manual
- Tom Chick
- Sound Design
- Remi Agullo
- AI Development
- Sergey Popov, Alexander Stummp and modnar_hajile (reddit)
- Translations
- Inda Ardani, Emre Ergin, Leonor Gomes, George Grants, Zed Lindberg, Stanislav Maslenikov, Sonke Meyer, Brano Mikulka, Daniel Minculescu, Yu Qin, Teodor Savov, Thales Seabra, Vangelis Skoupras, Michal Sweitlik, Mike Visnjic
Also thanks to coder111 (reddit) for his exemplary mod work.
A special thanks to Rob Honaker of the eXplorminate website for supporting and believing in the potential of this project since the summer of 2015 when it was just starting.
And finally, I want to thank the untold number of people who played the various alpha and beta releases over the years, providing the invaluable feedback that shaped and polished the project into its final state.
- Ray Fowler, developer
Introduction
"A beginning is a very delicate time." --opening line of the classic Nazlok sci-fi novel, Sandworld
1993 was a long time ago. The computers we used to run Master of Orion may as well have been galaxies far, far away. The only Civilization clone you could play was actually Civilization itself. Just Civilization I. There weren't even any sequels. If you wanted a 4X, you had to go into the sketchy back room of your local video rental store.
In 1993, Simtex's Master of Orion was basically created from whole cloth. You could see its inspirations, but it didn't have the luxury of just copying other games, because there weren't any other games like it. That would come later. But many of the games inspired by Master of Orion abandoned what made it unique to be more like Civilization. Master of Orion II, for instance.
Remnants of the Precursors is an attempt to recreate what's unique in Master of Orion, including its appeal and its idiosyncrasies. As such, some of it will be unfamiliar to modern strategy gamers. That's where this manual comes in. Master of Orion comes from a time when you needed a manual to really appreciate a game. So here now is your manual for Remnants of the Precursors.
Of course, you probably want to start playing immediately, so Remnants of the Precursors has helpful tooltips to teach you the basics. Just press the question mark in the upper left corner of the screen. It will always be there for you. For more pressing issues, flip to the FAQ in Chapter 9 for troubleshooting emergencies.
1. Overview
001100101000110001 --Meklonar aphorism
1.1. What's different from Master of Orion
If you've played Master of Orion, you're going to be comfortable just jumping into Remnants of the Precursors. However, depending on how much you've played Master of Orion, you might notice some differences. Remnants of the Precursors isn't just a straight-up remake. The intent is not only to make the design more accessible to new players (streamlined interface, more information available, more game set-up options), but also to close loopholes and work around exploits that might be familiar to returning players, and especially veteran players. Here are some of the broader gameplay differences.
- Completely overhauled interface. Remnants of the Precursors gives you more -- and easier! -- ways to interact with the game.
- Dramatically improved AI. It's not only more competitive, but it's more flexible to allow for different kinds of challenges. We've even got three different flavors!
- The Diplomacy system has been reworked to make it more interactive with the rest of the game, to give players more control over how it unfolds, and to give the AI players more personality.
- Combat has been tweaked to make battles less about exploiting the AI and more about realizing the potential of ships' designs.
- Larger maps with more opponents. Your games can be as ridiculously epic as you want, and you can even have multiple factions of the same race.
- In Master of Orion, research and colony development offered considerable advantages to players who took the time and effort to micromanage or exploit loopholes. Those advantages have been removed.
And here are some smaller differences:
- You know that cool history replay at the end of a game of Civilization, showing how every empire expanded across the map over time? We have that, but not just at the end of the game. Check out the history buttons on the Status tab of the Race screen.
- Space Monsters do new things and they're more powerful. In fact, they're so powerful that we added the option to toggle them off!
- Jot down a note for every planet or stick a colored flag on it. We can't pretend to know the different ways you'll want to sort planets, but however it is, we've tried to make it easier for you.
- You could always customize your ship names in Master of Orion. But in Remnants of the Precursors, you can also customize your ship graphics and colors. In fact, you can even rename and customize enemy ships to keep track of them better!
- We've come up with tons of options to let you tweak the gameplay, or even completely change fundamental rules. Remnants of the Precursors isn't just a modern version of Master of Orion; it's a sci-fi sandbox.
- You might have noticed that the races have different names than what you remember. We've renamed them to avoid legal entanglements, but we assure you they play just like you remember!
1.2. Getting the game running
Remnants of the Precursors is available in a Windows-specific zip file that includes the game as an executable. Unzip the file and run the game normally. You can associate the *.rotp file type to the executable so that double-clicking on a save game will automatically open up ROTP for that save.
Remnants of the Precursors is also available as an executable Java file designed to be playable on any Windows, Mac, or Linux PC. It is a Java application, so you must have the 64-bit version of Java 8 installed on your system. You can download Java for free at https://www.java.com/en/download.
To conveniently manage your game, create a folder for the Remnants.jar file. Simply double-click on the file to start it with Java. If you want to start the game from the command line, type:
java -jar Remnants.jar
All saved game files will be stored in that same directory and have the *.rotp suffix. There are two special files you may see in this directory. The remnants.cfg file keeps the configuration settings. It is a text file and safe to view, but manually changing the values might create unexpected behavior in the game. The recent.rotp file tracks your current game. Every time you hit Next Year, this file is updated immediately. It updates again after the game has finished processing the turn. If any bugs occur during the Next Year resolution, this file can be used for debugging.
1.3. Starting a new game
Select Your Race There are ten races available. For detailed information about each race, refer to Chapter 8: How Races Work.
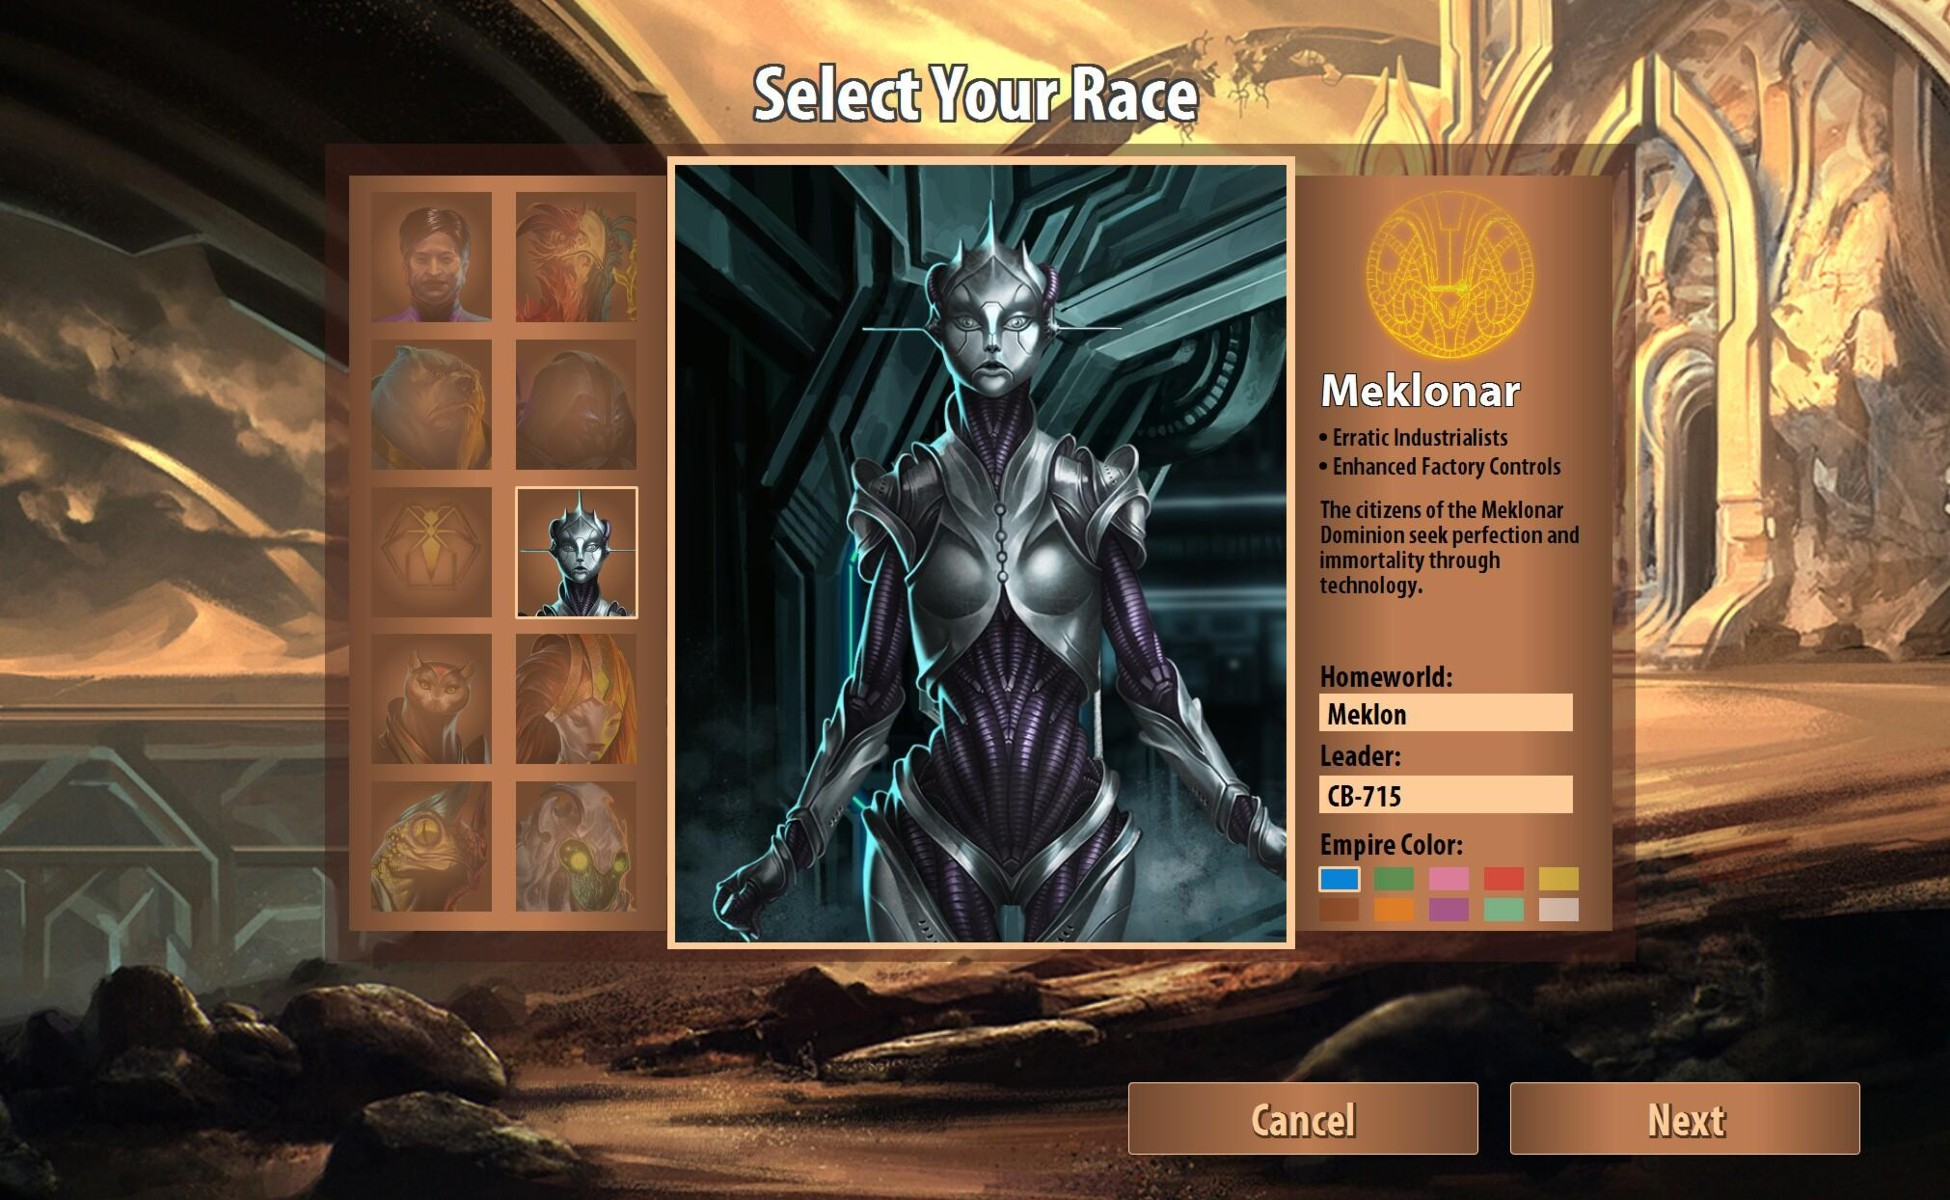
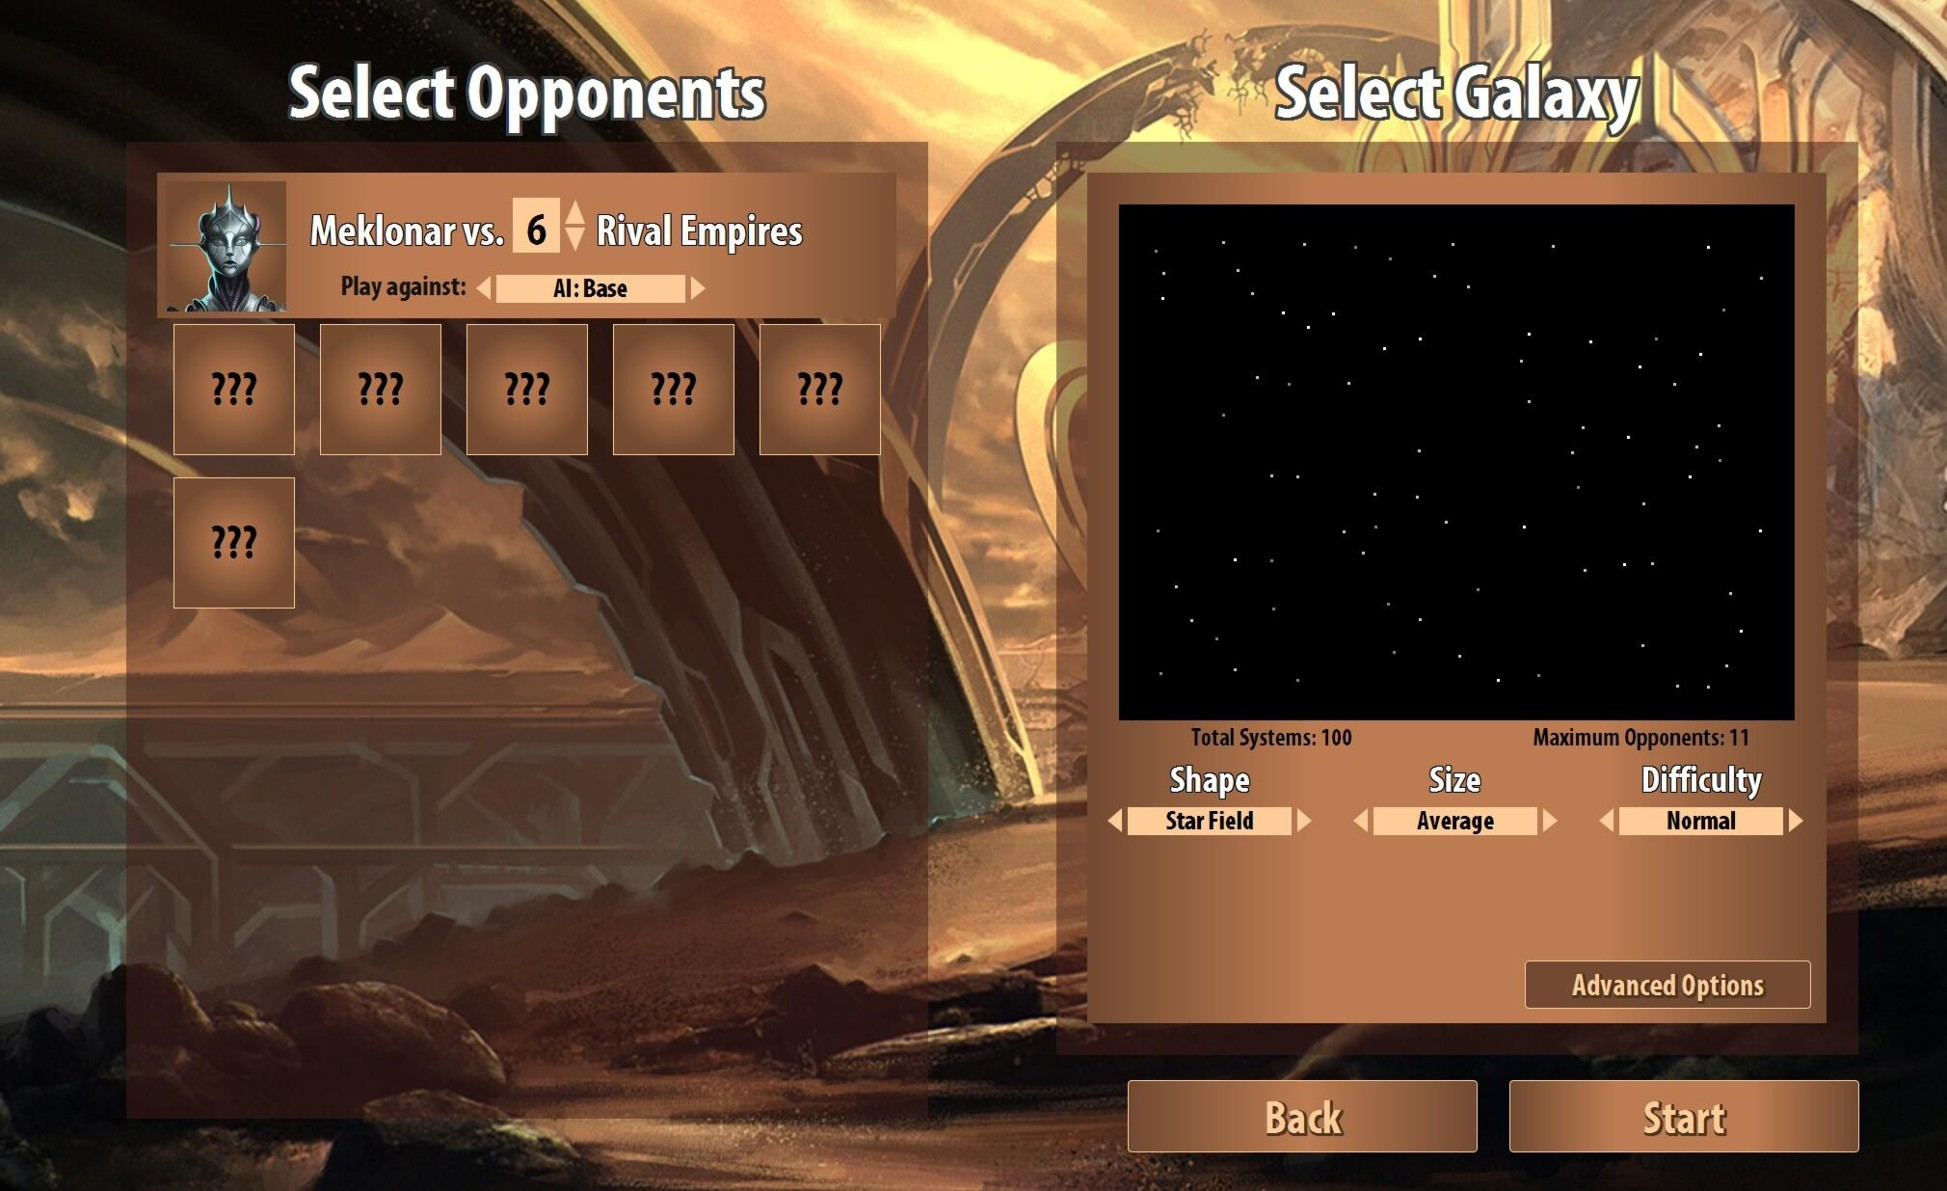
Select Opponents Select the number of opponents, which will be limited by your map size. Then select the setting for base AI (the default), the Modnar AI (a stronger AI that retains a sense of personality sometimes at the expense of efficiency), the Xilmi AI (a ruthless AI that prioritizes efficiency), or individual settings for each opponent.
Select Galaxy Select star field, ellipse, or spiral for the shape of the galaxy. Ellipse and spiral offer additional settings for shape. An elliptical galaxy can have variable flatness and a variable void size in the center. A spiral galaxy can have a variable number of arms. The size and shape of the arms will be determined by the spiral galaxy's rotation setting.
The galaxy size will determine the number of stars and therefore the maximum player count. Note that there are multiple star counts for some size settings. For instance, an average sized galaxy can have 100 or 150 stars. A large galaxy can have 225 or 333 stars. Each selection will change the number of opponents to its default setting, which can then be adjusted on the Select Opponents panel.
The difficulty setting will apply a boost or penalty to AI players' production. On normal or higher, Space Monsters will be introduced among the random events somewhere during the mid-game. But on the easy, easier, and easiest difficulty levels, Space Monsters will be delayed to give players more time to build up.
Advanced Options for your galaxy include a number of parameters to set up your own Remnants of the Precursors sandboxes. You can adjust the settings for Galaxy Age, Star Density, Nebulae, Planet Quality, Hostile Terraforming, Random Events, Hostility, Council Win, Randomize AI, Autoplay, Research Rate, Warp Speed, Fuel Range, Tech Trading, and Colonizing. The settings are mostly self-explanatory, but a few need some elaboration.
Galaxy Age: Refer to Appendix 10.1 for more information about the significance of star colors.
Star Density: The distance between stars is a major factor in how quickly factions can expand, so the density of stars on your map will basically determine how soon the factions start interacting with each other. For more on the interaction among distance, speed, and travel, see 4.1 Fleet Management.
Nebulae: Love 'em or hate 'em, the nebulae are a major factor in the shape of the galaxy. They slow ships to a speed of one parsec and they switch off all shields. Whether you're talking about a small ship or an entire colony, it's naked in a nebula. You can adjust here how much nebula you want gumming up your ships and shields, or you can even ensure a blissfully nebula-free galaxy. For more on ship travel, see 4.1 Fleet Management. For more on shields, see 7.1 Space Combat.
Planet Quality: Do you want your galaxy to lean more terran or more barren? For more on planet quality, see 2.5 Planet Types.
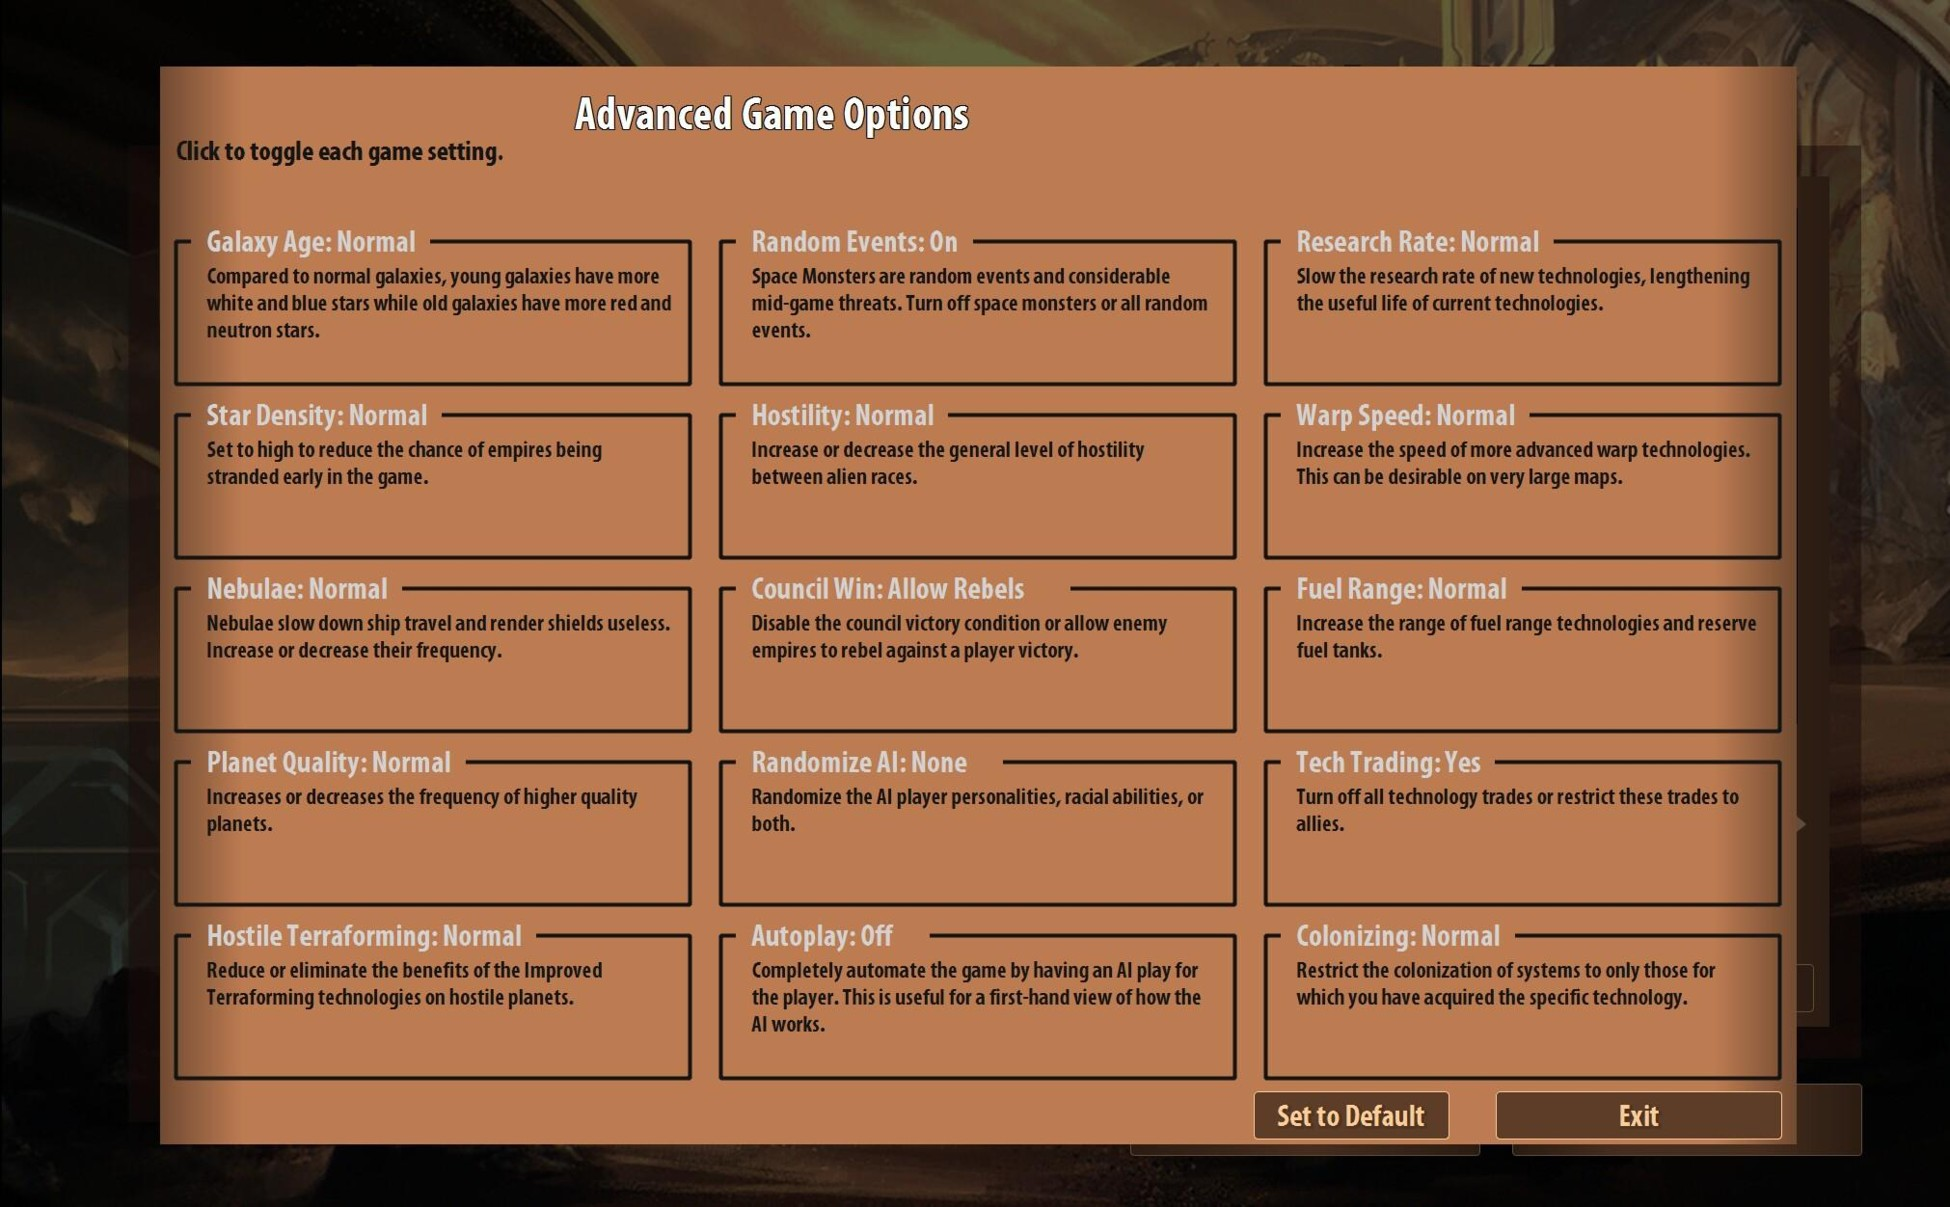
Hostile Terraforming: When this is set to Normal, once you've colonized a Hostile planet with the required colony base, the only difference from non-Hostile planets is a 50% penalty to population growth. This can be removed with Atmospheric Terraforming, at which points the Hostile trait is removed and the colony is like any other environment. But if you'd like your Hostile planets to have more bite, put this setting on Reduced. Now the Improved Terraforming technologies that increase the size of your planets will only have half effectiveness on Hostile planets. For instance, the first step of Improved Terraforming lets you add +10 to a planet's size to represent more hospitable conditions. But with this setting at Reduced, a Hostile planet will only get +5 size. And if you want really hostile Hostile planets, put this setting on None. Now you can't apply any terraforming size upgrades until you've applied Atmosphere Terraforming to remove the Hostile trait. For more about Hostile planets and terraforming, see 2.5 Planet Types.
Random Events: You can turn off random events, but you can also opt to only turn off the Space Monsters, leaving the rest of the random events in effect. The Space Monsters are supposed to be challenging, but they're equal opportunity rampagers, just as likely to eat your ships and colonies as the AI players' ships and colonies. However, if you'd rather not be distracted by our brand new rampaging cosmic horrors, we completely understand. After all, these are not your father's Space Monsters. You can read more about them in 10.14.
Hostility: If you're playing Remnants of the Precursors, you've clearly got time for fussing and fighting. Make more of it in the galaxy by boosting this setting. On the other hand, if you'd rather give peace a chance, dial down this setting.
Council Win: This determines whether factions can reject a council victory, or whether one is even possible. See Diplomatic Incidents in 5.2 for more on council victories.
Randomize AI: The default state (None) is for each faction to be weighted towards a specific personality (e.g. the Altairi tend to be diplomatic, the Cryslonoids tend to be xenophobic) with some hard and fast limits (e.g. the Fiershan will never be pacifist). Setting the Randomize AI to Personality removes all weighting and limits (e.g. you might get pacifist Fiershan!). Setting Randomize AI to Ability shuffles all the races special abilities. You might get Fiershan that can settle any environment like a Cryslonoid, and Cryslonoids that have the same spying advantages as a Nazlok, and Nazloks that get a bonus to ship attacks like a Fiershan. And if that wasn't crazy enough, setting Random AI to Both means utter chaos, Altairi and Fiershan living together, mass hysteria! See 8.1 for more on race abilities and 8.2 for more on AI personalities.
Autoplay: If you haven't got time for a game of Remnants of the Precursors, it can play itself without you! All you need to do is click Next Turn. This is a great way to watch the AI and maybe learn a few of its tricks.
Research Rate: If you like savoring your new technologies, if you want to delay being distracted by science's newest shinies, you can slow the rate of research. See Chapter 3 for more on how technology works. Warp Speed: Everybody will get where they're going quicker when you set this to Fast. See 4.2.1 for more on ship speeds.
Fuel Range: Everybody can travel farther when you set this to High, Higher, or Highest. See 4.1 for more on ships and distance.
Tech Trading: Keep in mind Remnants of the Precursors isn't like the usual 4X when it comes to technology. Research introduces new technologies to the galaxy, but once anyone has researched a technology, it's just as liable to propagate through diplomatic deals or spies as research. In other words, research is only one of three ways to reliably earn technologies. Tech trading and espionage are the other two. If you want to severely reduce tech trading, set this to Allies Only. If you want to eliminate this vector entirely, set this to No. For more on tech trading, see 5.3.
Colonizing: By default, any special colony base can colonize a planet of that hostility or lower on the "hierarchy of hostilities" from Barren to Irradiated. But if you set this to Restricted, a Hostile environment will need a colony base of that specific type. Now the Irradiated Colony Base you'll need to settle the most hostile of planets is no longer the be-all and end-all of colony bases. See 2.5 for more on colonizing Hostile planets.
1.4. The main display
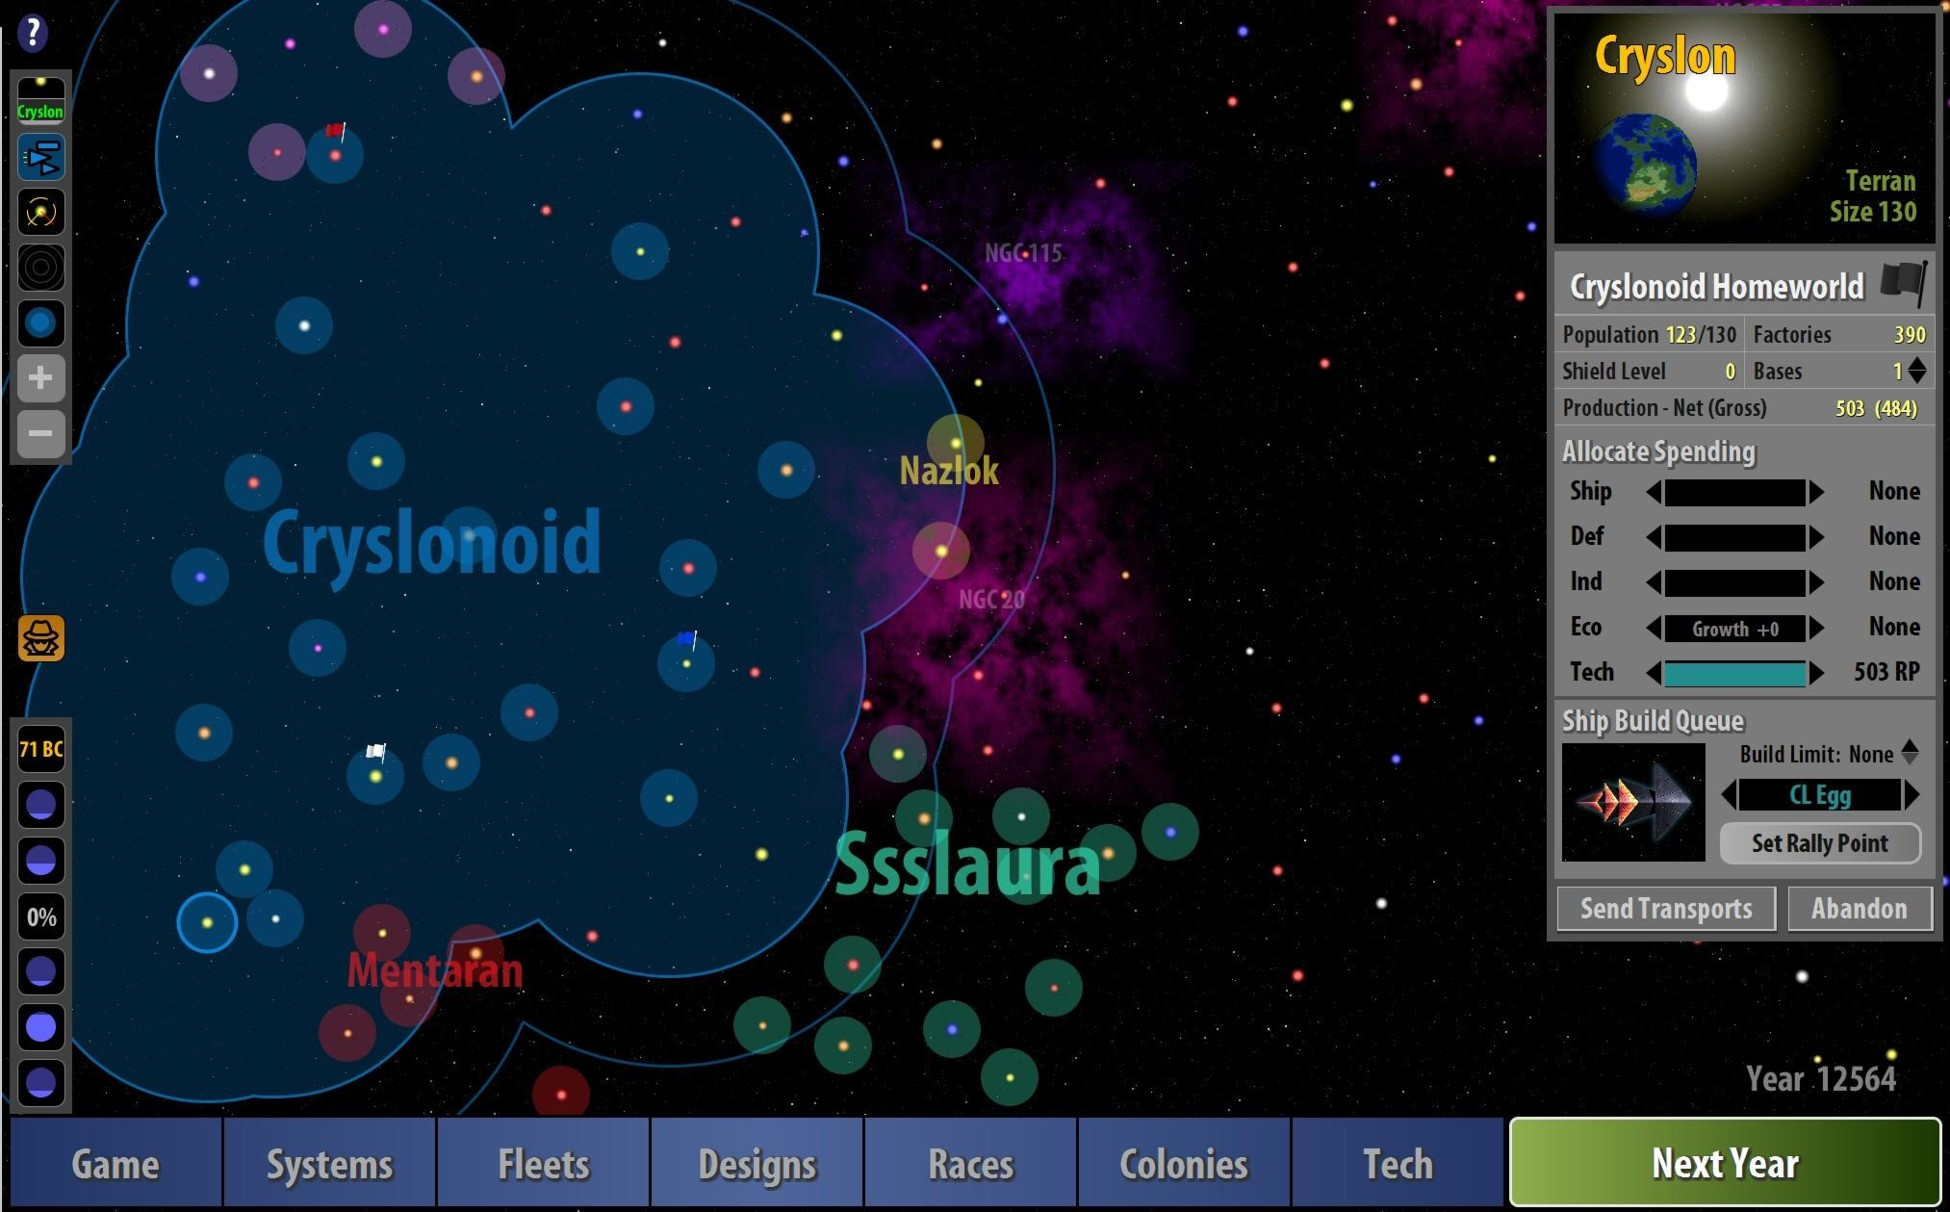
The question mark in the upper left corner will display basic information about whatever screen you're viewing.
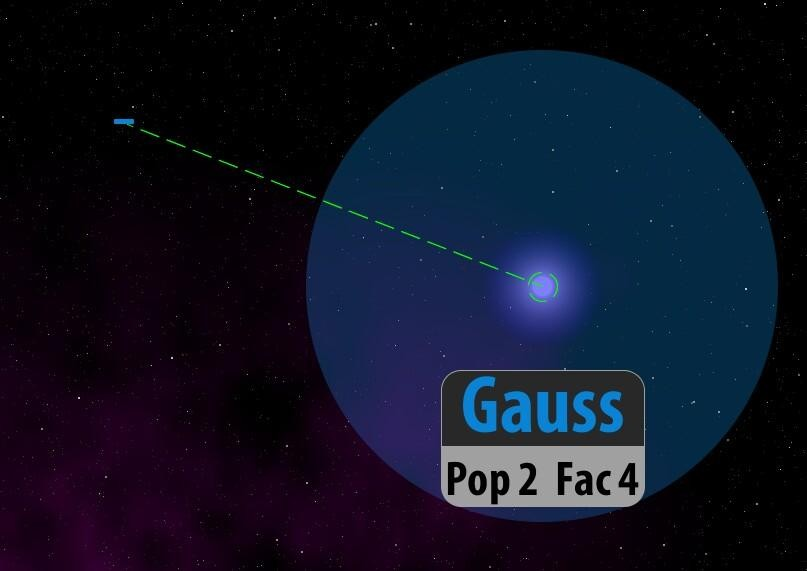
Star systems are indicated by the color of their star. A colored arc over a star indicates a shielded colony. At higher zoom levels, the map will display each faction's race and the names of nebulae (these begin as numbers, but once a colony is settled inside the nebula, the nebula takes its name). A system's name is color-coded by the controlling player. A system with a white name is uncolonized. In the default map view, a colony has a shaded radius of one light year in the color of its controlling player, which is also the clickable area to select that system. A slightly lighter shaded radius with a bold colored line along the edge indicates the range of your ships based on the highest level of fuel cells you've researched in Propulsion technology. The colored line outside the shaded radius indicates the range of ships equipped with Reserve Fuel Tanks.
Military fleets are represented by triangles with three little exhaust trails behind them. The size of the triangle varies based on the largest hull size in the fleet. Unarmed fleets, such as scouts and colony ships, are represented by smaller triangles without exhaust trails. Transport fleets are represented by rectangles. A friendly fleet's destination is indicated by a dotted line. An enemy fleet's destination, which will be visible once you've researched Improved Space Scanners, is indicated by a red or yellow line.
Flags can be set for any system. When you select a system, click the gray flag to cycle through various flag colors. You can also mouse over the flag and use the mouse wheel to cycle through the colors. Colored flags will appear on the map and your colonies list. Right-clicking reverts the flag to its non-visible gray color. Flags are for player reference and have no gameplay impact.
Nebulas are splotches of purple that reduce fleet speed to one parsec per turn. They also disable all shields on fleets and colonies within their boundaries.
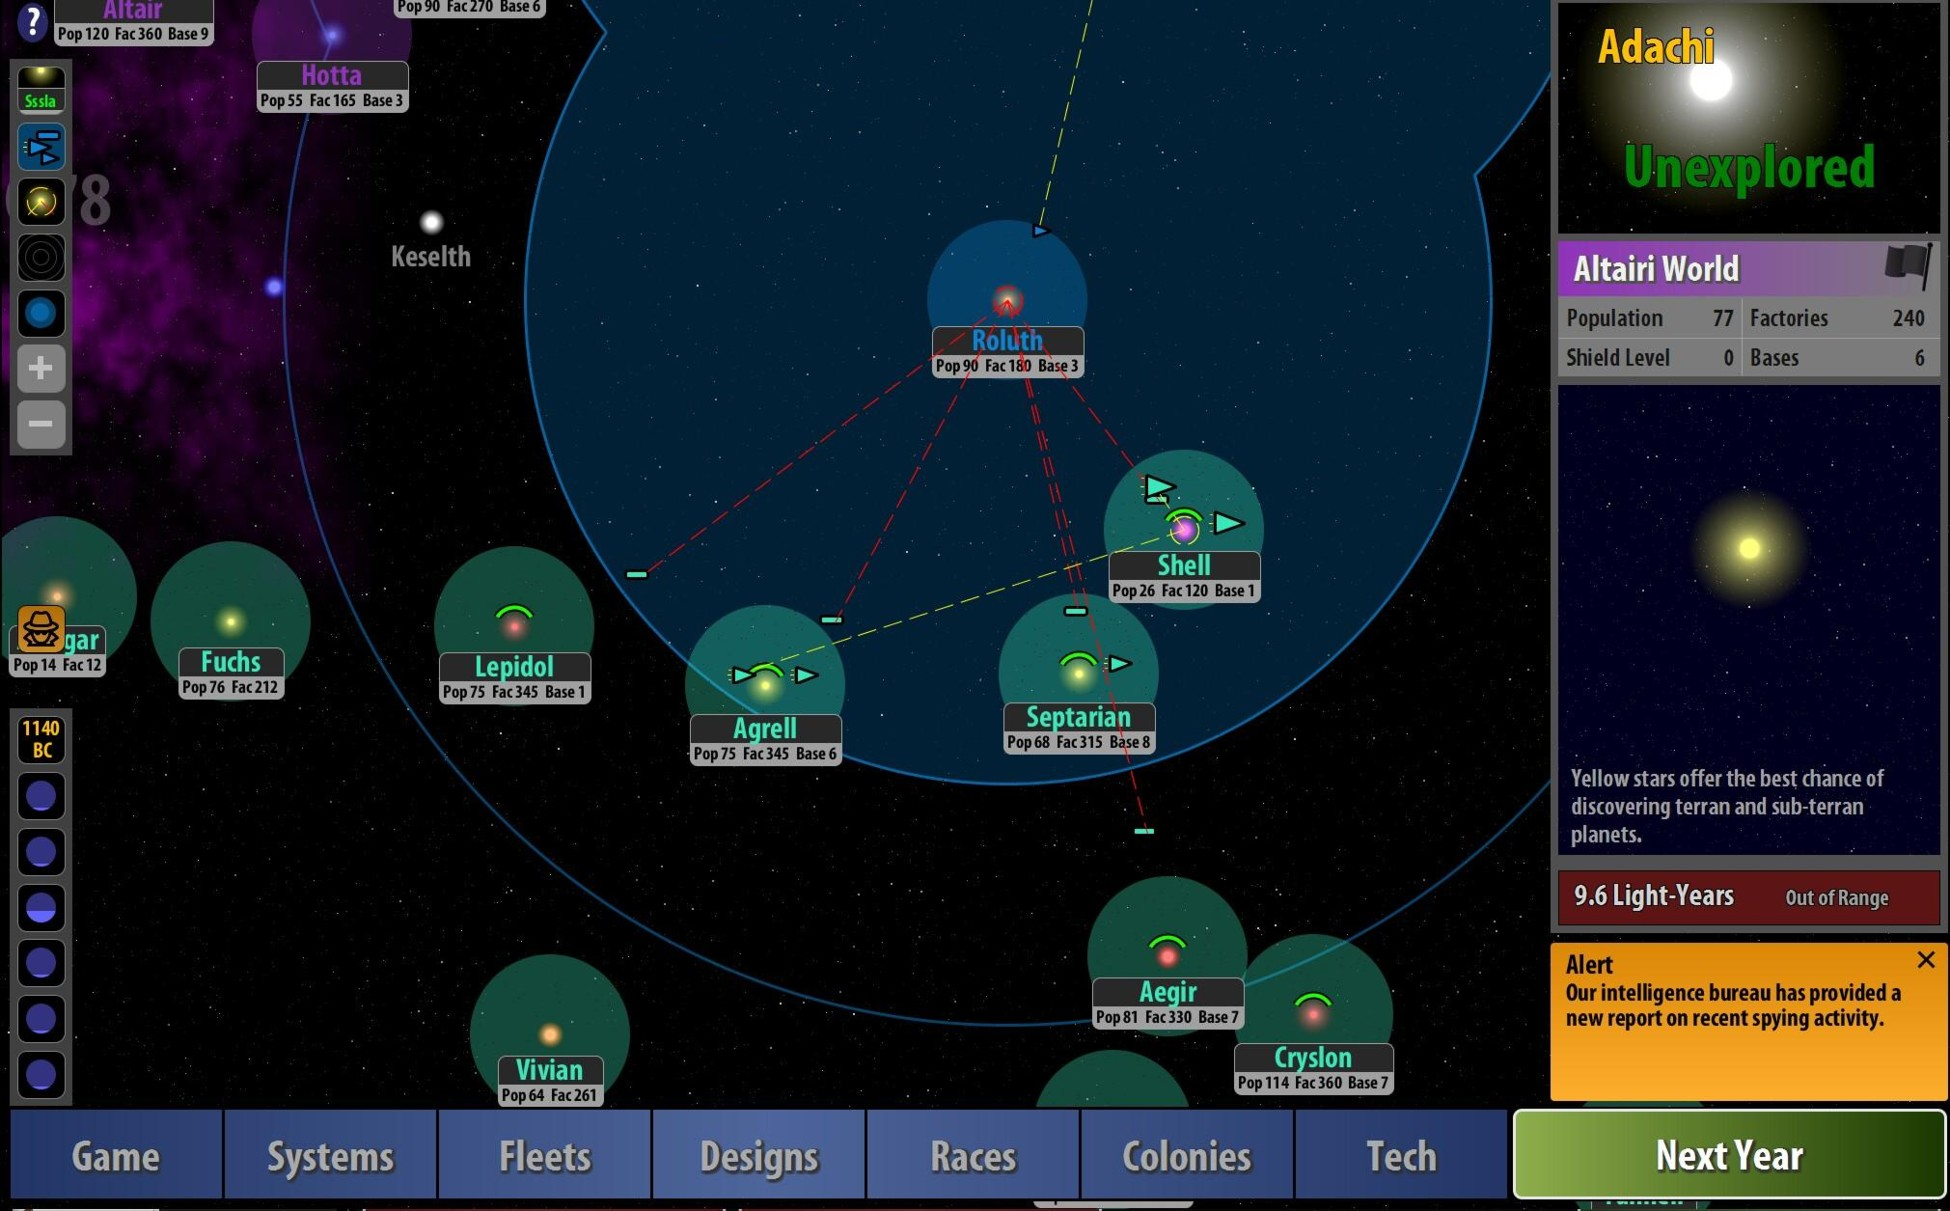
On the main map display, as well as in the systems and fleets screens, an overlay panel in the upper left corner adjusts how information is displayed. Click the buttons multiple times to cycle through different settings.
The first button cycles through no labels, system names, or system names with tags that indicate a colony's population, factories, and base count (the tags disappear at certain zoom levels).
The second button cycles through showing only combat fleets, showing combat fleets and unarmed fleets, or showing combat fleets, unarmed fleets, and transport fleets.
The third button cycles through three settings to display fleet destinations. The settings are no destinations displayed, all destinations displayed, and all destinations displayed except unarmed enemy fleets and enemy fleets not traveling to your colonies. Green lines indicate the route of your fleets. Yellow lines indicate the route of unarmed opponent fleets or opponent fleets not traveling to your systems. Red lines indicate armed fleets or transports approaching your systems. Dark purple lines indicate rally points where newly constructed ships from another colony will gather, and they're unaffected by the fleet destination button. Note that destination lines are only displayed at lower zoom levels. Also, selecting a system will show all ships in transit to that system regardless of the map filter setting.
The fourth button toggles a dynamic range indicator from the selected planet or fleet, indicated by a ring every parsec and a label with the specific range for every system. If you have a planet selected, slightly bolded rings show the range of your ships from that planet. The first ring is your default fuel cell range, and the second ring is fuel cell range for ships with Reserve Fuel Tanks.
The fifth button cycles toggles persistent range indicators for all your colonies, with your most advanced fuel cells' range as the smaller shaded radius, and the additional range for reserve fuel tanks as the larger unshaded radius. The fifth button also toggles the starfield background.
The plus and minus buttons adjust the map zoom.
A dynamic alert button appears below the map controls to track espionage activity.
The indicators on the bottom left display your Treasury Funds and technology progress. The six circles represent progress on the selected technology in each of the six categories. The circles gradually fill and then display a percentage chance for a breakthrough once you've paid the technology's base cost.
A panel on the right side of the screen displays information on the selected system or fleet. As you mouse over systems and fleets, the panel dynamically displays information on whatever is below your cursor. To set how quickly this information displays, change Hover Sensitivity in the settings screen. The current year is displayed below this panel. Click the display to toggle between the current year and the current turn number.
The tabs along the bottom of the screen will take you from the main display to various reports and management tools, explained in the next section.
1.5. Hotkeys
F1 help F2/F3 next/previous player colony F5/F6 next/previous player colony that has constructed a ship this turn F7/F8 next/previous player colony with incoming armed enemy fleets or transports F9/F10 next/previous player fleet F11/F12 next/previous AI fleet
D designs S systems C colonies R race reports T technology F fleets G game menu L rally point B add base construction N next year
1-5 allocate spending to ship, def, ind, eco, tech CTRL+1-5 lock slider +/- zoom map arrows move map mousewheel increment quantities/moves slider SHF-click increment in quantities of 5 CTRL-click increment in quantities of 20
1.6. All the other screens
Along the bottom of the main display are seven tabs.
1.6.1. The Game screen
The Game tab lets you start a new game, manage saved games, and change your settings. Note that if you want to check the settings for a game in progress, select New Game from this screen. The parameters for the new game will be identical to your current game. As long as you don't click the "start" button, you'll be able to back up to return to your current game. This way you can verify galaxy size and shape, difficulty settings, and any advanced options you might have changed.
1.6.2. The Systems screen
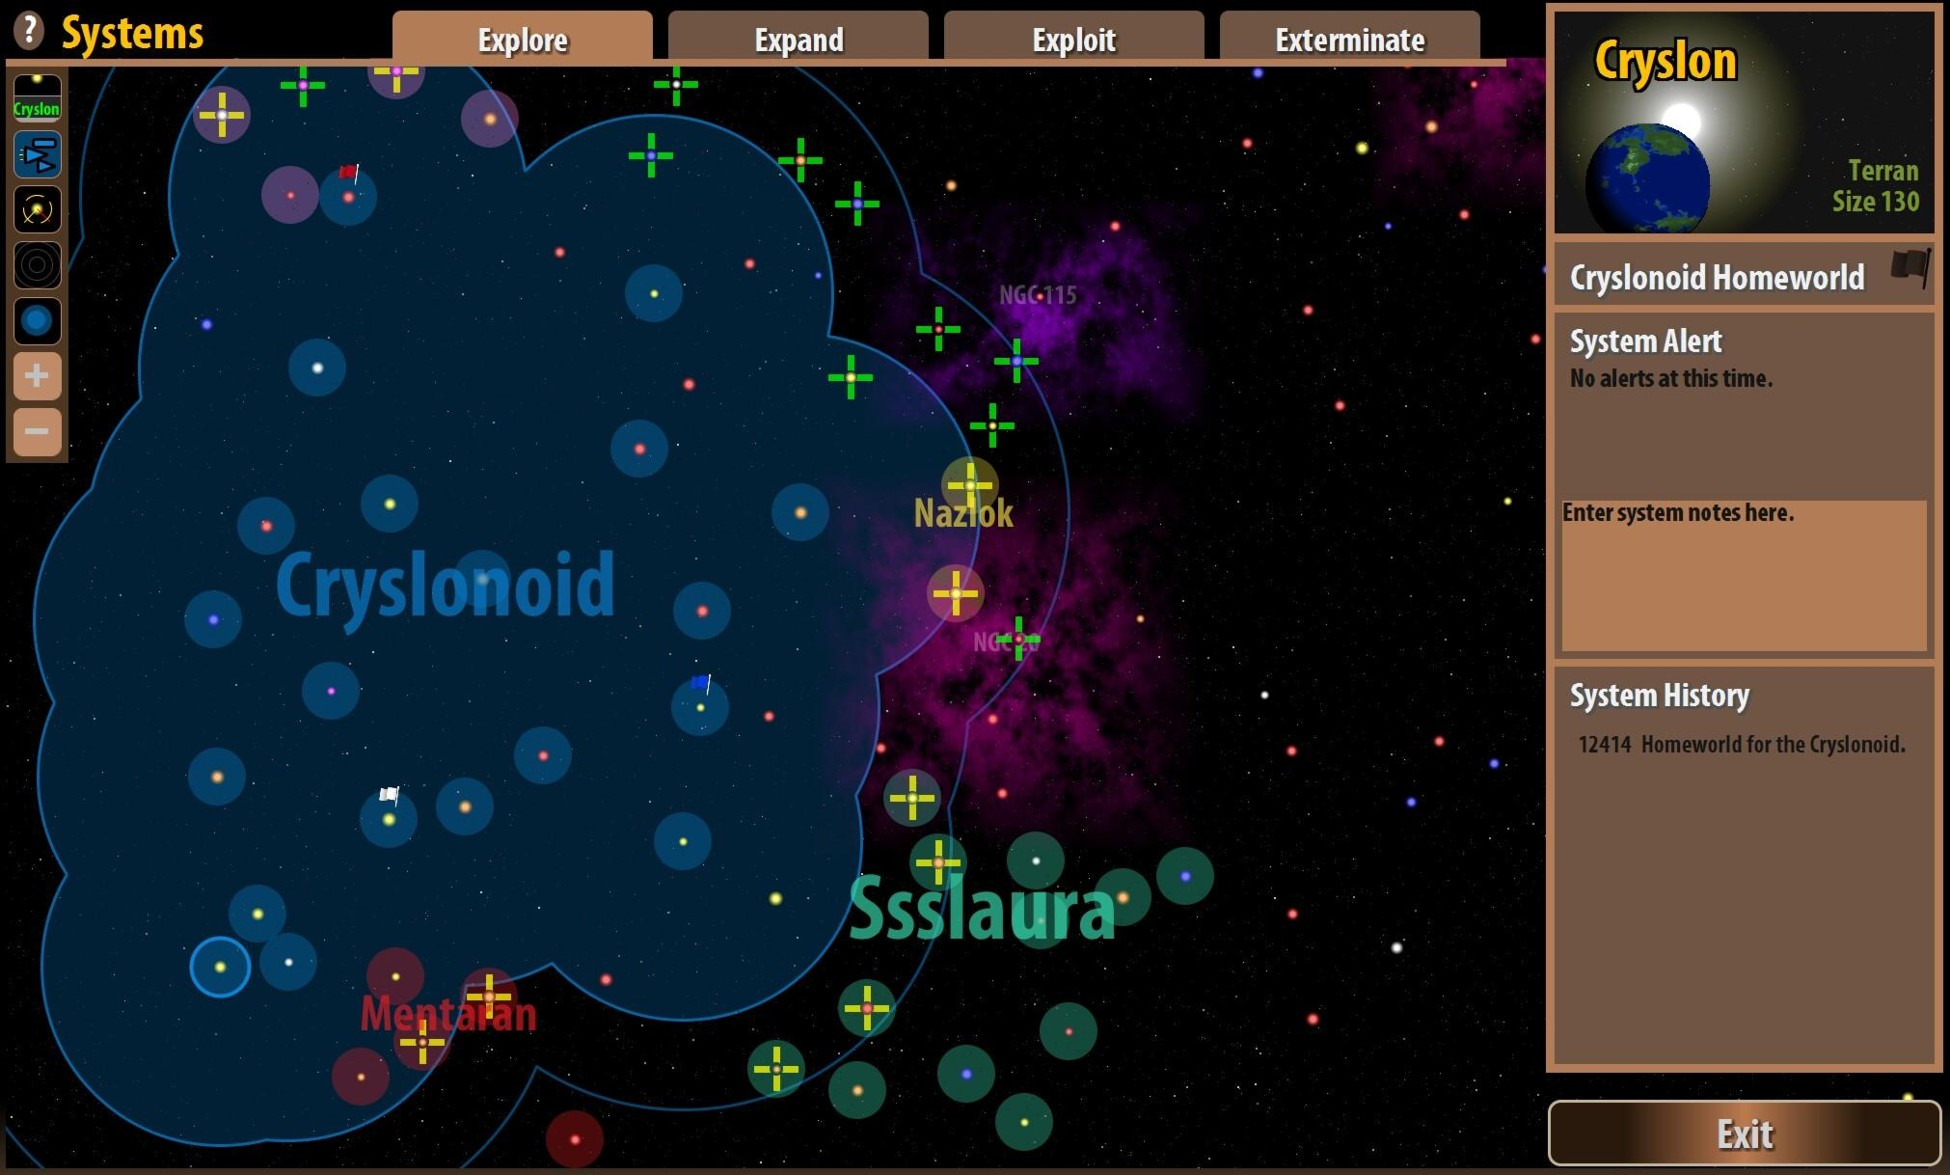
The Systems tab is a set of tools to help you track all the systems in the galaxy. The screens you'll find here have been specifically created to manage the larger games that were impossible in Master of Orion. Each of the four screens under the System tab relates to one of the four elements of a 4X game. Each is designed as a place to conveniently answer common questions. Are there unexplored systems in range of scouts? Check the Explore tab. Are there colonizable systems in range? Check the Expand tab. Are any colonies lagging in development? Check the Exploit tab. Are there any systems that are undefended or have enemy fleets in transit? Check the Exterminate tab.
The common elements among all four Systems screens are the main map, the detail panel for each system along with an alert box related to the current screen you're viewing, a section for notes (which will also appear in the Colonies screen), and a system history. Any systems flashing a colored cross indicate some sort of alert. The Systems/Explore screen shows you which systems you've scouted, which systems you can reach, and whether a system is occupied. The Systems/Expand screen shows you which systems can be colonized. The Systems/Exploit screen shows you how close your colonies are to being fully developed. And finally the Systems/Exterminate screen helps you track your colonies' defenses and the locations of your enemies.
1.6.3. The Fleets screen
The Fleets screen offers alternative methods for four things you can also do on the main map, but with tools that will be especially convenient for players managing dozens of colonies. From this screen, 1) you can set up and manage rally points where newly built ships will automatically gather, 2) you can adjust ship production spending for multiple colonies at once, 3) you can use transports to redistribute your population, and 4) you can deploy fleets.
The Fleets screen also changes the rules for selection to give you more flexibility. You can use the Select All and Deselect All buttons as handy shortcuts. In addition to clicking directly on stars, you can right-click and drag to select multiple systems within a box. Holding down shift while right-click drag selecting will deselect any selected systems.
To set up rally points, select the systems from which you would like to send newly produced ships. You can click directly on the star, or you can use the checklist to select all, deselect all, filter by the system type, or filter by the ship type being constructed. Each selected system will be indicated by a flashing circle. Note that the two selection modes are mutually exclusive. If you use the filters, you can't click directly to select a colony; and if you click directly on a colony, you can't use the filters. Once you've selected the departure colonies, click the Set Rally Points button. Select the destination colony, then click Start Rallies. All your newly established rallies will be indicated by purple lines. Note that you can also cancel rallies from this screen.
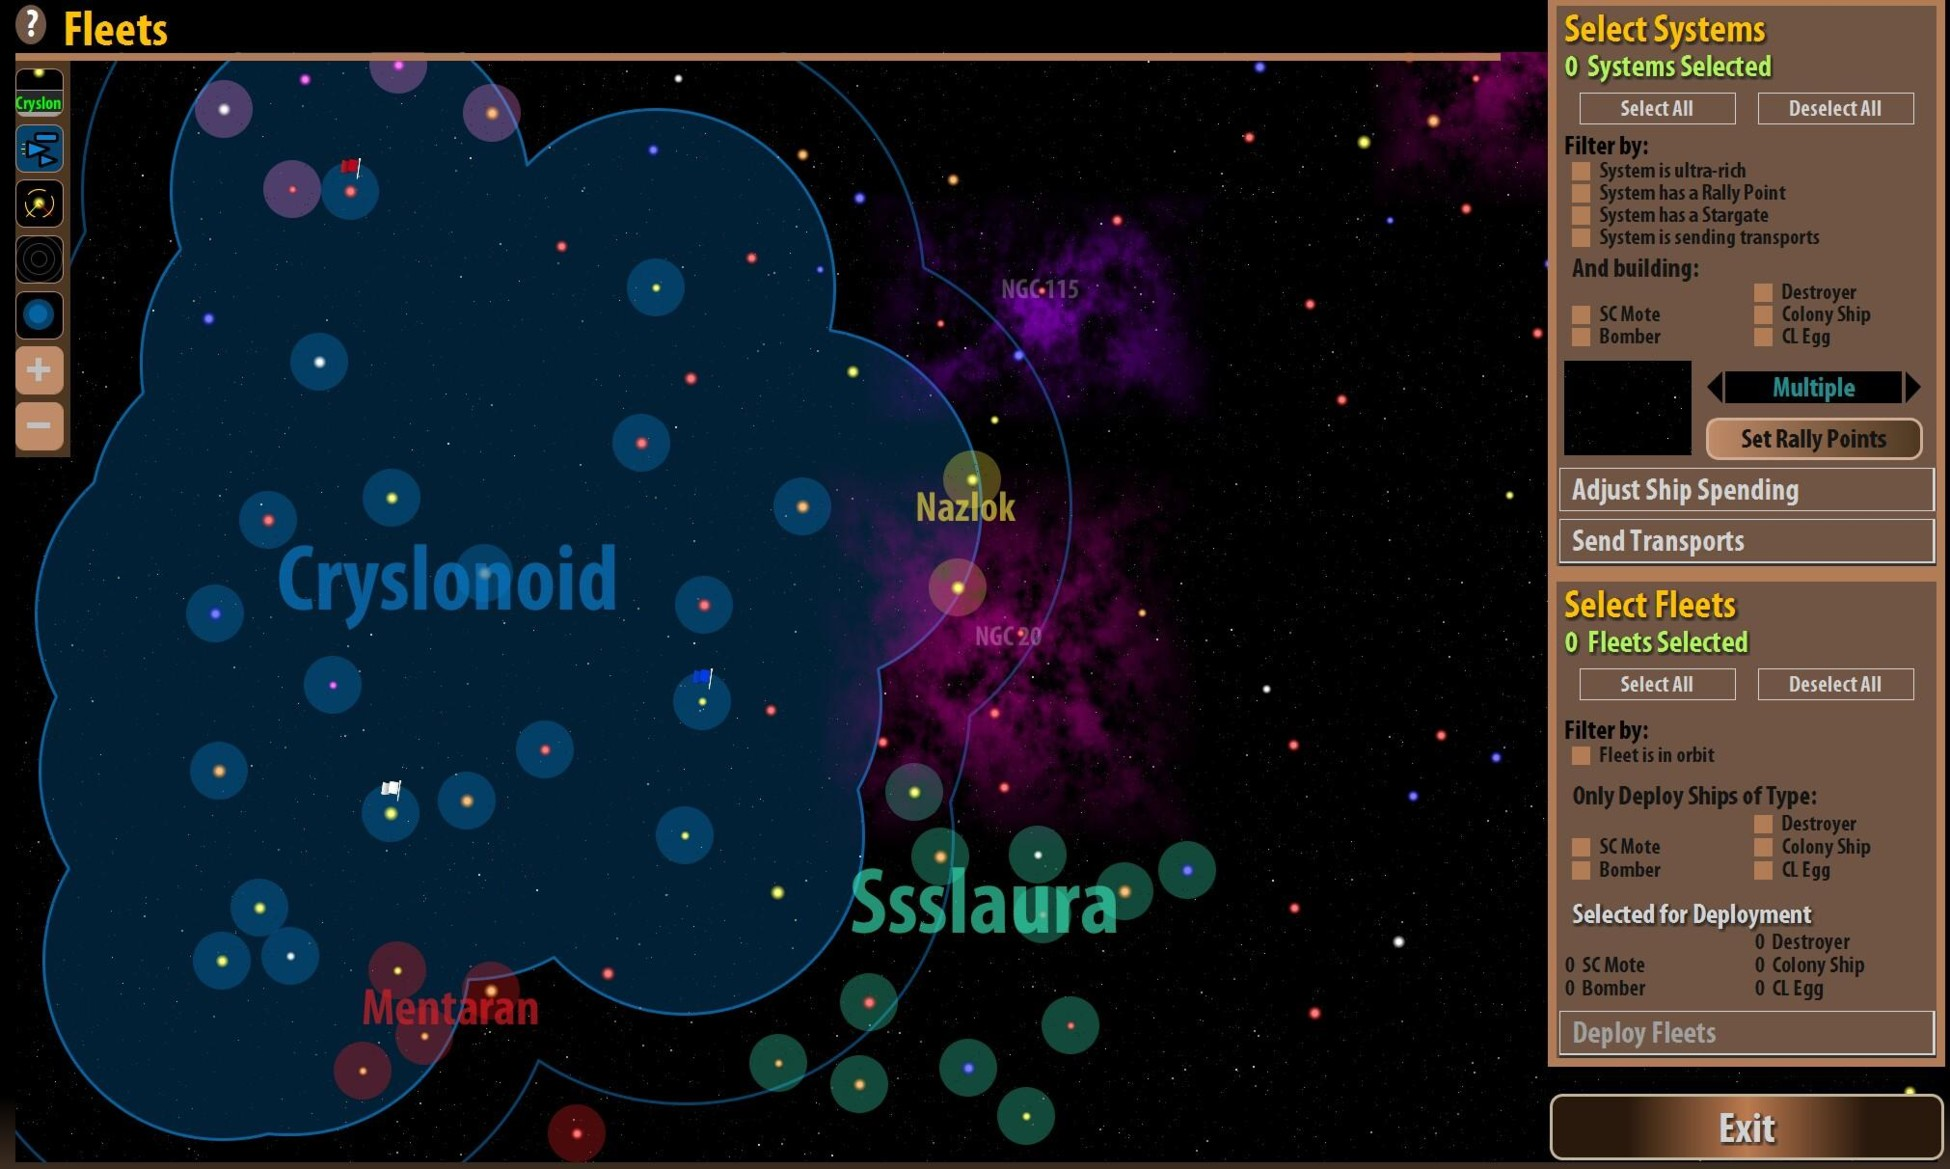
To adjust ship production spending for multiple colonies at once, select the relevant colonies by clicking directly on the map or by using the filters. Then click Adjust Ship Spending to bring up the options to set spending for ship production on the selected colonies. Note that you can also stop ship spending from this screen.
To redistribute your population among your colonies, select the planets that will be exporting population by using the filters. Then select a destination colony and click the Deploy Transports button. Now you'll see a list of all the exporting colonies, sorted by distance and therefore travel time. Use the slider bars for each colony to set the number of transports to be sent. If you'd like to automatically stagger their departure times to make sure they arrive at the same time (this will mostly be useful to invade enemy colonies), click the Sync button in the lower left corner. Note that the exporting planet will show the number of transported population as a negative modifier on its growth slider. Also note that each point of population costs 1bc paid by the colony from which it departs. Transports travel at one point slower than your fastest engines. They'll be equipped with your best armor, but they're still vulnerable to armed interceptors.
To deploy fleets, select the fleets you would like to deploy directly on the main map or using the Select Fleets filters. These allow you to filter ships by location and type. The total ships you have selected are tracked in the Selected for Deployment panel. Click the Deploy Fleets button to select their destination (if you've selected any ships that already have destinations, you'll have to override those ships' existing destinations by clicking the red Cancel Deployments button). Then click Deploy Fleets to confirm your orders.
1.6.4. The Designs screen
The Design screen is the beating, evolving, confounding heart of Remnants of the Precursors. This is where you will create -- and sometimes destroy! -- your implements of galactic conquest. Refer to 4.2 for more information.
1.6.5. The Races screens
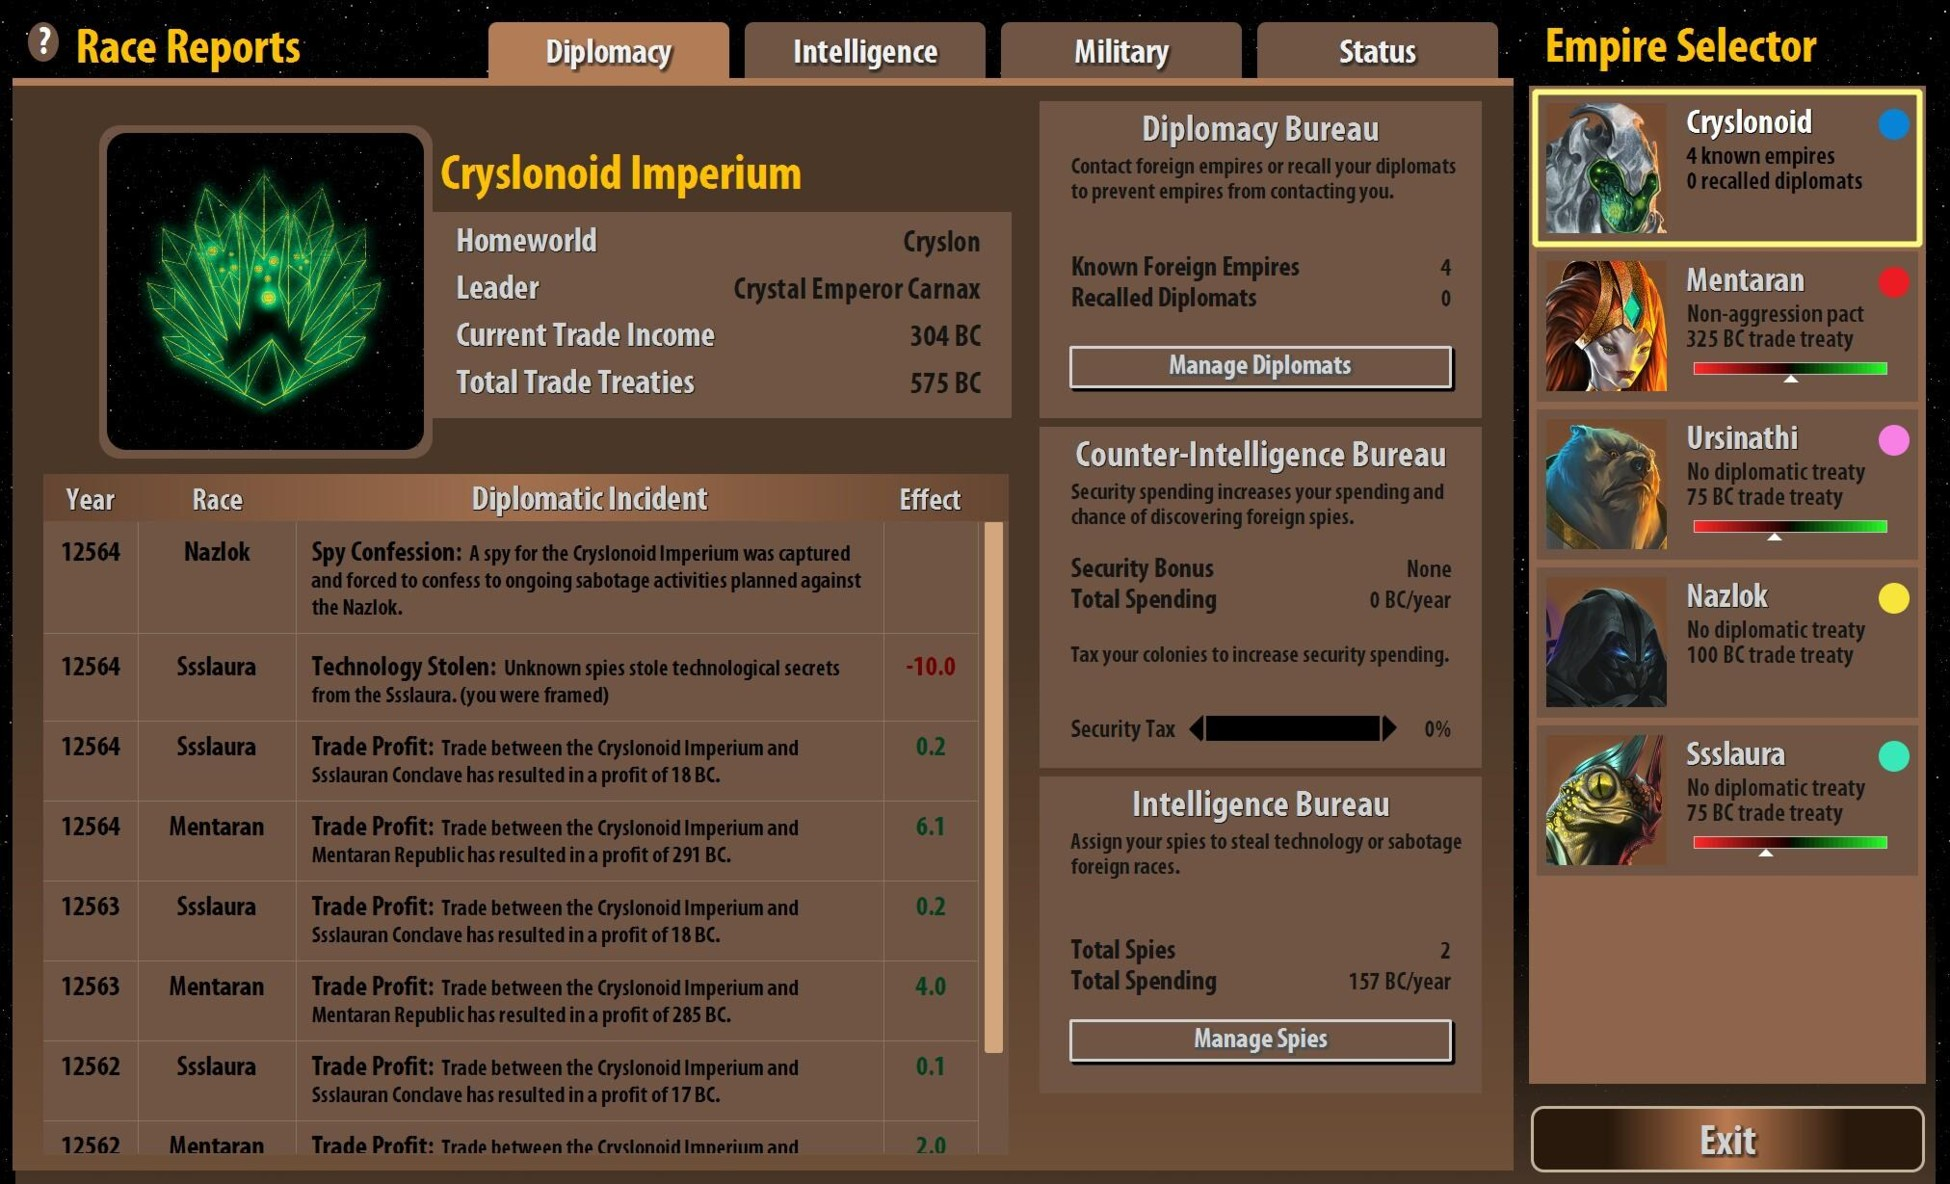
This is where you will manage your interaction with everyone else in the galaxy, through diplomacy, trade, or espionage. It's also where you'll track how well you're doing compared to everyone else. There are four tabs available on the Races screen: Diplomacy, Intelligence, Military, and Status. Each tab also features a list of all the factions on the right side of the screen showing each faction's leader, color, diplomatic status, trade status, and relationship meter.
1.6.5a. Races: Diplomacy
The Diplomacy tab shows information for the faction selected on the right side of the screen. The top selection will always be you, showing your homeworld, leader, and trade income on the left of the screen. Below that is a list of all your diplomatic incidents with an ongoing effect. The center of the screen shows your known opponents, counter-intelligence spending, and total spy expenditures. If you select an opponent from the list on the right side of the screen, you'll see that opponent's homeworld, leader, personality, and diplomatic status to the left. Below that is a list of the diplomatic incidents affecting your relationship, indicated by the bug on the Relations Meter. The center of the screen has a button to open diplomatic interaction, a summary of your trade treaty with the opponent, and the opponent's relationship status with everyone else in the galaxy. For more information about these screens, refer to Chapter 5: How Diplomacy Works.
1.6.5b. Races: Intelligence
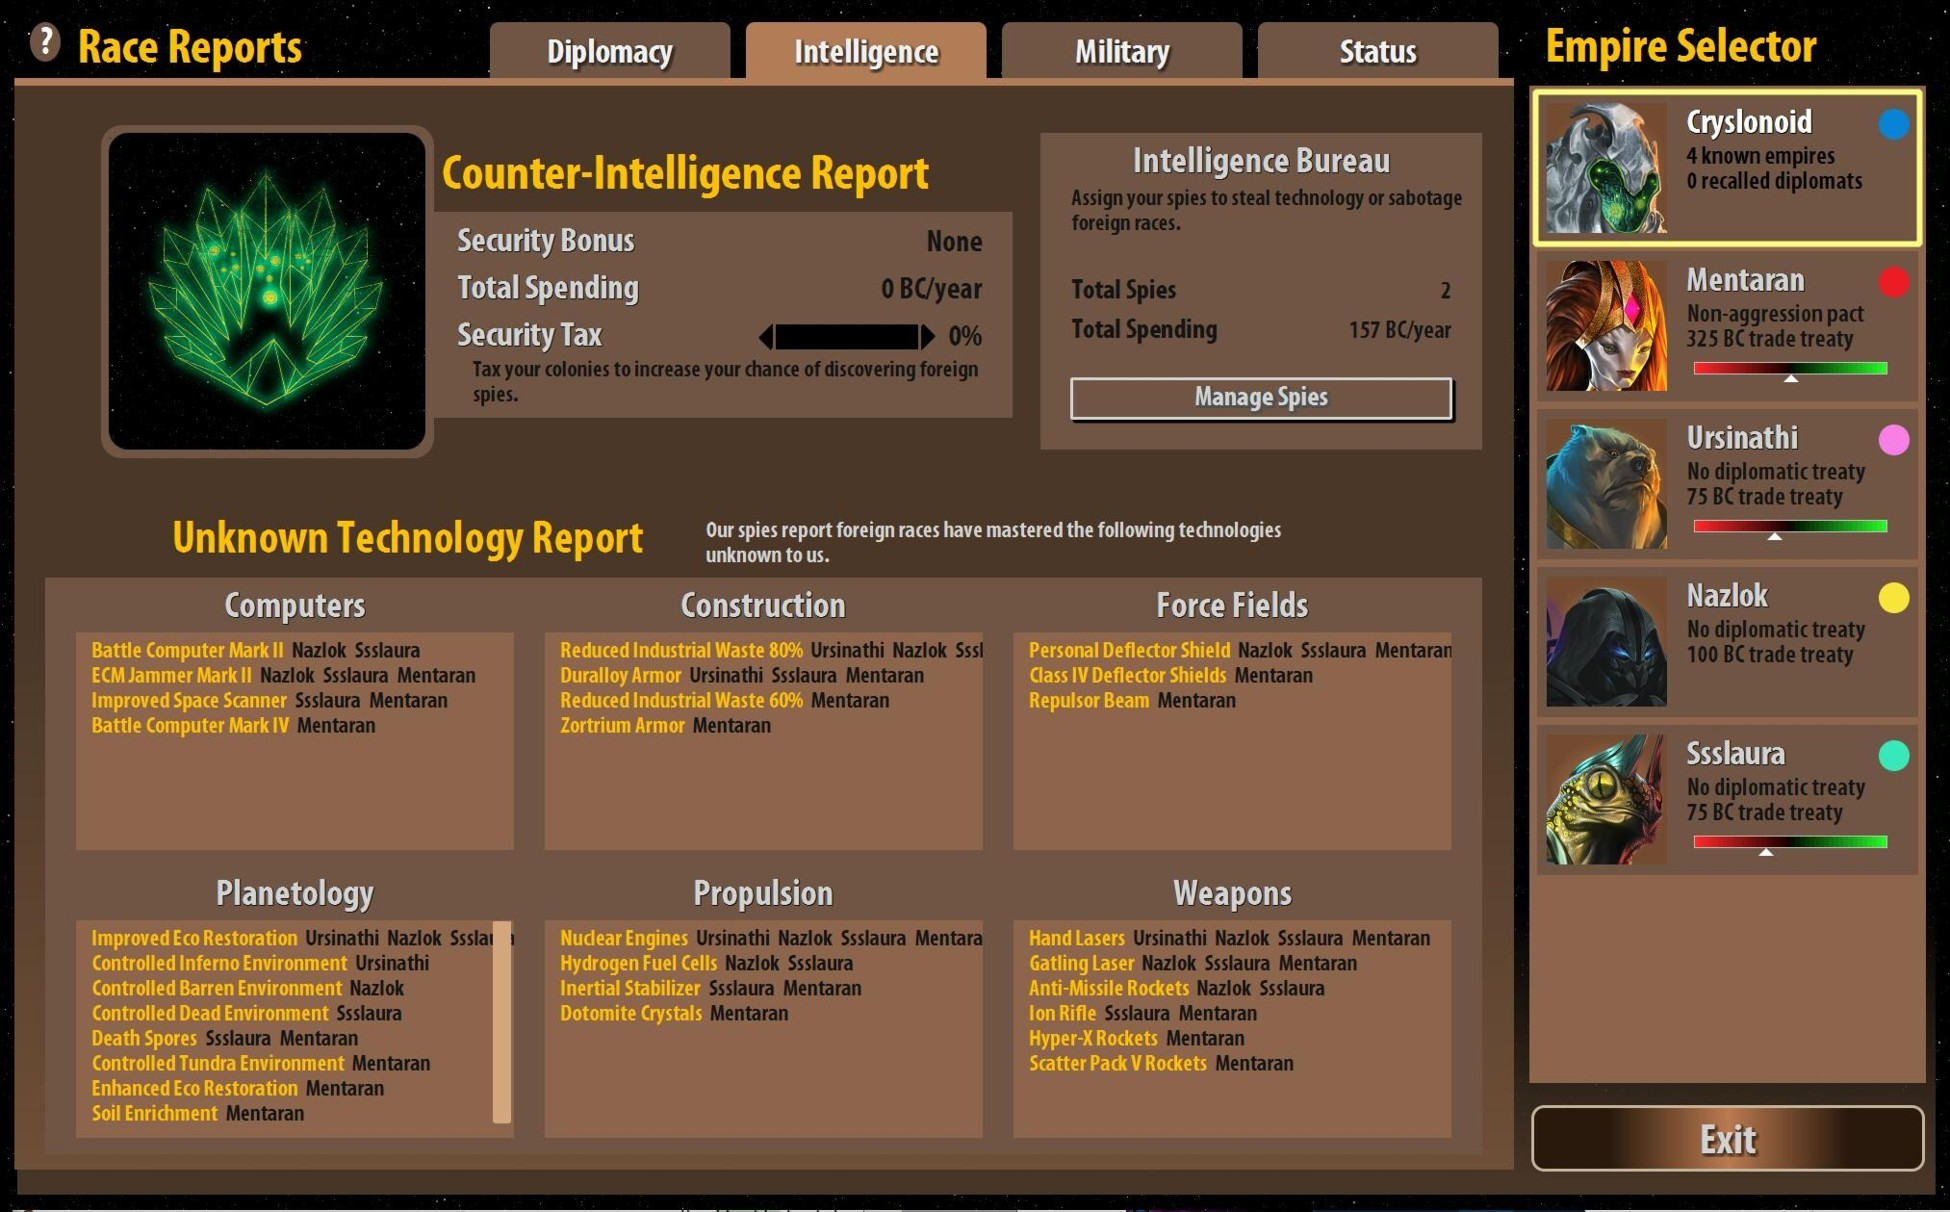
The Intelligence tab shows information about espionage for the faction selected on the right side of the screen. The top selection will always be you, showing your bonus to counter-intelligence, the total money deducted from your colonies' income for security, and the slider to set how much you're taking from each colony to fund counter-intelligence. The Manage Spies button brings up a list of all your spy networks, with options to change your spies' funding and orders. The bottom of the screen lists any unresearched technologies by which races have acquired them (as far as you know). If you select an opponent from the list on the right side of the screen, you'll see the status of your intelligence for that opponent (an intelligence report will be current as long as you have spies with that opponent), a setting for how many spies to send to that opponent, and a slider to set spending to train new spies as needed. To the right of this panel, you can give orders to your spy network. On the bottom of the screen is a list of that opponent's known technologies, with any unknown to you highlighted in bright yellow. For more information about these screens, refer to Chapter 6: How Spies Work.
1.6.5c. Races: Military
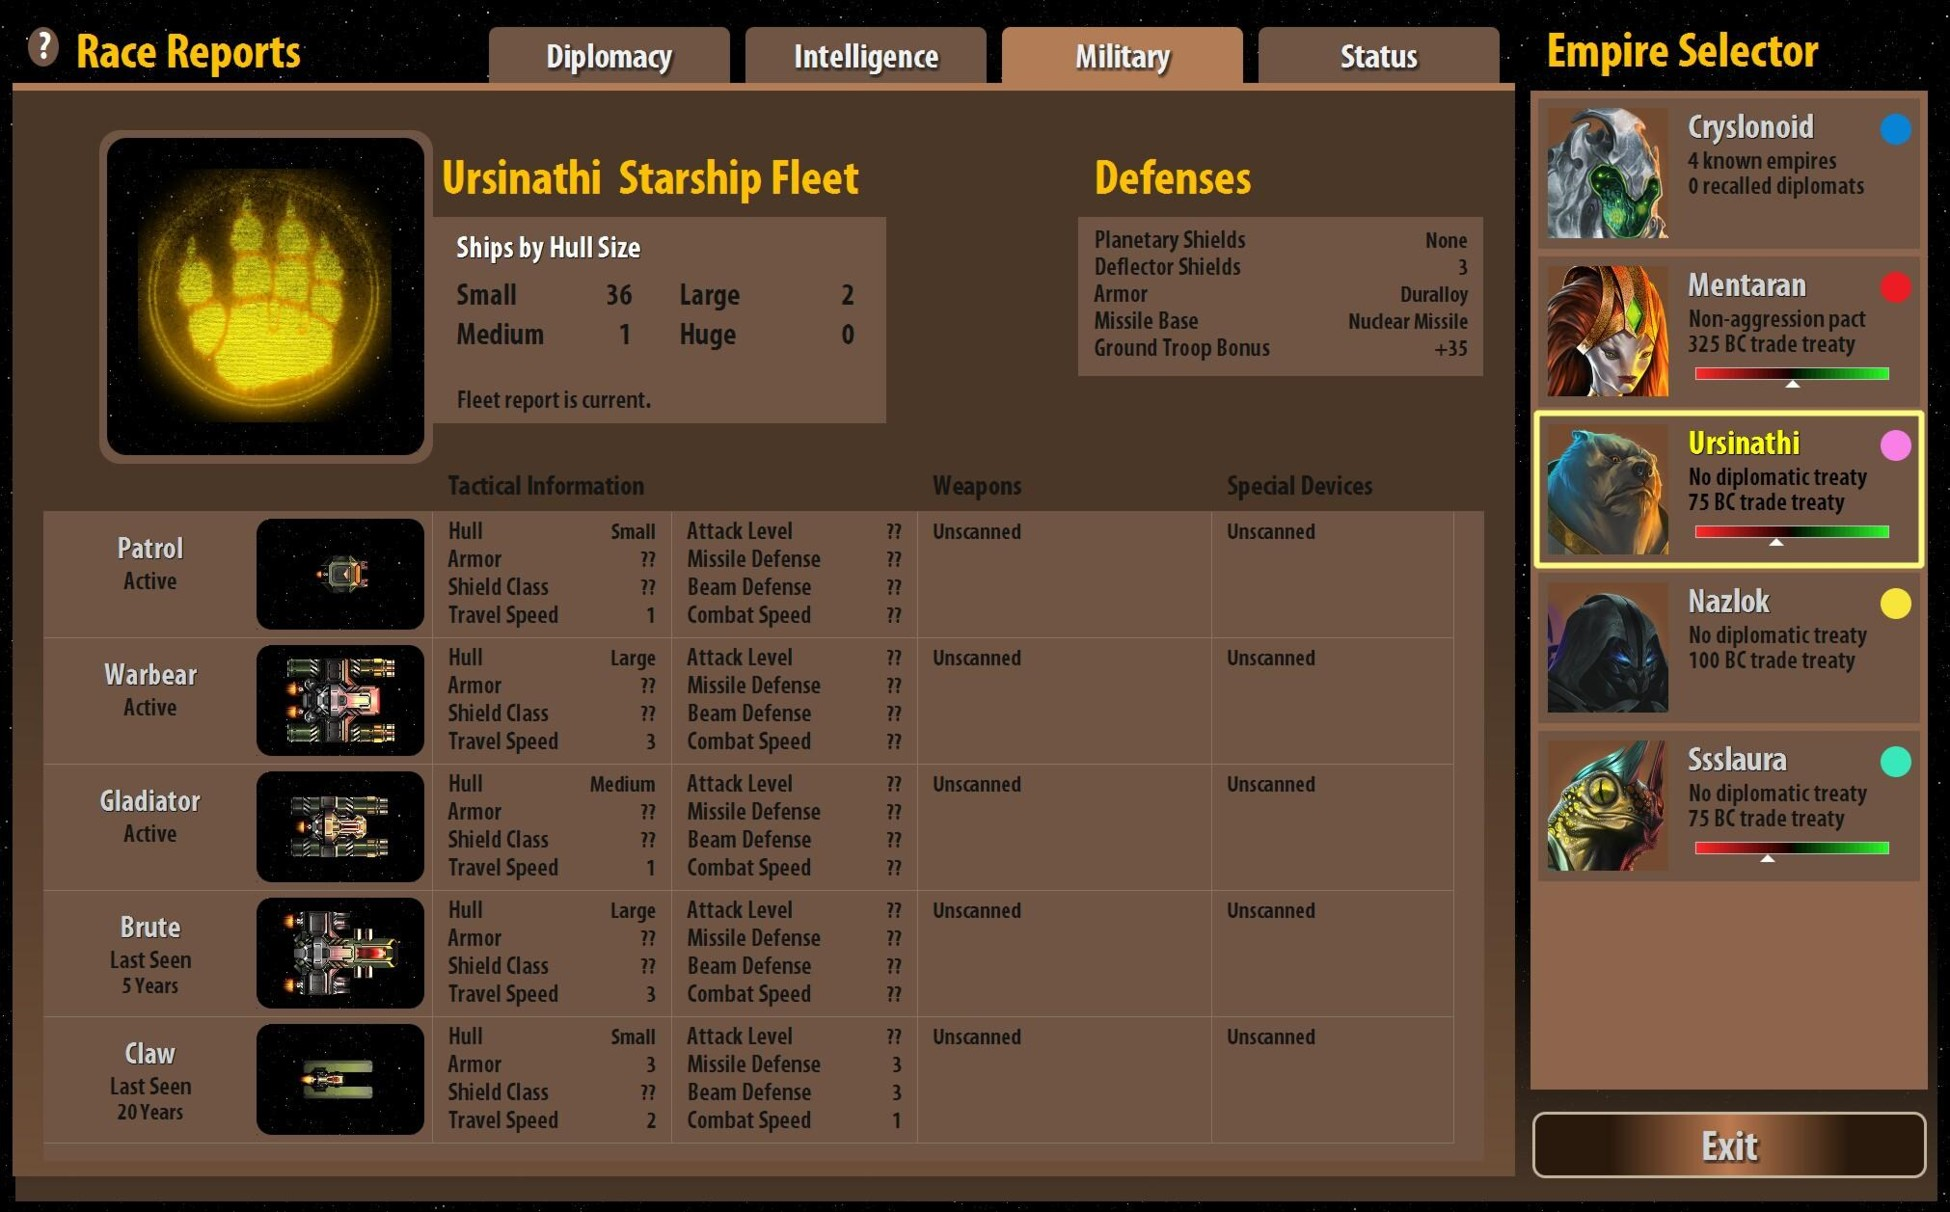
The Military tab shows information about fleet composition, planetary defenses, ground forces, and ship design for the faction selected on the right side of the screen.The top selection will always be you, breaking down your entire fleet by hull size, showing your planetary defenses and ground forces, and letting you set the default number of missile bases for new colonies. The bottom part of the screen shows all your ship designs. If you select an opponent from the list on the right side of the screen, you'll see the same information, along with a notation whether your intelligence is current and how long it's been since you've seen any given ship design.
1.6.5d. Races: Status
The Status tab shows information about how you're doing, although it's important to note that it's based on the ships and planets in your scanner range and the intelligence gleaned by your spies. If you don't have a spy network with a player, the status screen won't reveal anything you can't see directly.
If you select yourself from the top of the list of factions on the right side of the screen, you'll see bar graphs ranking all factions for each of the six metrics of progress: fleet strength, population, technology, planets, production, and total power. Each of these displays lists percentages, not absolute values. For instance, the planets display isn't literally the number of colonies belonging to a faction; instead it's the percentage of all colonies in the galaxy that belong to that player.
Fleet strength uses a formula to assign each ship a value based on its combat capabilities. Note that ship size is one of the main factors in this value, so this graph won't indicate whether a faction has larger ships, more ships, or both. Population is a straight-up comparison of population points on colonies. Technology compares the average level in the six technology categories for each faction. Planets compares the number of colonies. Production compares the gross production of all that faction's colonies. And finally total power singles out the combination of fleet strength, technology, and production to calculate each faction's capacity to project military power. For each of these metrics, you can see a timeplot and direct comparison to your own status by selecting that faction on the right.
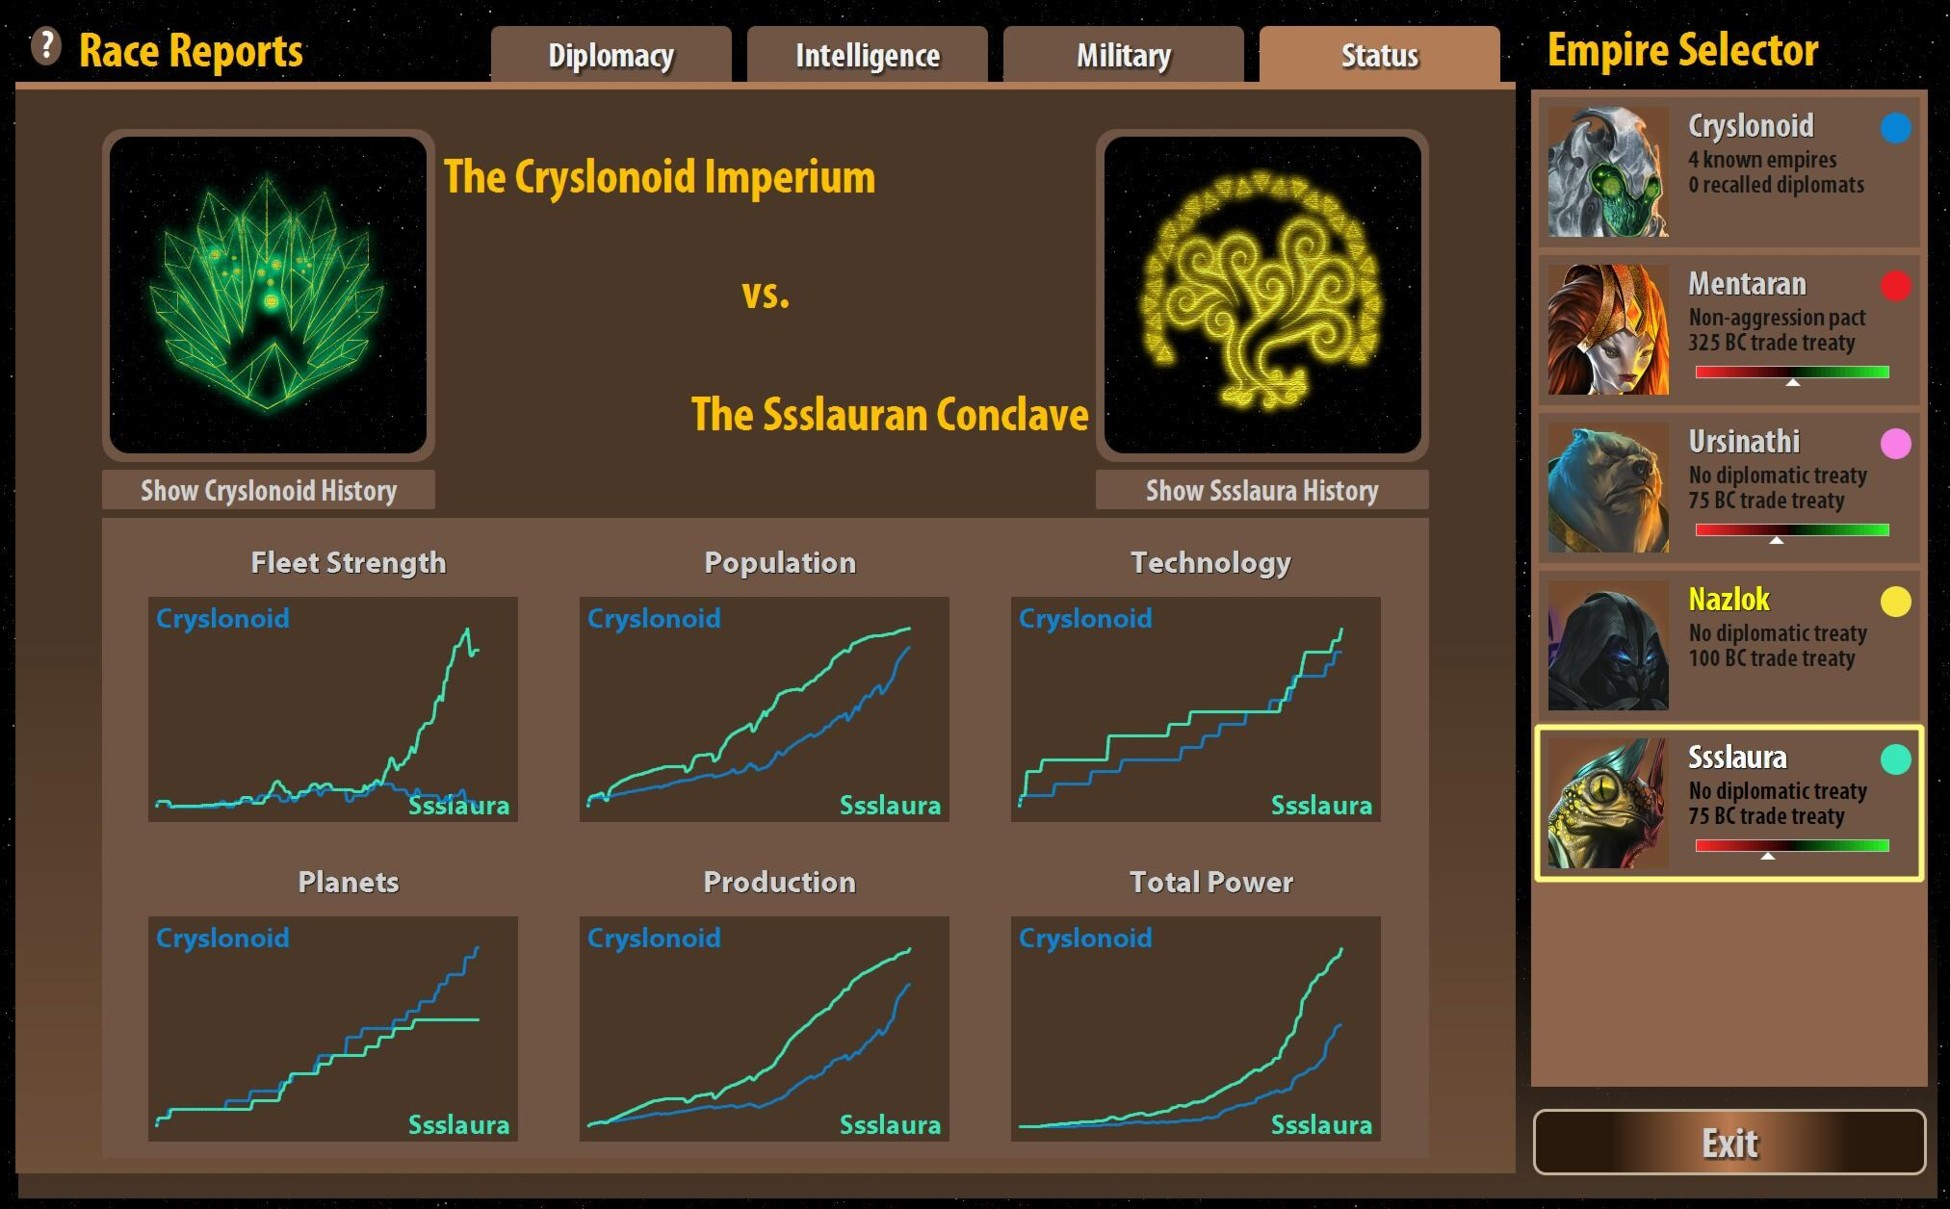
Note the History buttons on the Status Screen will open a map view with a replay feature. From here, you can see how the galaxy has developed since the first turn, complete with the option to fast-forward, rewind, and skip to any turn. This lets you see it all! Provided, of course, you have the necessary intel.
1.6.6. The Colonies screen
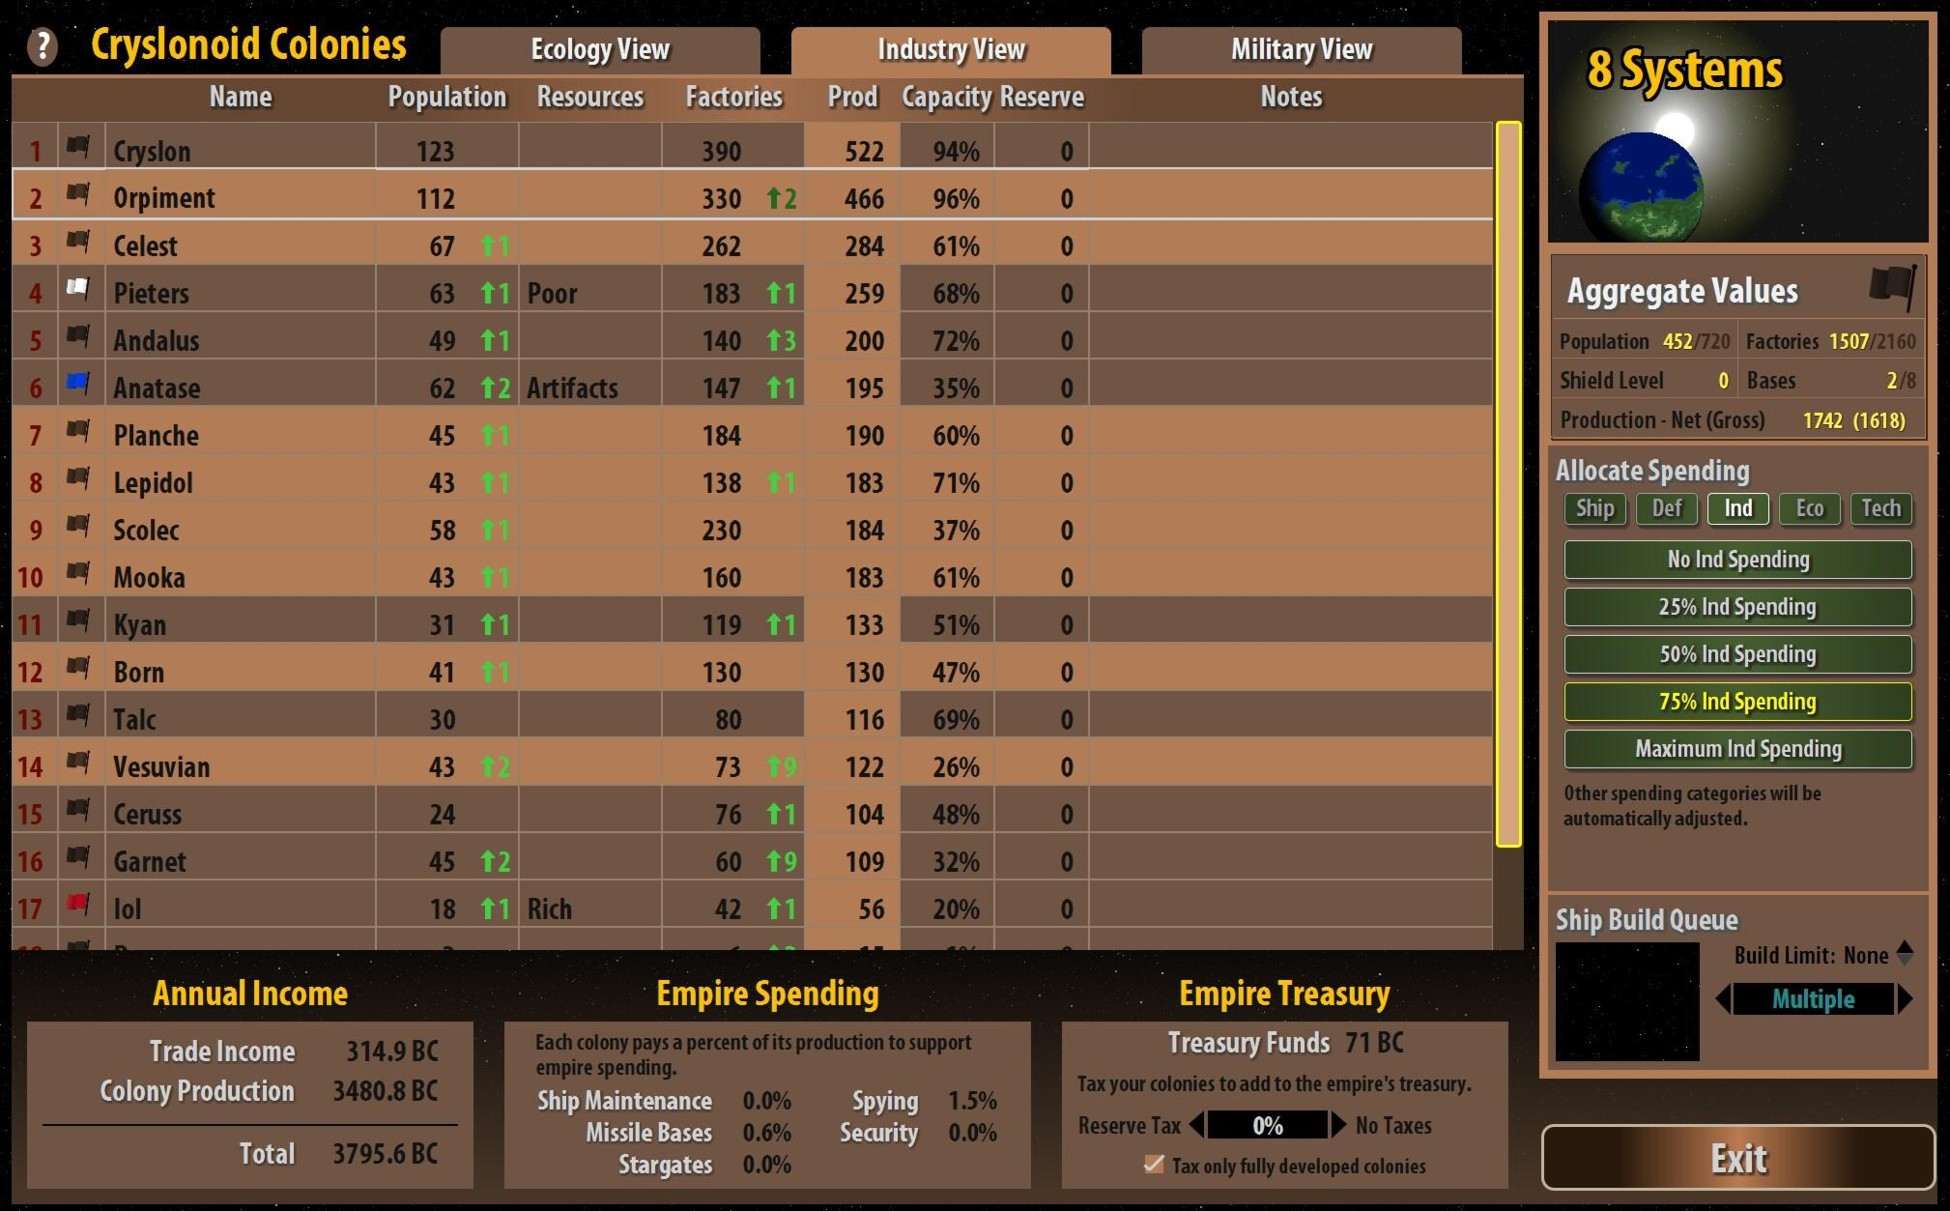
This list of your colonies is actually three lists of your colonies and a helpful interface for adjusting multiple spending sliders at once.
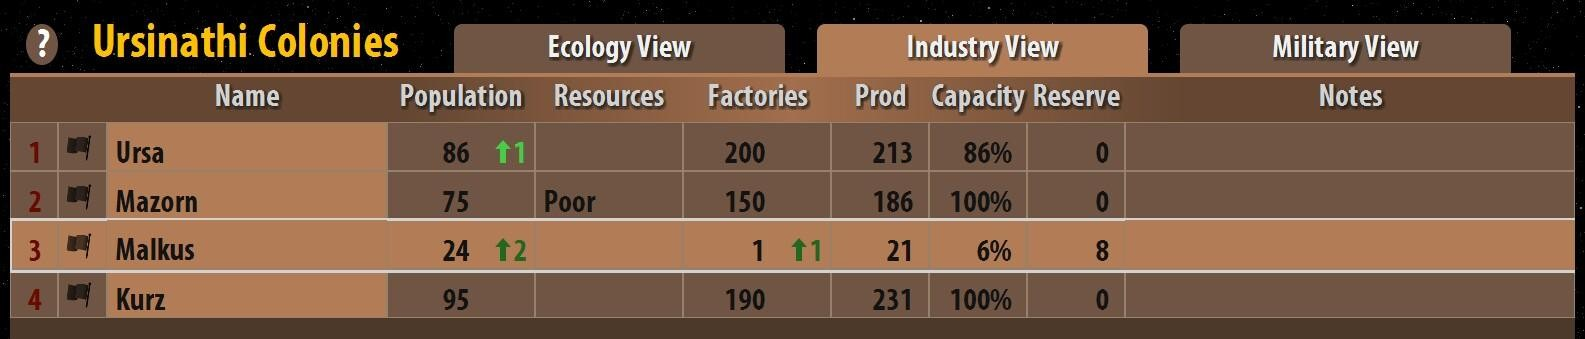
All of the lists are sortable by clicking on a column header to toggle ascending or descending order. Each list is numbered along the far left, next to any colored flag you've assigned, the name of the colony, the current population and growth since last turn, and whether it has any special traits affecting production. Each list also shows any notes you've attached to a colony (notes can be written from any of the Systems or Colonies tabs by simply clicking on the Notes field). The Ecology View additionally shows each colony's environment, size, and accumulated waste. The Industry View additionally shows each colony's current factory count and increase since last turn, net production, percentage of population capacity, and any reserve funds contributing to its production. The Military View additionally shows each colony's net production, percentage of population capacity, shield level, missile bases, and current ship production.
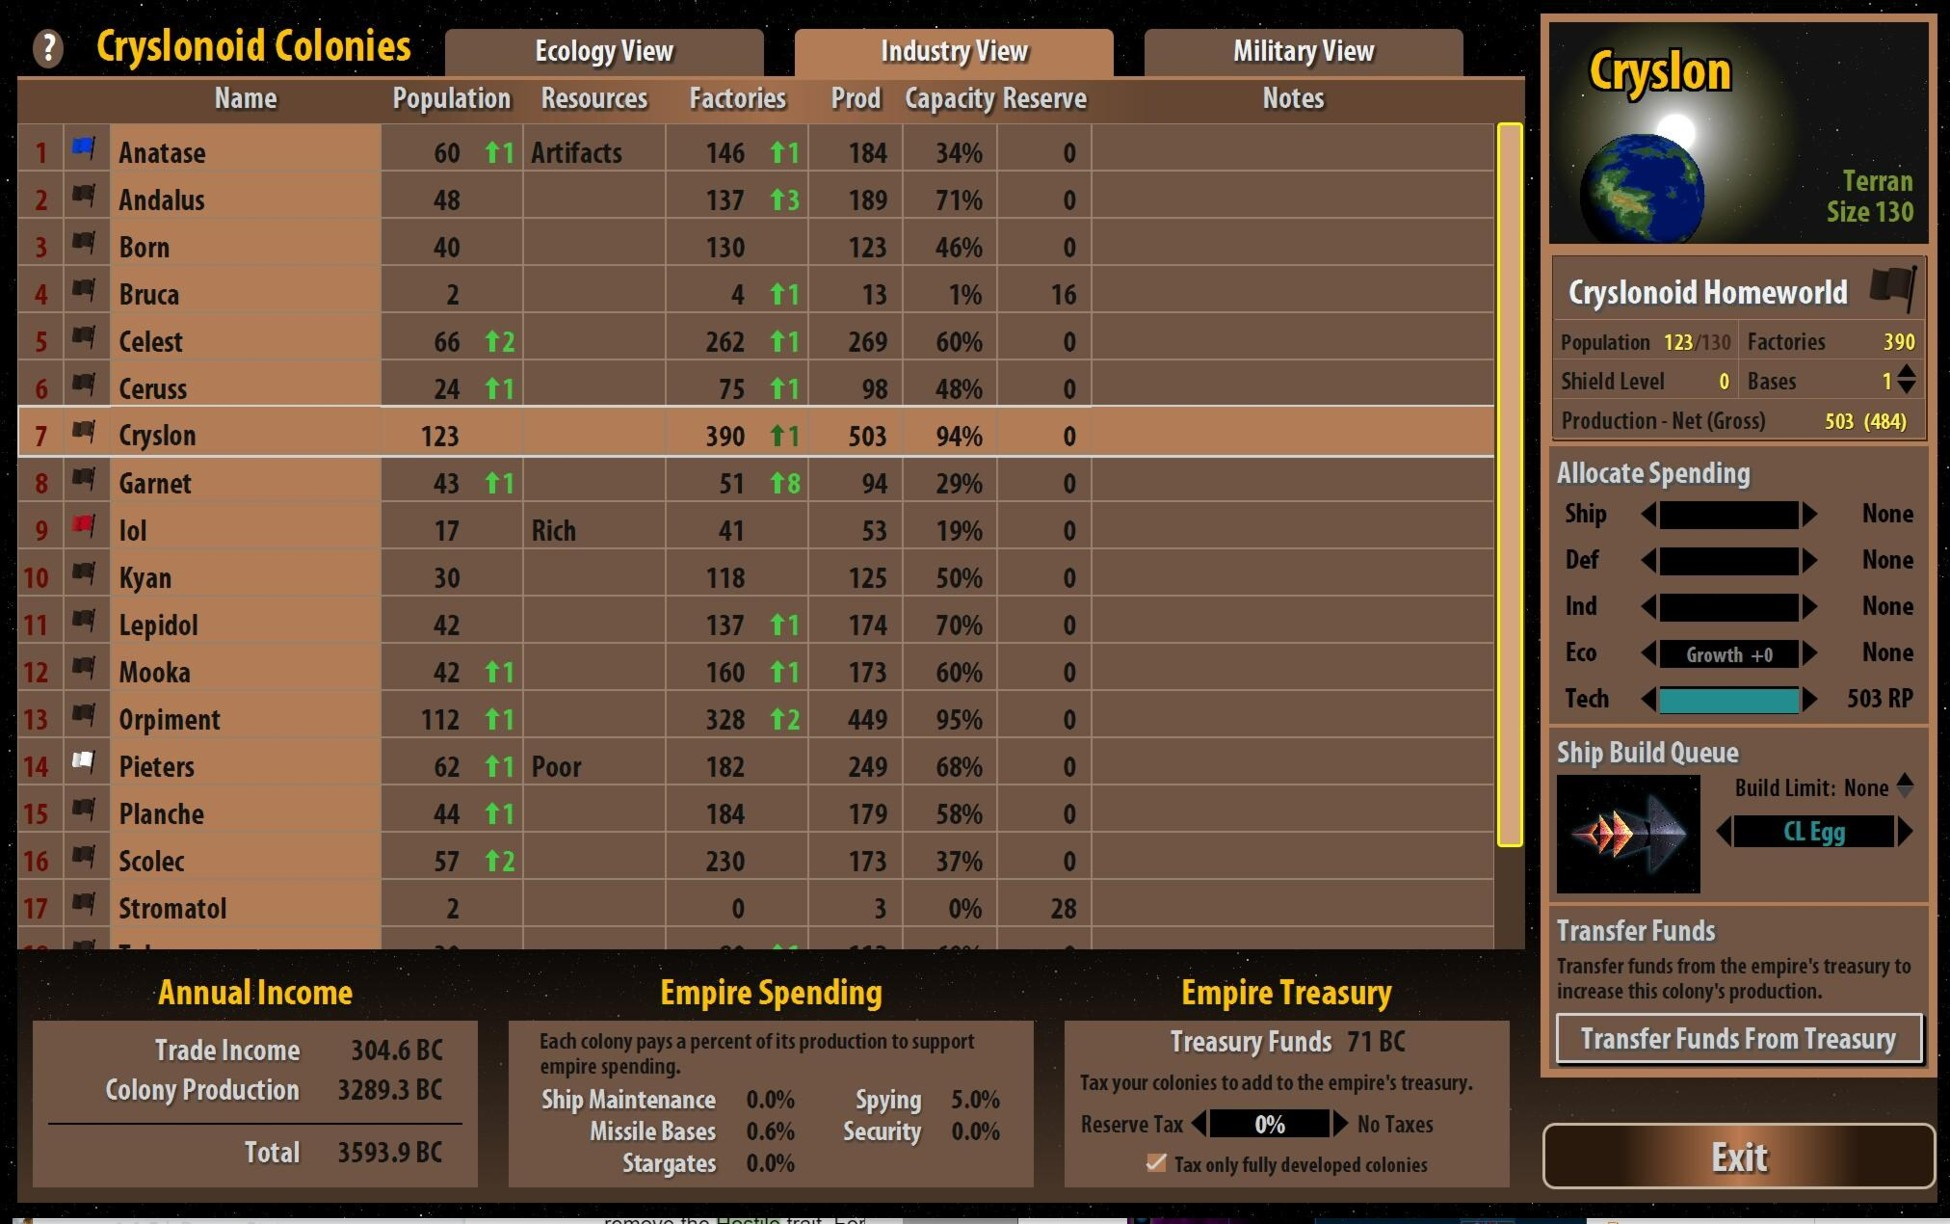
Note that you can select multiple colonies from this screen by shift-clicking or control-clicking. CTRL+A will select all your colonies. This is particularly valuable because selecting multiple colonies calls up an option to set any spending slider for all those colonies at once. It also shows the aggregate value of all selected colonies' population, factories, bases, and production.
You'll find important information about your overall faction at the bottom of the Colonies screen. Here you can see your Annual Income, Empire Spending, and Empire Treasury. For more information about what these displays mean and how to use them, refer to 1.6.6.
1.6.7. The Tech screen
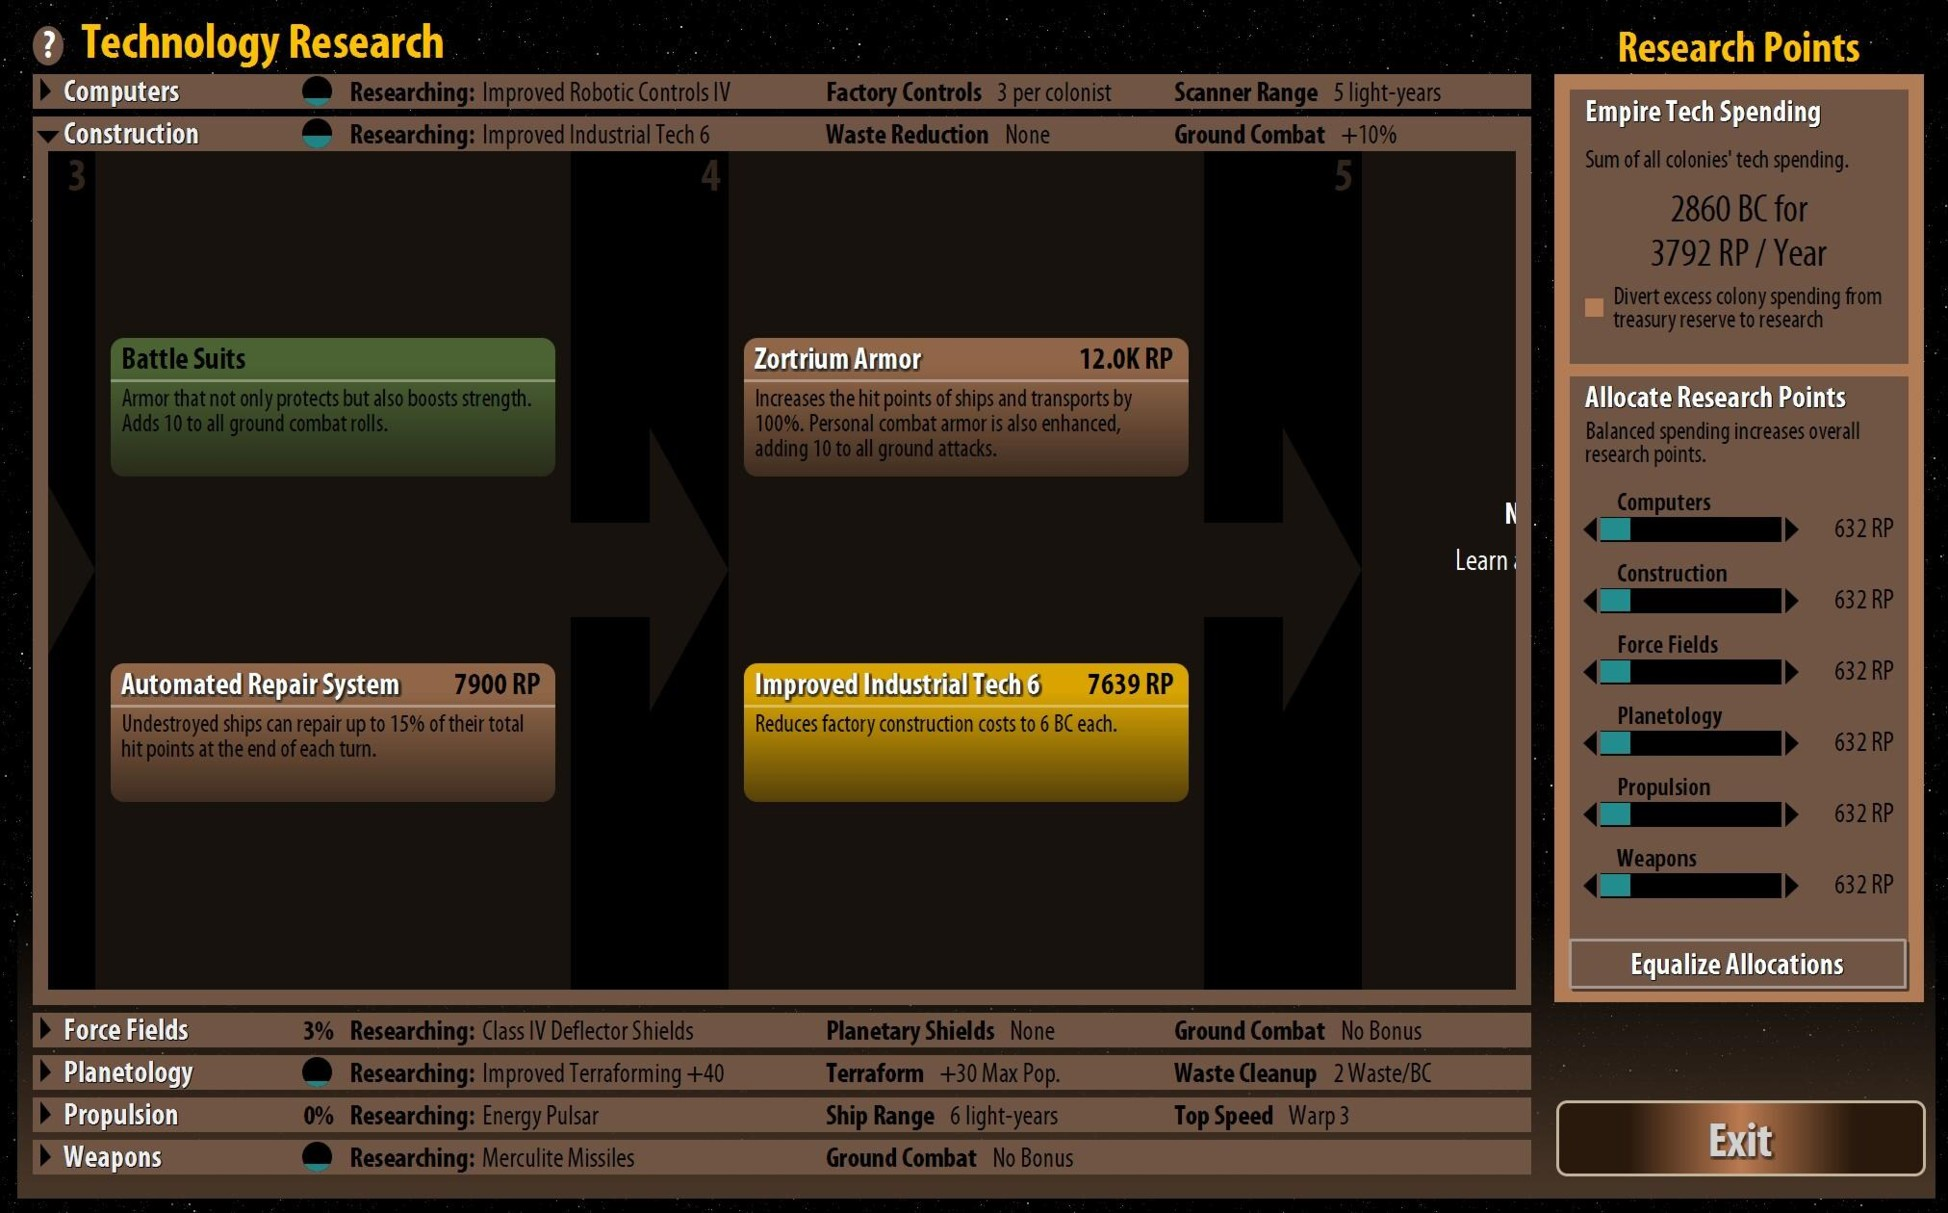
If the Design screen is the beating, evolving, confounding heart of Remnants of the Precursors, the Tech screen is its brain. As you research new technologies, basic rules of the game will change, and all those changes are tracked here. The box on the right side of the screen shows the sum of tech spending for all your colonies, along with the commensurate number of research points that will be divided among the six technology categories according to the slider bars.
Suffice it to say, there's far too much to unpack in a single paragraph. Refer to Chapter 3: How Technology Works for more details on this screen.
1.7. How do I win?
There are two ways to win Remnants of the Precurors. The first and most obvious is to wipe out everyone else. Last [insert race here] standing is a perfectly valid victory. The less brutal way to win is the High Council vote. These guys are basically the United Nations of space. Once two-thirds of the galaxy has been colonized, they'll pop up every 25 years to hold elections.
The Council nominates the two most populous factions. Then everyone votes for one of the two factions or abstains. The number of votes each faction gets is proportional to its population. It's a popularity contest at a galactic scale. This continues every 25 years until there's a winner. If the winner was you, GG! If the winner was someone else, you have a chance to reject the election and take on the rest of the galaxy by yourself. We call this Final War. Good luck!
Just as there are two ways to win Remnants of the Precursors, there are two ways to lose. The first and most obvious is to get wiped out. Once your last colony is gone, so are you. The second way to lose is to accept another faction's High Council victory. At least you were a good sport about it!
1.8. Now what?
There will be a few helpful introductory screens when you first start playing. No matter where you are, the question mark in the upper left hand corner or F1 key will briefly explain everything you see onscreen. Otherwise, keep in mind this is a remake of a game from back in the day when you had to read manuals to learn how to play a game! We've done everything we can to make Remnants more accessible than a 1993 strategy game, but there's still a lot that you'll learn by reading the manual. If you get stuck, we've provided a Frequently Asked Questions section to help with common problems.
But if you've played Master of Orion, you're pretty much good to go. It'll likely come back to you as you play, and this manual will help if you have any questions or need any reminders about how something works. The Master of Orion manual will also apply to most of Remnants of the Precursors' gameplay mechanics, if not the interface. The same is true of the Prima Strategy Guide for Master of Orion, although Remnants of the Precursors fixes many of the loopholes and exploits detailed in the strategy guide. Furthermore, systems like diplomacy and combat work so differently that they invalidate large parts of the strategy guide.
Finally, there's a reddit community at www.reddit.com/r/rotp with an active, supportive, and knowledgeable community. You'll find us there as well, and we're happy to answer questions and discuss strategies.
2. How Planets Work
Don't put all your eggs on one planet; put them on all planets. --Ssslaura saying
2.1. Production
Remnants of the Precursors doesn't separate production and economy. Production is economy, and vice versa. There aren't hammers or test tubes or coins. It all comes down to BCs, or billions of credits. Population provides some credits, but the more efficient source of credits is automated robotic factories. However, the number of factories you can operate is limited by available population. So basically, you make money in Remnants of the Precursors by having lots of population supporting lots of factories.
A colony produces .5BC per population point and 1BC per operated factory. As you research any technologies in the Planetary category, raising your Planetary technology level, each population point produces more BCs. Eventually, a colonist can produce up to 2BCs. A single population point can additionally operate two factories. As you research Robotic Controls, a series of technologies in the Computers category, colonists can operate additional factories. Eventually, each population point can operate up to seven factories. Nine if they're Meklonars.
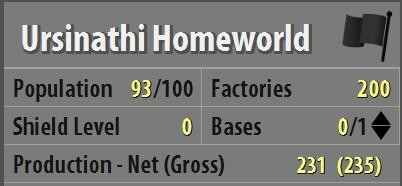
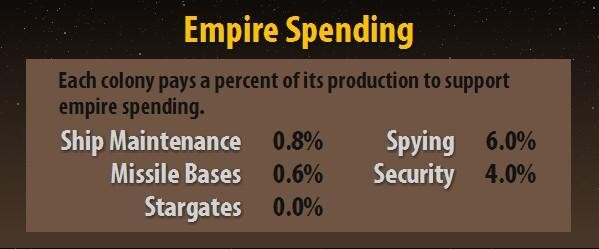
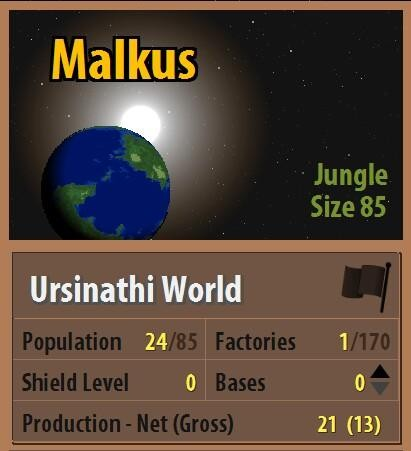
Each colony's production is displayed as a net value, with its gross production in parentheses. The gross value is simply BCs produced by colonists and operated factories. The net value includes BCs earned through trade income as well as reserve funds transferred from the treasury. The net value also takes into account maintenance costs, which are a percentage of each colony's gross production. Maintenance includes the cost for upkeep of ships, missile bases, stargates, spying, and security. The total percentages are displayed on the Empire Spending section of the Colonies screen.
A colony's net production is divided among five different categories. Each category's slider bar determines how much of that colony's production is spent in that category. The text to the right of each bar indicates the result of that level of spending.
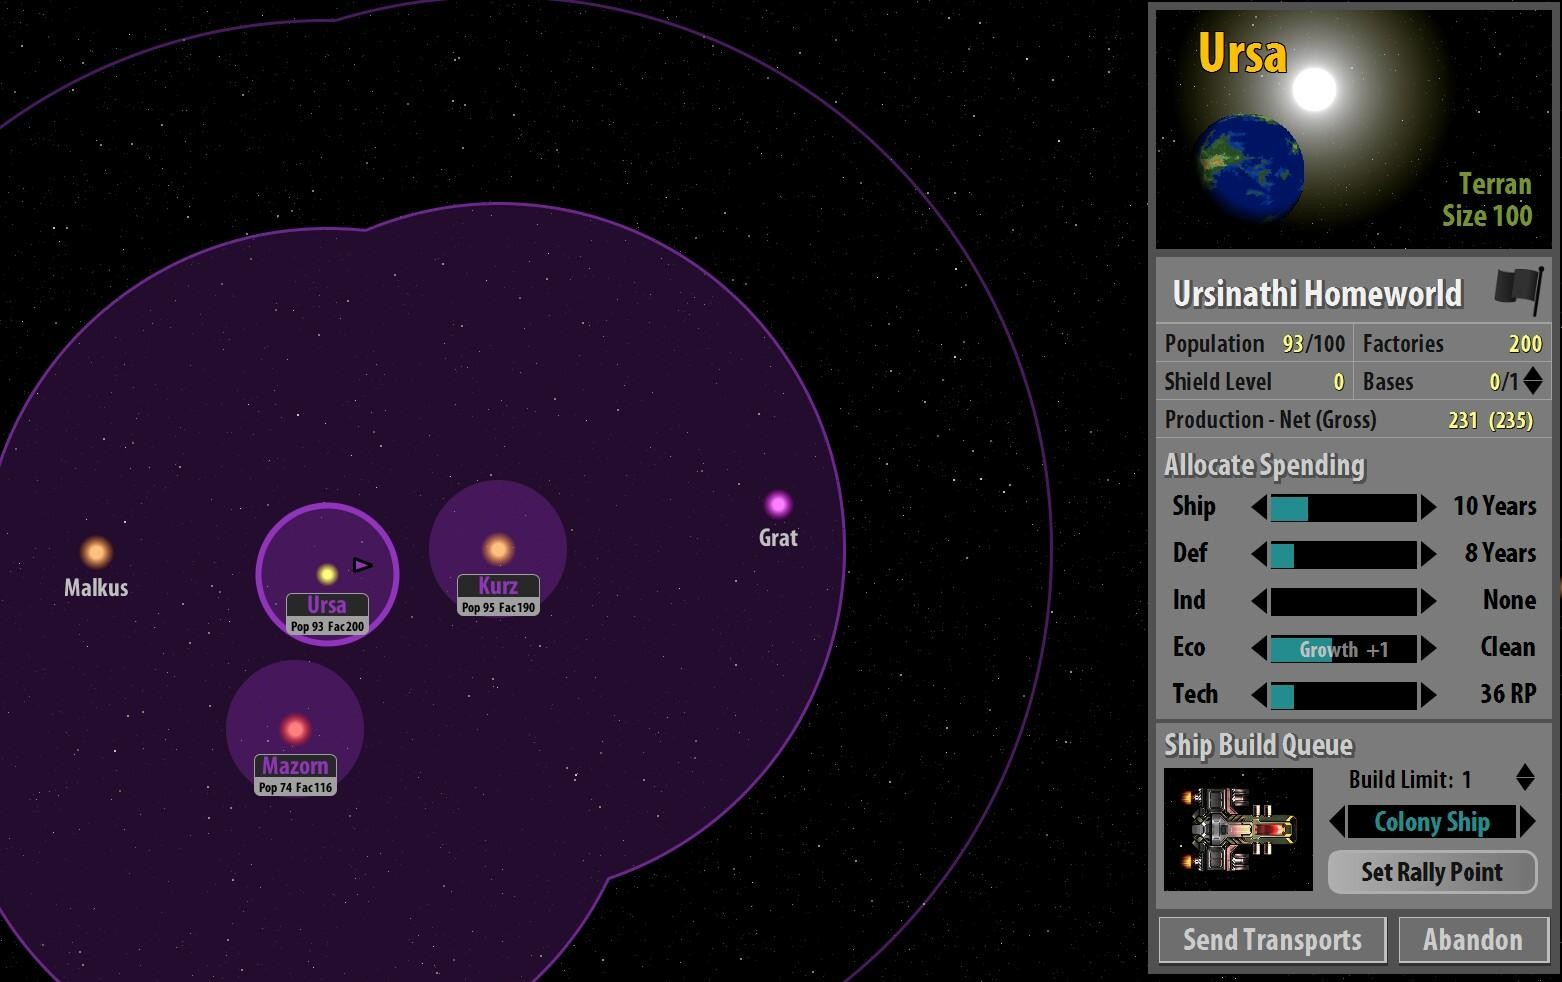
2.1.1. Ship (Ship)
BCs spent in this category are applied to the cost of the ship design designated in the colony's Ship Build Queue. The result on the right side of the slider shows how many years it will take to build that ship. If the ship costs less than the allocated BCs, the result shows how many of those ships will be built. Any excess BCs will be diverted to the treasury at an exchange rate of 2BCs of overspending for 1BC in the treasury. To instead divert excess BCs into research, click the Divert Excess Colony Spending option on the Tech screen. You can limit the number of ships to be built by setting the Build Limit in the Ship Build Queue below the slider bars. After the designated number of ships is built, the Ship slider bar will be set to zero.
2.1.2. Defenses (Def)
BCs spent in this category will be assigned to building planetary shields, upgrading missile bases, and building new missile bases, in that order. The default setting for each planet is to build a single missile base. This number can be adjusted for each individual colony by clicking the up and down arrows on the colony's Bases indicator (the default setting for new colonies is a single missile base, but you can adjust this number on the Military tab of the Races screen).
Missile bases are fixed defensive emplacements consisting of your most advanced components in missiles, shields, ECM jammers, and battle computers. Missile bases also have a battle scanner installed. Unlike ships, missile bases can be upgraded. As you research new components, upgrades to existing bases are prioritized for Defense spending before new bases or shields are constructed.
Planetary Shields cannot be built until the corresponding Force Fields technologies are completed. There are four levels of Planetary Shields technology: Class V, Class X, Class XV, and Class XX, each designated for how much damage they absorb from attacks. A shielded colony is indicated on the main map by a colored arc over the star, with the size increasing and the color progressing from green to blue to orange to purple based on the strength of the shield (the colors mirror item rarity in games like Diablo and World of Warcraft). Note that shields cannot be built if a colony is located inside a nebula.
The results to the right of the slider bar indicate the number of years until the next job is completed. If the job will be completed next year, the results indicate whether it's an upgrade, a shield, or a missile base. Any excess BCs will be diverted to the treasury at an exchange rate of
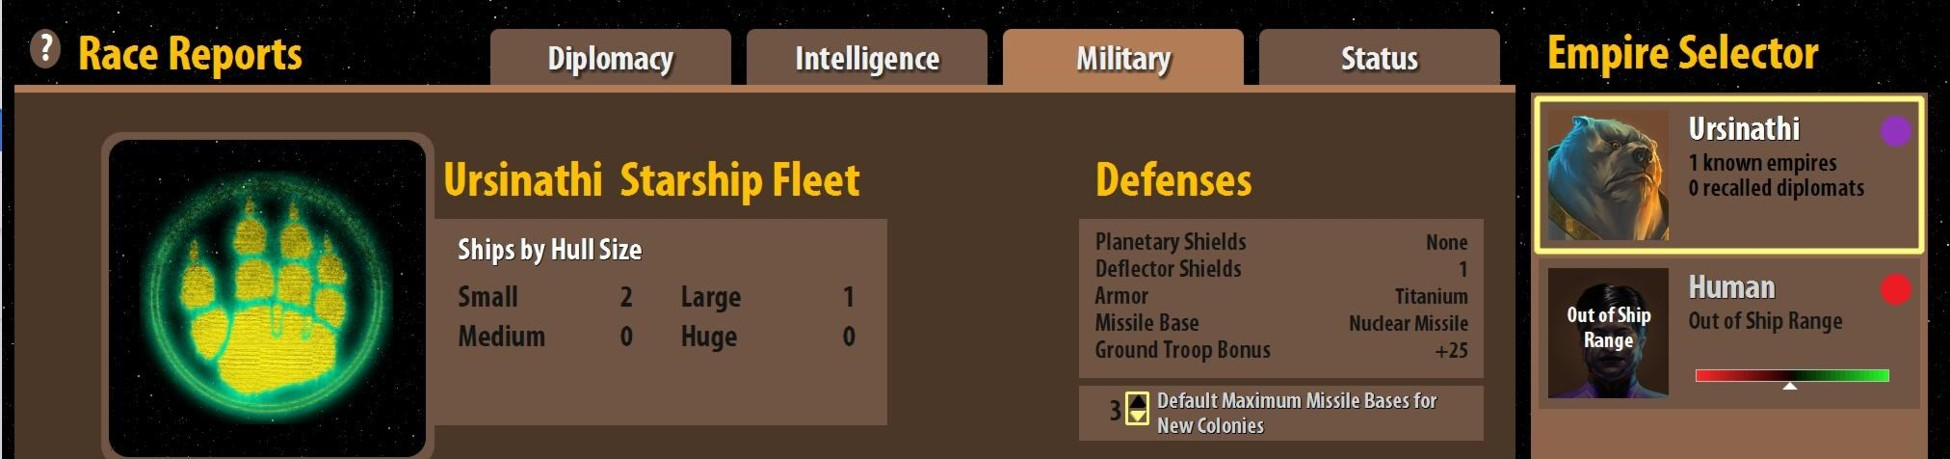
2BCs of overspending for 1BC in the treasury. To instead divert excess BCs into research, click the Divert Excess Colony Spending option on the Tech screen.
2.1.3. Industry (Ind)
BCs spent in this category will be used to construct factories. A single factory costs 10BCs. Each level of Improved Industrial Tech reduces the cost. The results to the right of the slider indicate how many years it will take to build a factory, or how many factories will be built in a year. Any excess BCs will be diverted to the treasury at an exchange rate of 2BCs of overspending for 1BC in the treasury. To instead divert excess BCs into research, click the Divert Excess Colony Spending option on the Tech screen.
As you discover Improved Robotic Controls to allow your population to operate more factories, you'll have to refit your existing factories before you build any new factories. This means building the existing factories all over again, although at half price. While this is underway, the results to the right of the slider will read Refit. This is especially expensive at the default cost per factory, so even if your colonies are filled to capacity with factories, the Improved Industrial Techs to lower factory costs will come in handy when it comes time to improve your robotic controls.
2.1.4. Ecology (Eco)
Operating factories produce waste. If waste accumulates, it will be applied as a reduction to the planet's population capacity, with a maximum reduction of 90%. To counteract waste production, you must spend BCs on ecology every turn. Each factory produces one unit of waste; 1BC of ecology cleans two units of waste. Any waste not cleaned will accumulate, as indicated on the results to the right of the ecology bar when it's set below the threshold for the number of operating factories. Construction technologies can reduce and eventually eliminate waste production, which reduces and eventually eliminates the need for ecology spending to counteract the waste. Think of waste as a maintenance cost that reduces as you research cleaner energies represented by the Reduced Waste technologies in the Planetology category.
If a planet is eligible for Improved Terraforming, Atmospheric Terraforming, or Soil Enrichment, the ecology slider pays for those after the current turn's waste is countered. Then the ecology slider will clean any accumulated waste.
Finally, ecology spending will provide a boost to population growth. 20BCs will "purchase" an additional point of population. This cost is reduced with Cloning technologies in the Planetology category.
The results to the right of the slider bar indicate whether the colony will accumulate waste (Waste), clean existing waste (Clean), terraform (T-form), terraform the atmosphere (Atmos), enrich the soil (Soil), or boost growth (Growth). Text inside the slider bar indicates how much your population's natural growth will be boosted by the slider setting. It will also reflect any changes in population due to departing transports. If you lock ecology spending, you will get a warning if it's ever insufficient to offset produced waste. Any excess BCs will be diverted to the treasury at an exchange rate of 2BCs of overspending for 1BC in the treasury. To instead divert excess BCs into research, click the Divert Excess Colony Spending option on the Tech screen.
2.1.5. Technology (Tech)
BCs are converted directly into research points, which are then allocated among the six areas of research according to the allocate research sliders. The results to the right of the slider bar indicate how many research points will be generated. Note that you can set all overspending to divert into Research instead of the Treasury by clicking the Divert Excess Colony Spending option on the Tech screen. Otherwise, all excess spending is diverted into the Treasury at a penalty of 2BCs in excess spending per 1BC accumulated in the Treasury.
2.2. Treasury
Any spending that cannot be allocated to its category -- for instance, trying to build defenses when a planet is at capacity -- will go into the treasury reserve. This sum of BCs is indicated in the lower left corner of the main screen, above the technology progress indicators.
To manually build up your reserve, you can set a tax rate in the Empire Treasury section of the Colonies screen. This will reserve a percentage of each colony's production for the treasury. However, taxation is not an efficient way to accumulate BCs. BCs are converted into treasury funds at a rate of 2 to 1. In other words, half of the BCs you reserve for your treasury are paid as a penalty fee. You can exclude growing colonies from your designated tax rate by clicking "Tax only fully developed colonies". This will only apply taxation if the colony has completed all defense, industrial, and ecology spending.
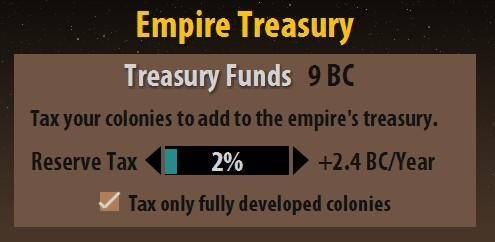
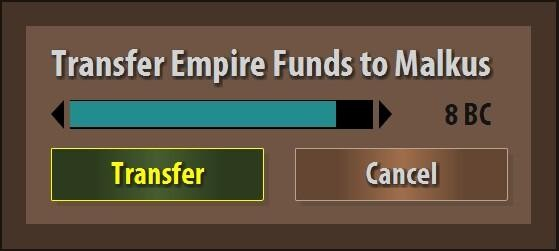
Any money in your treasury can be directly sent to a colony on the Colonies screen. At the bottom of the selected planet's control panel, click the Transfer Funds From Treasury button.
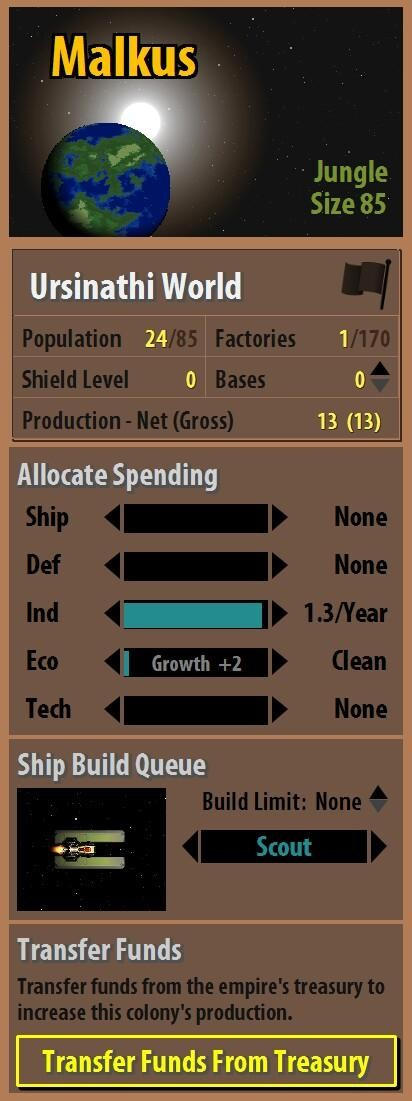
This brings up a box to set the amount of BCs to send directly to that colony.
The BCs will be added to the planet's net production, but it can never increase net production more than double.
Any BCs assigned in excess of that limit will carry over to the next year. The amount of treasury funds queued up for a colony is listed on the Industry tab of the Colonies screen under the Reserve column.
2.3. Population
One point of population represents one million people, beings, souls, entities, or whatever you would like to call the individuals in your faction. When you colonize a planet, it begins with two points of population. Population is the basis for production, since a point of population produces a half BC, and can operate two factories that will each produce a BC. In short, you need population for everything you do.
Population grows at a rate based on the current population and the population capacity, which is determined by the planet's size. Growth is a per-turn percentage that decreases linearly as a planet fills up. When the planet is at 10% or less capacity, the growth rate is 10%. When a planet is at 90% or greater capacity, the growth rate is 1%. In terms of raw population points, this means the growth rate is a bell curve where population accrues most quickly when a planet is at half capacity. Population growth slows when the planet's capacity is nearer to either end, with growth slowing dramatically near the extremes of capacity, on either end.
What this means in practical terms is that the most efficient way to grow population is to keep your planets ideally at half capacity, but at least one quarter capacity. You can use Transports to distribute your population for optimum growth. Move population among your colonies using the Send Transports button below the Ship Build Queue. Transports cost 1BC per population point. They move one speed slower than your fastest engines and are vulnerable to attack. Note that a colony from which colonists depart via Transport will incur negative growth for that turn equal to the number of departing colonists.
Population growth is modified for some races and planets. Ssslaura populations grow at double the default rate, and Cryslonoid populations grow at half the default rate. Population growth is increased by 50% on a fertile planet and 100% on a gaia planet. Population growth is reduced by 50% on a hostile planet (i.e. planets that can't be settled without a special colonization module, namely barren, tundra, dead, inferno, toxic, and irradiated planets).
Finally, you can "buy" population growth by spending a colony's production. If you set a colony's Ecology slider high enough, each 20BC above the cost of waste cleanup will add new population points as indicated on the slider. Planetology technologies Cloning and Advanced Cloning reduce the cost of "buying" population to 10BC and 5BC respectively.
2.4. Ecology
Each star has a chance of including a single planet. The type of star also determines the environment type of its planet. Some planets might also have a special environmental trait. A planet's environment sets the possible ranges for its size, with hospitable planets tending to be larger and inhospitable planets tending to be smaller. A planet's size is its population limit. If a colony accumulates waste, the amount of waste is subtracted from the planet's size (you can see the amount of waste accumulated on the Ecology tab of the Colonies screen). Any population in excess of a planet's modified size will die off over time at a rate proportional to the overage.
Researching Planetary technologies will let you improve your colonies. If a + appears next to the size, the colony is eligible for Improved Terraforming, Atmospheric Terraforming, or Soil Enrichment. Improved Terraforming is represented as an increase in the planet's size, which is an abstraction for a more friendly environment. There's no functional difference between a size 20 planet, and an otherwise identical size 10 planet that has been modified with Improved Terraforming +10. Atmospheric Terraforming removes the Hostile trait that halves population growth on planets that require special colonization modules (i.e. barren, tundra, dead, inferno, toxic, and irradiated planets) and increases the planet's size by 20. Soil Enrichment adds the Fertile trait that boosts population growth. Soil Enrichment also increases a planet's size by 25%. Note that planet sizes are rounded up in multiples of five, so soil enrichment won't leave you with a bunch of planets with derpy sizes like 63.
2.5. Planet Types
A planet's environment is a template for determining that planet's stats when the galaxy is created. After the stars have been placed, each star has a percentage chance based on its type of getting a single planet. The star type then determines the environment of its planet. The environment sets the range of sizes available for a planet, with unfriendly environments tending to smaller planets. However, the formula allows planets to sometimes stray dramatically from their default ranges. It's possible, but unlikely, to find massive barren planets and tiny fertile planets. Finally, the star type determines the chance that its planet will have a special trait like poor, rich, or artifact.
What this means is that a planet's environment is mostly inconsequential after the map has been generated. You might expect a jungle planet to be very different from a desert planet, but if they're the same size, there's no gameplay difference between them. In other words, you can ignore a planet's environment and just pay attention to its size. There are two exceptions when the environment type matters, and they're both related to the Hostile trait applied to barren, tundra, dead, inferno, toxic, and irradiated environments.
The first exception to environment not mattering is that all races other than Cryslonoids have to research and construct special ship modules to colonize Hostile planets. Since there's a module for each hostile environment, a planet's specific environment will matter. Furthermore, all colonization modules work on environments of that hostility or lower, so it's helpful to know the ranking of inhospitable environments.
The second exception to environment not mattering is that some planets will have special traits. The Hostile trait, which is applied to any radiated, toxic, inferno, dead, tundra, or barren environment, reduces population growth by 50%. The inverse of this is the Fertile trait gained through Soil Enrichment, which boosts population growth by 50%. Gaia planets are even more fertile, boosting population growth by 100%. Note that gaia planets do not occur naturally.
Mineral rich and ultra rich planets boost BCs allocated to ships, defenses, and industry by 100% and 200%, respectively. Mineral poor and ultra poor planets apply a penalty to BCs allocated to ships, defenses, and industry of 50% and 66.6%, respectively. Artifacts boost BCs allocated to research by 100%.
2.6. Random Events
There are sixteen random events in Remnants of the Precursors, some favorable and some unfavorable. As of turn 50, the percentage chance that a random event will occur somewhere in the galaxy begins to climb. After a random event occurs, the percentage chance resets to zero and begins climbing again next turn.
Random events are a catch-up mechanic that favors weaker factions. Once the event is determined, it will target a player based on how well they're doing in the game. Favorable events are more likely to happen to players with lower overall production, whereas unfavorable events are more likely to happen to players with higher overall production. Each event can only happen once.
Some players might consider a list of random events a spoiler, so we've hidden it from them in the appendix!
3. How Technology Works
"Not only do we outnumber you 5-to-1, but this time we're wearing tritanium battle armor and carrying state-of-the-art hand phasors! Prepare to be invaded!" --last words of Fiershan Underkhan Jianna before her transport was disintegrated in the Sixth Failed Siege of Mentar
3.1. The tech tree...
Remnants of the Precursors, like Master of Orion before it, has a tech tree completely different from the ones you're used to climbing. There are two main differences between this tech tree and the usual Civilization tech tree you see in many strategy games.
3.1.1. ...will be incomplete.
The first main difference is that a Remnants tech tree is going to be full of holes. This is because there's only a 50% chance any given technology will be available for you to research (75% if you're the Mentarans, but that still leaves a lot of holes). When you begin the game, every technology is checked for its chance to appear (with the stipulation that you'll always have at least one technology per tier per category); if a technology doesn't make the check, you're not going to be able to research it. Ever. So no matter how much research you accumulate over the course of the game, it's only going to unlock half of the tech tree. This accomplishes a few things, including a ton of replayability. But most importantly, it means that research won't be enough. If you want to be counted among the most advanced factions in the galaxy, you'll have to consider tech trading, espionage, and perhaps even conquest.
Research isn't the only or even necessarily the primary route to getting new technologies. The Mentarans have a huge advantage when it comes to research, but the Humans can parlay their diplomatic bonuses into technological superiority through trading, just as the Nazloks can parlay their spying bonuses into technological superiority through espionage. There are different ways to climb around in this tech tree, and they each have different advantages and disadvantages.
3.1.2. ...is full of redundancy.
The second main difference is that this tech tree isn't just a bunch of discrete nodes, each with its own unlocked ability or upgrade. Instead, many of the technologies gradually improve existing gameplay mechanics. This means missing out on a technology might slow you down, but it will never hobble you.
For instance, there are eleven levels of Deflector Shields in the Force Field category (you start with knowledge of Class I Deflector Shields, and each of the ten tiers has an improved class). Each successive level unlocks more powerful shields for your ships. If you don't get access to Deflector Shields II, then there's always Deflector Shields III, IV, V, and so on. If there were only a single Deflector Shield technology, the game would fall apart if you were randomly denied the chance to research it. You would never be able to put shielding on your ships and even the most basic lasers would chew through your armor. But because there are several iterations of shielding, the tech tree can be variable and unreliable. This wouldn't work for a tech tree with items like The Wheel, Gunpower, and Flight. Imagine a 50% chance that it never even occurred to your civilization to invent a wheel.
Not to say the tech tree consists only of incremental improvements! There are plenty of one-off technologies that introduce game changers. Hyperspace Communications, Stargates, and Cloning, for example, are hugely disruptive technologies. The different types of weapons can introduce significant changes on the battlefield. But many of the technologies in Remnants of the Precursors simply improve what you were already doing.
3.1.3. ...sets the basic rules.
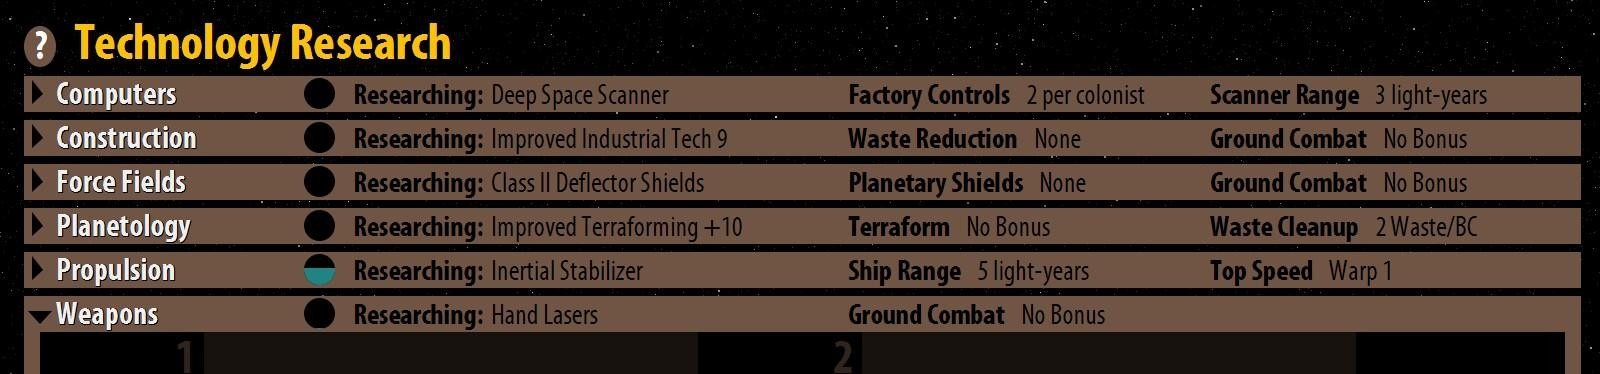
This is why the Technology Research screen isn't just a place you go to pick your next tech. Many of the basic rules of the game are tracked here as they develop. For instance, at the start of a game, each point of population can support two factories. This is a hard-and-fast rule that will inform how you develop your colonies. But as you research higher levels of Robotic Control, each point of population will be able to support more factories. This is tracked on the Technology Research screen because it's determined by the technologies you've researched.
Similarly, you'll find your scanner range, waste management cost, ground combat bonuses, planetary shield level, terraforming limit, ship range, and ship speed listed here, because they're all determined by the technologies you've researched.
These effects are often related to an under-the-hood "technology level" for each category. This is a number you can't see in the game, but it's referenced by several gameplay mechanics. Your level in a technology category is determined by taking the level of your highest known technology in that category (the level of each individual technology is also under the hood, but they range from 1 to 50 for every technology in a category, and you can infer their relative levels by their relative costs). Multiply the level of your most advanced technology by .8, and then add 1 for every technology you know in that category. This means tech level is primarily determined by your most advanced technology, but it's also determined by the number of technologies you know.
This means even obsolete technologies will boost your technology level. This is also the purpose of the Future technologies in each category. You can research these to raise your technology levels even if you have no more technologies in that category.
3.1.4. Technology levels
These are the effects of your technology levels in each of the six categories, which is determined by multiplying your highest known tech's level by .8 and adding 1 for every technology you know in that category.
Computers: During espionage, the difference between your Computer level and your target's Computer level is applied as a modifier.
Construction: Every Construction level increases the available space for all hull types by 2%.
Planetology: At the start of the game, each colonist produces .5BC. As your Planetology technology level rises, so does their productivity. The increase is incremental, but the overall rate doubles at level 17, triples at level 33, and quadruples at level 50.
Weapons: The amount of damage your spies inflict during Sabotage actions increases with your Weapons technology level. This will destroy more factories and missile bases.
3.1.5. Miniaturization
All ship components get smaller and cheaper as you research other technologies in the same category as that component. For every technology level above a non-weapon component's level, its size is reduced by 2.5% and its cost is reduced by 5%. Weapon components shrink more quickly. For every technology level above a weapon's level, its size is reduced by 5% and its cost is reduced by 5%. This means your designs will get cheaper as you learn more technologies, and as weapons recede from the cutting edge, more of them will fit onto your ships. See 4.2 for more on ship design.
3.2. Research points
Each colony's BC allocated to research are pooled as research points, which are then allocated among six areas of research. Note that the first 1/6th of each bar applies a 25% bonus to the conversion from BCs to research points. This means you'll optimize research spending by keeping all six bars equal. Your conversion bonuses are displayed on the Tech tab in the Empire Tech Spending box, which will tell you exactly how many BCs your colonies have allocated, as well as how many research points they're generating after the conversion bonuses. You can furthermore see how many points are generated for each area.
Also note there is an option on the Tech screen to direct all excess spending on colonies to research rather than the treasury. This is useful for those who don’t want to take the 50% treasury hit except when they're specifically set it up through the taxation feature (see 2.2. for more on how the treasury works).
3.3. Gaining technologies
There are five ways to gain new technologies: research, diplomacy, espionage, conquest, and one other thing. Research will be the most common way to learn new technologies. All tech spending from your colonies is pooled and then divided among six technology categories where you've chosen the specific technologies to research. Diplomacy is also a common way to learn new technologies. Unless restricted by the advanced options during set-up, races can freely trade technologies with each other. Espionage spending can be diverted to stealing technologies from another faction. Conquering a rival faction's colony will sometimes net a new technology. And finally, there are some technologies waiting patiently to be discovered.
3.3.1. Research
Research on your colonies will be your primary means of unlocking new technologies. As soon as you start generating research points, and later after you unlock a technology, your science advisor will present you with a list of available technologies. Once you've spent research points on a technology, you cannot change to another technology in that category until you've completed the current technology.
Note that you don't automatically gain a technology once you've spent the base research points. Unlocking technology is a two-step process. First you must spend the base research points for that technology, then you must roll for a breakthrough. The chance for a breakthrough is based on research points you've spent beyond the base cost. To reach a 100% chance of success, you will need to spend double the technology's base cost over again. For instance, if a technology's base cost is 100 research points, you will have to spend another 200 research points before a breakthrough is guaranteed. So in terms of total research points spent, 100 will be a 0% chance of a breakthrough, 200 will be a 50% chance of a breakthrough, and 300 will be a 100% chance of a breakthrough. Hopefully, the random number gods won't be so brutal and you'll pass the breakthrough check before it comes to that.
3.3.2. Tech trading
Tech trading is the other common way to learn a technology. The AI factions will trade technologies with each other, so you might as well get in on the action. See 5.3 for more details on using diplomacy to trade technology.
3.3.3. Espionage
You can build up a spy network in another faction and steal from that faction any technologies you don't already know. This comes with a certain amount of diplomatic risk -- not to mention risk to the spies themselves -- but it can be well worth it. And for some races and in some situations, it would be foolish not to use espionage as a source of technology. See 6.3 for more on espionage actions.
3.3.4. Conquest
When you successfully invade a planet, there's a 2% chance per surviving factory that you'll learn one of the defeated faction's technologies (assuming it had some you didn't already know). Try to preserve some infrastructure when you invade colonies, especially when you invade more technologically advanced colonies. Bioweapon atrocities look a little more attractive now, don't they? Kill the pesky inhabitants, but leave the factories and technologies intact!
3.3.5. REDACTED
Maybe there's advanced technology just floating around in space or buried on an abandoned planet, waiting to be discovered? See table 10.15 for a list of random events and Chapter 2.5 for more information about the artifact trait.
4. How Ships Work
"I wish to have no connection with any ship that does not have at least Ion Engines, for I intend to go in harm's way." --Altairi Admiral Cormorant Tallen
4.1. Fleet management
Your ships are arranged into fleets. Even a lone ship is its own fleet. You can only deploy fleets from one star to another star within the range set by your best fuel cells. You can't interrupt movement until you've learned Hyperspace Communication from the Computer technology category, at which point you can change the destination of a fleet in transit.
On the map, military fleets are represented by triangles with three little exhaust trails behind them.
Unarmed fleets, such as scouts and colony ships, are represented by smaller triangles without exhaust trails.


Transport fleets are represented by rectangles.
A fleet's destination is indicated by a dotted line. An enemy fleet's destination, which will be visible once you've researched Improved Space Scanners, is indicated by a red line. Green lines indicate the route of your fleets. Yellow lines indicate the route of unarmed opponent fleets or opponent fleets not traveling to your systems. Dark purple lines indicate rally points where newly constructed ships from another colony will gather. Note that destination lines are only displayed at lower zoom levels and some of them are disabled by the map filter settings. Also, selecting a system will show all ships in transit to that system regardless of the map filter setting.
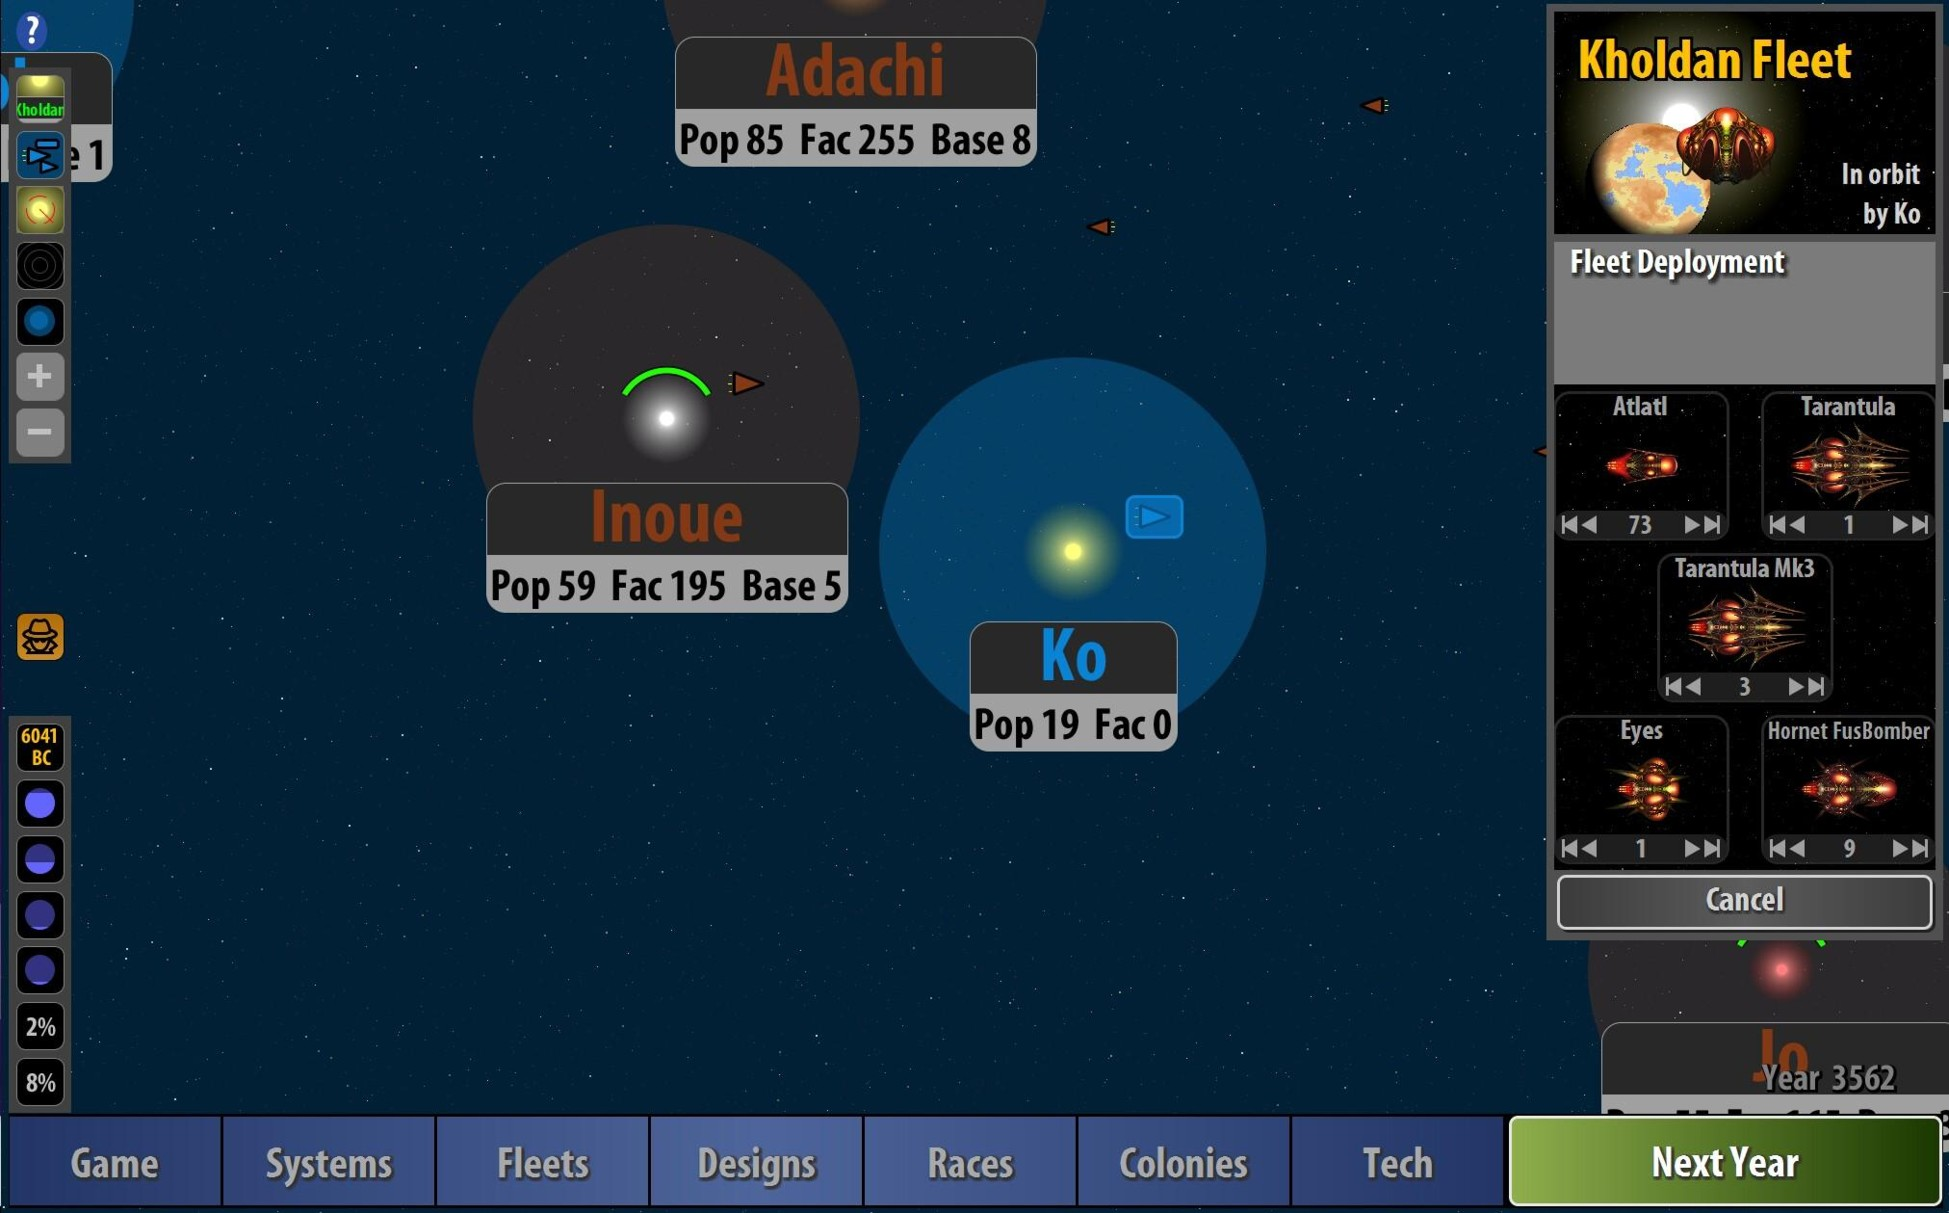
When deploying fleets, click on a fleet. The panel on the right side of the screen will show the ships gathered at that planet. The buttons along the bottom of each ship type will, from left to right, select none, decrement the selection, increment the selection, or select all. As with the slider bars in Remnants of the Precursors, you can also hover the cursor over each ship type and roll the mouse wheel to select a quantity.
Once you've selected the ships you would like to deploy, as you mouse over various destinations, the panel will display the numbers of years it will take to reach that destination, along with a warning if the fleet will be slowed by a nebula along the way. The route will also turn bright purple if it passes through a nebula. Click Deploy Fleet to confirm the destination. Click Cancel, or right-click, to cancel.
All fleets, even fleets already in transit, can be set to retreat upon arrival. This will be useful if the diplomatic situation changes in the interim between giving your ships orders to attack a colony and their arrival at the colony years later. With the fleet selected, check the box in the information panel that reads "automatically retreat on arrival". Note that you can't tell transports to retreat -- shipping out population is a one-way proposition -- but you can tell them to "surrender" upon arrival. There are also checkmarks for fleets that are Rallying. This is mainly to help sort reinforcements in transit from fleets ready for action.
For more on fleet management, refer to section 1.6.3 for information on the Fleets screen and how it can make ship juggling a lot easier.
4.2. Ship design
In 2021, there's nothing particularly innovative about designing your own military units in a 4X. But back in the day, this was unique to Master of Orion. And even now, this ship design system is distinct from other games you might have played. For starters, ship design is mandatory. You will not make it through a game of Remnants of the Precursors unless you design your own ships. The game won't do it for you.
The good news is that ship design is a lot more streamlined than you might expect. It's also not something you'll do frequently. You don't just willy-nilly make a new design every time you research a new component. Instead, ship design is a severely constrained system based on carefully timed dramatic breakthroughs instead of a steady trickle of improvements. This ship design is about disruption, not merely progress. Learning how to deal with this unique system is a central part of learning to play Remnants of the Precursors.
4.2.1. Concepts
Perhaps the most important ship design concept is also the most esoteric: you will only ever have six types of ships in play. If you ever want to design and build a new kind of ship, you'll have to replace one of your six designs, which necessarily involves scrapping all ships of that design. It's maddening, I know. But you know what's even more maddening? Playing a 4X with twenty variations of the same unit running around and you have to keep track of them all. Whether you love it or hate it, the six-ship limit is a fundamental part of Remnants of the Precursors, just like it was a fundamental part of Master of Orion. Fortunately, Remnants of the Precursors gives you a seventh "prototype" slot where you can experiment with different designs before committing them to one of your six slots.
Another important concept distinct from other games is scaling size and cost: ship components have no fixed cost or size. Instead, cost and size decrease as you research new technologies in that component's technology category. For every ten levels you have in excess of a component's level, its cost is reduced by 50% and its size is reduced by 25% (components from the Weapon technology category shrink more quickly; their size is reduced by 50% for every ten levels). You don't need to track all this, but you should be aware that "older" components will get increasingly less expensive and smaller. This keeps them relevant even after they're "obsolete".
4.2.2. Ship Design screen
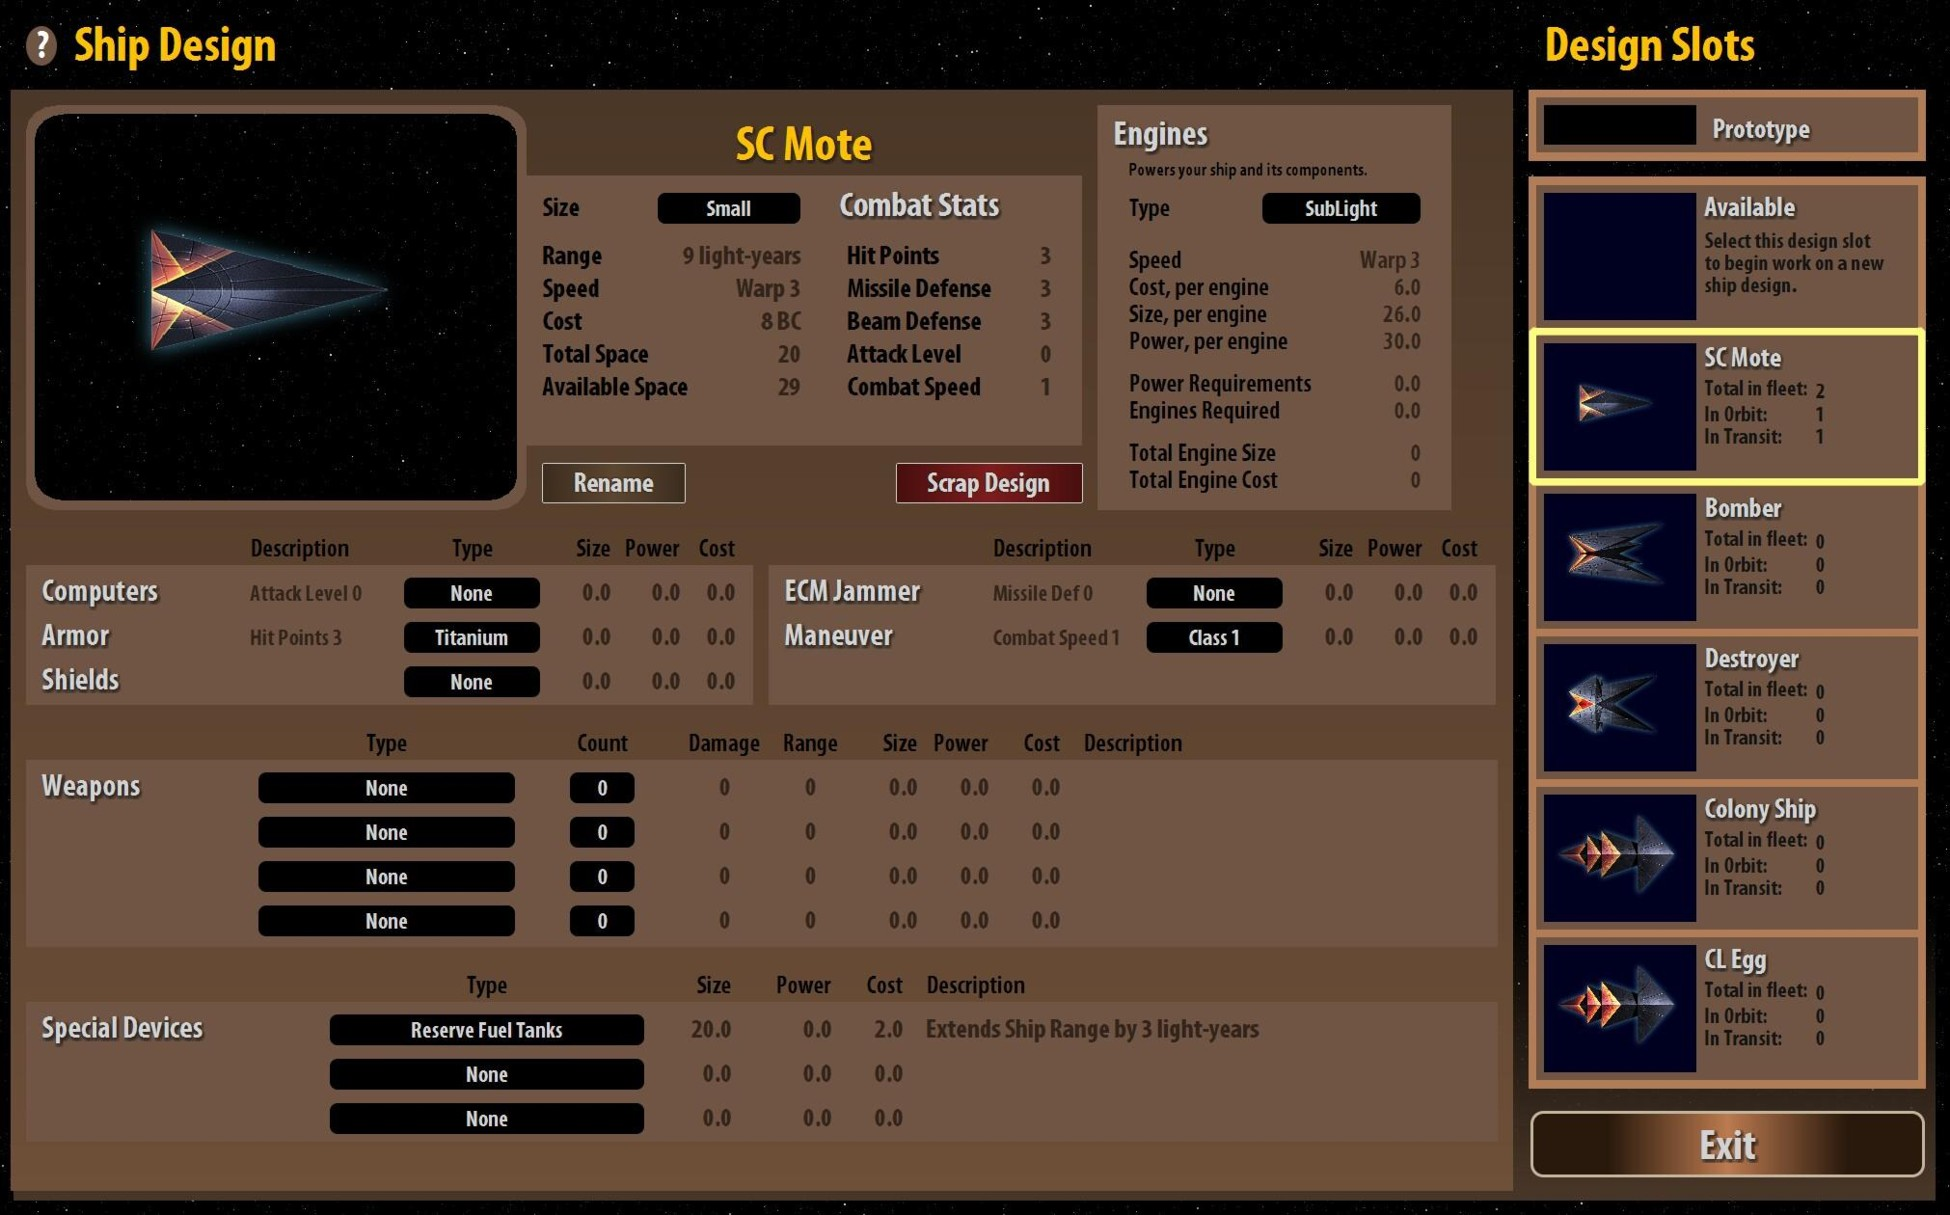
So let's break down the Ship Design screen, starting with the column of design slots along the right side of the screen. The prototype box at the top is for you to test different combinations. If you create one you want to keep, press one of the Copy buttons that appears in the six slots to transfer your prototype design into that slot. At the start of a game, the slots will all have basic starting designs built around each of the available hull sizes. But keep in mind, the slots aren't designated for any particular hull sizes. There's no restriction to how many designs you can have for each hull size. You could theoretically play an entire game with nothing but swarms of small ships. Probably not a good idea, but you could do it if you wanted.
Each design is broken down into three sections: Combat Stats, Engines, and Components. Note that Combat Stats and Engines have only a single slot for options.
4.2.3. Combat Stats
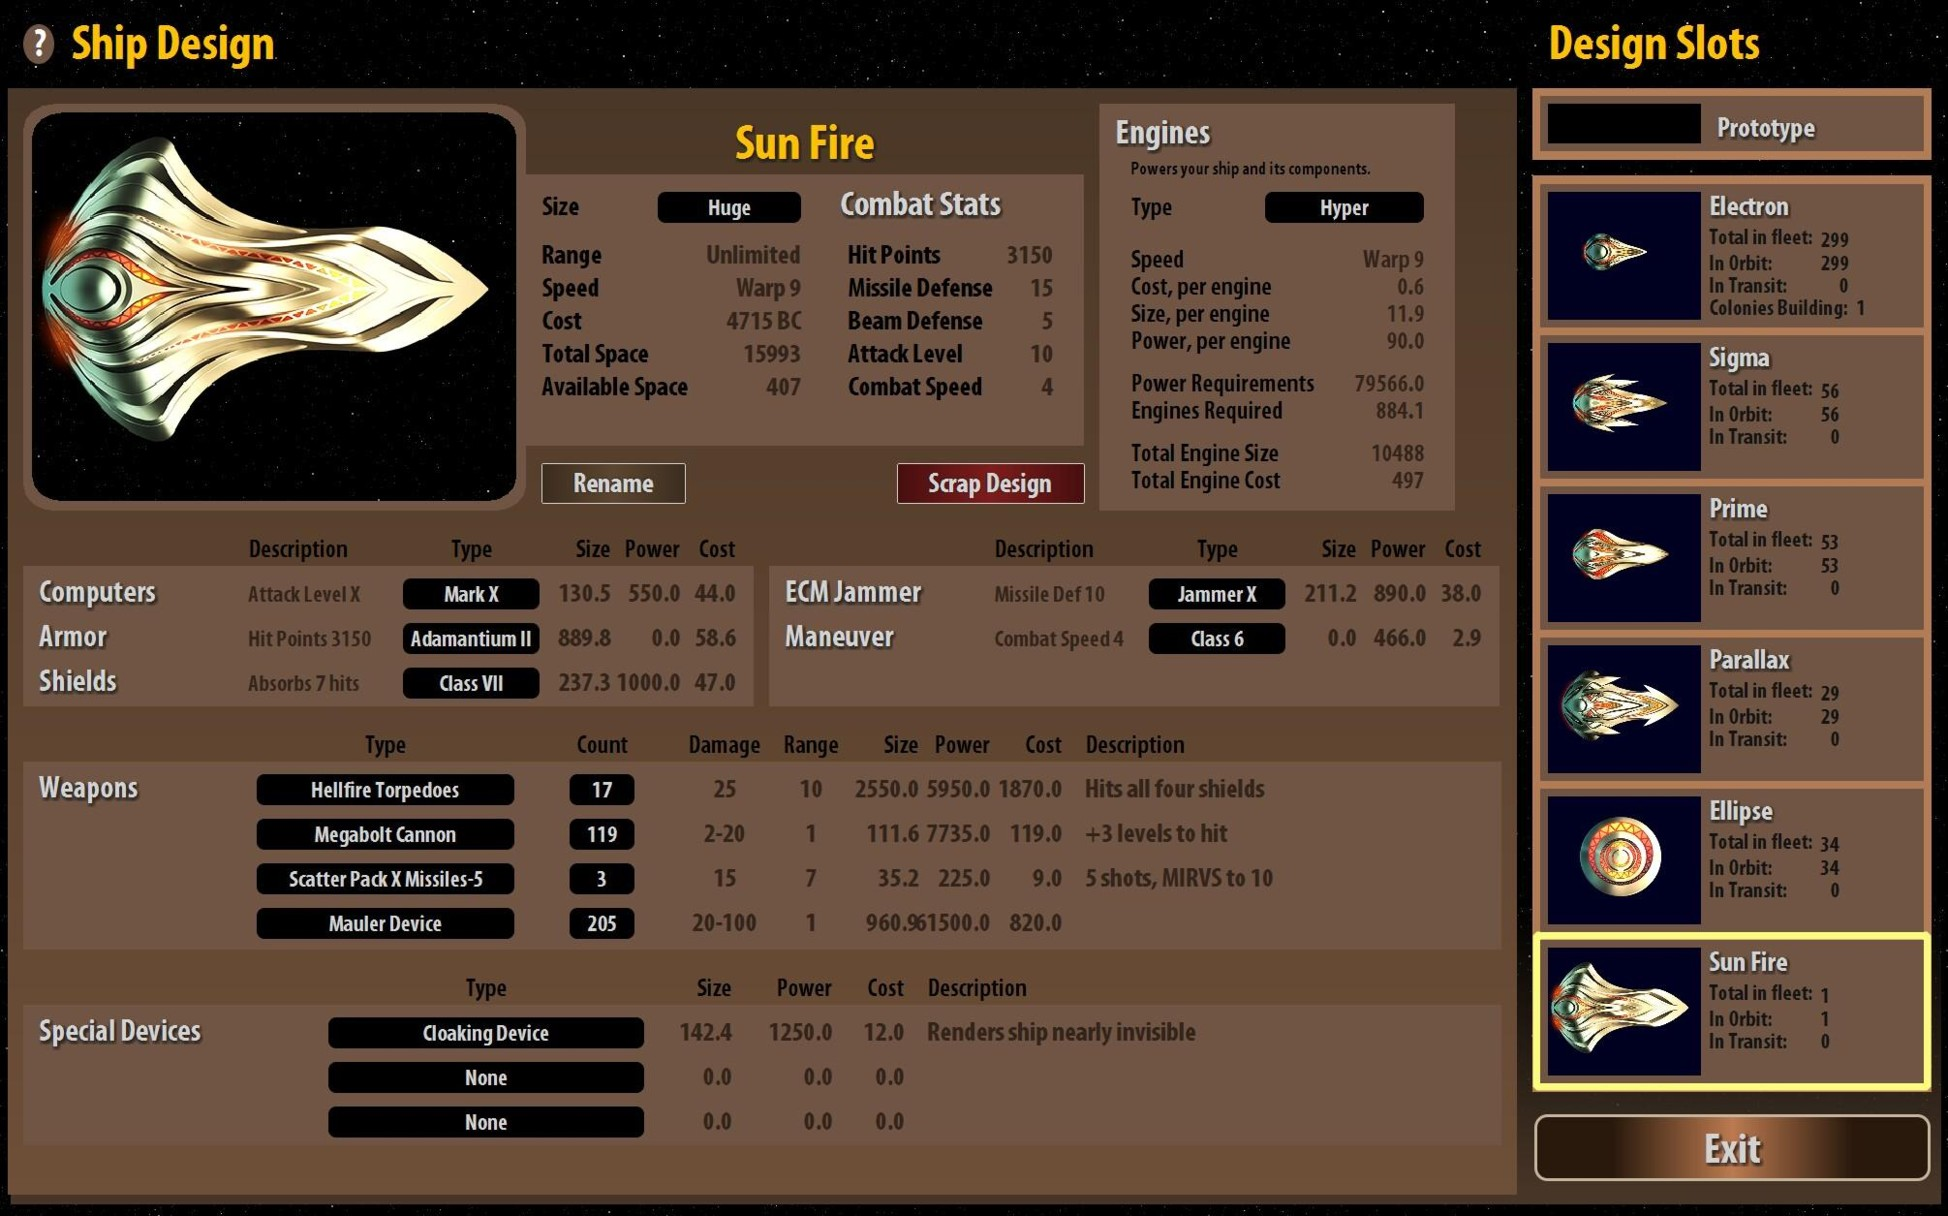
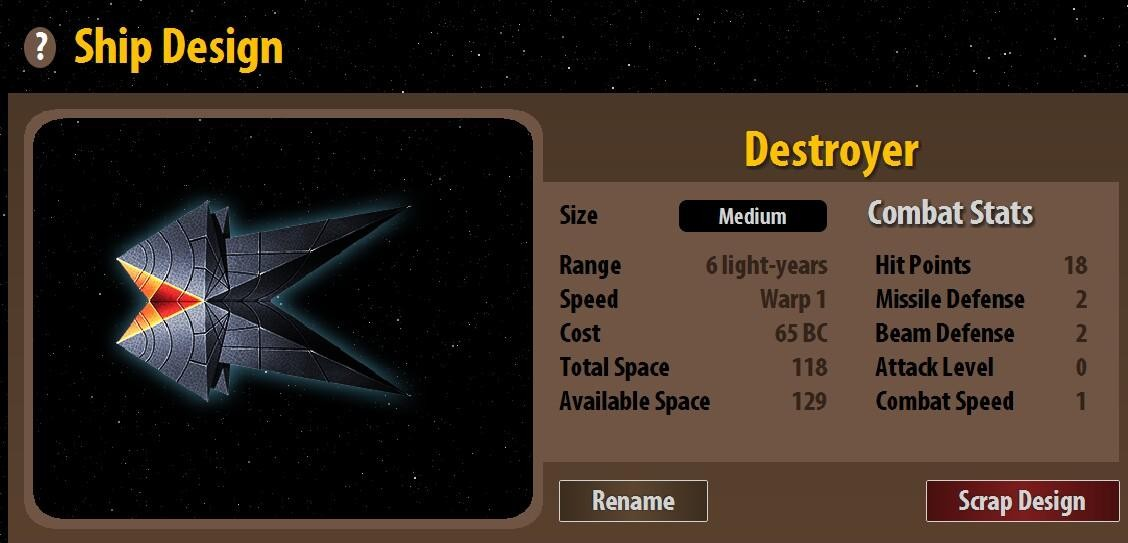
Your first step is deciding the size of your ship, which will determine its base combat stats. As you set a small, medium, large, or huge hull, you'll see the stats update. Range is a fixed value based on your fuel cell technology. Speed will be determined by your engines, which are set in the Engines section. Cost is an ongoing tally of the design's total cost in BC, which will be paid by however much the constructing colony has allocated to its Ships slider. Total Space is the running tally of all the ship's components, whereas Available Space is how much space remains for more components. Note that every level of Construction technology level adds 2% additional space to each hull size.
Hits points will be determined by a combination of the ship's hull size and armor type (see 4.2.5. Components for more information on armor). The base values for Missile Defense and Beam Defense are set by the design's hull size. Small hulls have a Missile and Beam Defense value of 3, Medium hulls have a Missile and Beam Defense value of 2, Large hulls have a Missile and Beam Defense of 1, and Huge hulls have a Missile and Beam Defense of 0. Missile and Beam Defense can be boosted by increasing a ship's Maneuver setting, which is capped by the ship's engine types. Missile Defense can be further boosted with ECM Jammers.
4.2.4. Engines
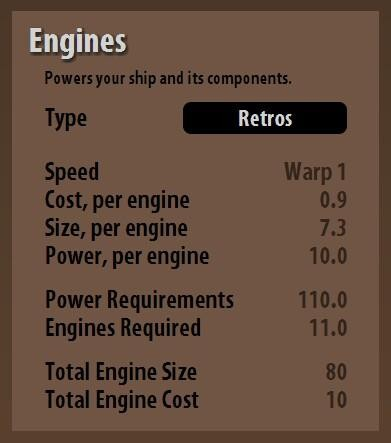
One important difference between Remnants of the Precursors and other games with ship design is that engines are 100% hands-off. You simply choose the engine type you want -- this will almost always be your best available type -- and the designer automatically adds engines to meet your power requirement, taking into account all the other settings on the Ship Design screen and displaying all the relevant information on the Engines panel. It even adds "partial engines", as you can see next to the Engines Required stat. This will routinely be a number with a decimal.
Your ship's engine determines its warp speed, which is how quickly it travels on the main map, measured in parsecs per year. Your ship's combat speed, which is how many spaces it moves during combat, is determined by its Maneuver class. Maneuver class is a setting for how much of the ship's power will be diverted to moving around during combat. Maneuver class is capped by a ship's engine type, and every two points in a ship's Maneuver class give it one point of Combat Speed.
The Cost and Size of an engine take miniaturization into account (i.e. every ten levels of Propulsion technology you have above an engine's tech level reduces its cost by 50% and its size by 25%). Power per engine is a fixed value ranging from 10 for Retro engines, 20 for Nuclear engines, 30 for SubLight engines, and so forth, all the way up to 90 for Hyper Engines. The numbers for Power Requirements, Engines Required, Total Engine Size, and Total Engine Cost adjust dynamically as you add and remove components from your design.
4.2.5. Components
Once you've selected your ship's size and engines, it's just a matter of slotting the components you want. As you install components, your design will automatically add engines as needed to meet your power requirements.
Computers will determine your design's Attack Level, which is compared to the target's missile or beam defense during combat.
Armor will determine your design's hit points. As you research better armor -- starting with titanium, and then progressing through duralloy, zortrium, andrium, tritanium, adamantium, and neutronium -- each of your hull sizes will get more hit points. Note that every type of armor is available in default strength or double strength (double strength is indicated by a II following the name). Double strength armor takes up more space, but gives your ship 50% more hit points. Also note that armor is subject to the benefits of miniaturization (i.e. every ten levels of Construction technology you have above an armor's tech level reduces its cost by 50% and its size by 25%).
Shields mitigate damage according to the strength of the shield. They're subject to the benefits of miniaturization (i.e. every ten levels of Force Field technology you have above a shield's tech level reduces its cost by 50% and its size by 25%). ECM Jammers contribute directly to a design's Missile Defense. The Maneuver Class isn't a component, but a setting to determine a design's combat speed as allowed by its engine type.

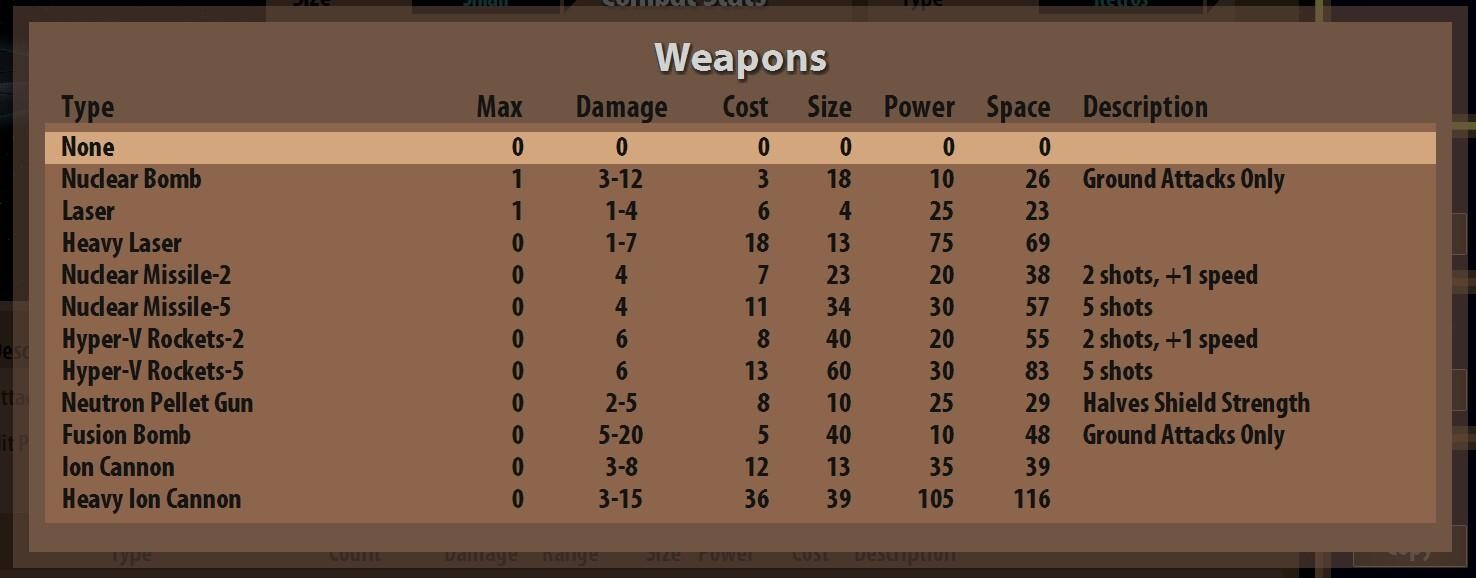
The real fun begins when you get to the Weapons and Special Devices. When you click a slot, a table appears with data for all the components you've researched for Weapons or Special Devices. The tables can be sorted by clicking any column header. The table lists information about the available components, including cost, size, power, and space (remember that cost and size will change with miniaturization). Also, note that size, power, and space are all part of a larger formula. Size is the amount of space the component requires, power is the amount of engine output the component requires, and space is the amount of your design's available space that will be taken up by the component and the increased engines necessary to power the component. Don't get "size" and "space" confused.
The table for weapons also shows the maximum number of that weapon that can be equipped (based on the design's current available space) and the damage the weapon inflicts.
You can find more information about ship components in the Appendix. The different weapons are detailed in tables 10.5, 10.6, and 10.7. Special devices are detailed in table 10.8. Fuel cells and range are detailed in table 10.9. Engines and travel speeds are detailed in table 10.10.
5. How Diplomacy Works
Curl yourself into a tiny ball and play dead. --Ursinathi instructions for how to respond to aggressive Humans
One of the major revisions in Remnants of the Precursors is the diplomacy system. The goal is to open what used to be a black box and make it accessible to players. Now you can see the effects -- right down to the severity and duration -- of everything that impacts diplomacy. Every race will tell you exactly why it likes you or doesn't like you and what you did to make it feel that way. The objective in Remnants of the Precursors is a system you can manage rather than a guessing game (erratic leaders and Nazloks excepted; it's always going to be a guessing game with those guys).
5.1. The relations meter
Every faction's opinion of you is indicated on a relations meter (except for the notoriously cagey Nazloks, who have opted to keep their meters hidden).
This is a bar that represents the range of opinions from positive 100 to negative 100. Although the specific value isn't displayed, the bug along the bottom of the meter indicates your position. Each span of 12 points (the shaded sections represent five points) has its own name to describe a relationship at that portion of the meter. This name is displayed to the right of the meter. A relationship is characterized as Neutral if the meter is between 6 and -6. It improves a step as it reaches these thresholds: 7 Relaxed 19 Amiable 31 Calm 43 Affable 55 Peaceful 67 Friendly 79 Unity 91 Harmony
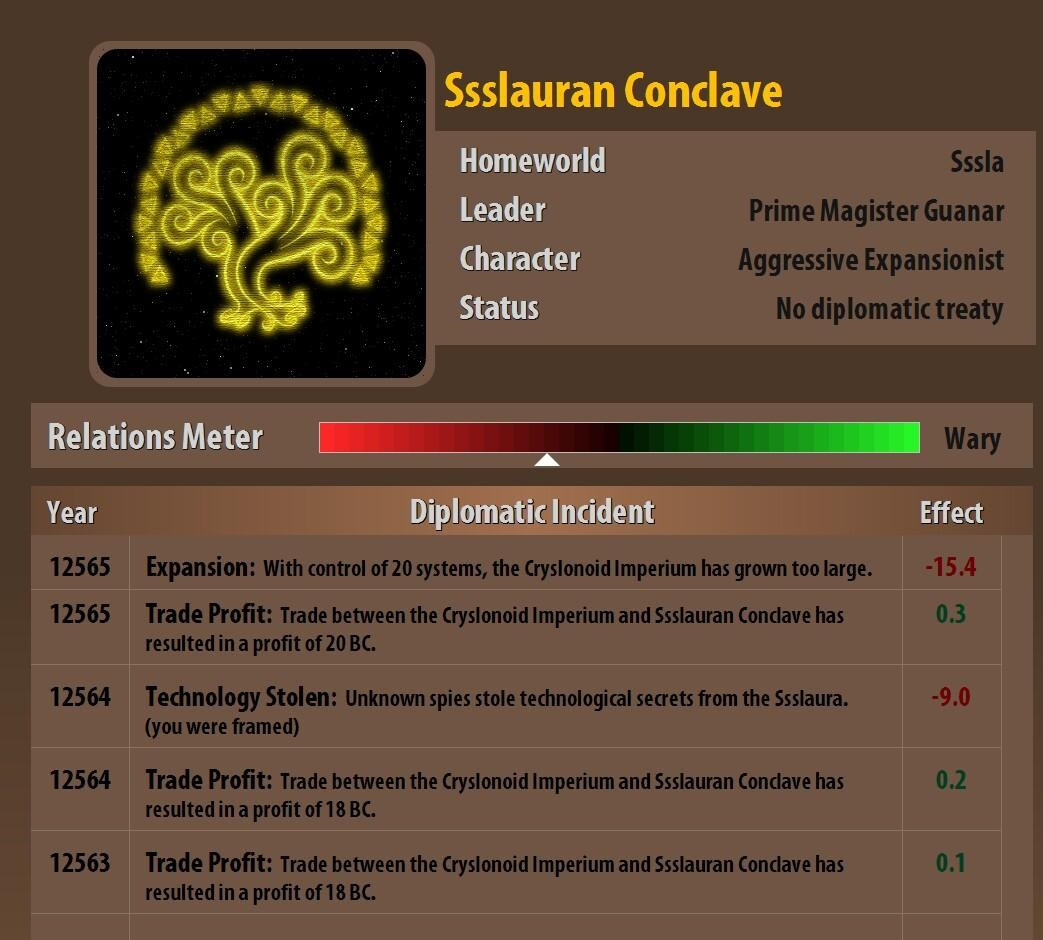
A relationship degrades a step as it drops to these thresholds: -7 Unease -19 Wary -31 Restless -43 Tense -55 Troubled -67 Discord -79 Hate -91 Feud
5.2. Diplomatic incidents
When a game begins, each faction's relationship to the other factions is set at their default values (see table 10.14). As the game progresses, actions are tallied as a list of diplomatic incidents. These incidents will be listed for each faction on the Diplomacy tab of the Races screen. Note that their values usually degrade over time, which means even the grandest gifts or the most egregious wrongs can be forgotten. This means the relationships among factions are constantly trending back to their base value.
Some personalities and races might react differently to the same incident. For instance, the penalty for using biological weapons is reduced when aggressive leaders react, and it’s gone entirely when ruthless leaders react. The Meklonar are more likely to bristle at destroyed factories, while the Humans are more likely to take it personally if you break a treaty. Using Diplomatic Incidents to your benefit means understanding the different races and leader personalities (see 8.2).
Following is a comprehensive list of diplomatic incidents, their effect on the relations meter, and how long before they dwindle to zero. They're grouped below into helpful categories for actions relating to war, heroics, subterfuge, diplomacy, good neighbors, money, integrity, and The Council. War Incidents with a max value vary by the amount of damage the action did. In the case of a space battle, that's ships or missile bases destroyed. In the case of a colony, that's colonists killed.
Declare War: -70 Declarations of war might also trigger a separate oathbreaker penalty. Lasts 10 turns, at which point you've presumably degraded the relations meter even further by trashing their ships and colonies.
Skirmish: -10 max Since the penalty scales by damage, this won't count things like fleeing scouts or quick recon peeks before retreating. Lasts 5 turns.
Attacked Another Faction's Ally: -20 max Lasts 5 turns.
Attacked Another Faction's Enemy: +15 max Lasts 5 turns.
Attacked Colony: -45 max When a colony is attacked by an orbital fleet, the severity of the penalty is based on the number of colonists killed. This is a rare incident that can actually trigger a war. Lasts 10 turns.
Invaded Colony: -40 max Note that this only counts if the invasion failed, because otherwise the incident would be "Captured Colony" (see below). This can also trigger a war. Lasts 10 turns.
Captured Colony: -50 max This goes into effect after a successful ground invasion. It always triggers a war. Lasts 10 turns.
Signed Peace Treaty: +20 The war is over! Or is it? Lasts 10 turns. Heroics Kill Space Monster: +50 You've saved the galaxy! Everyone is appreciative for 30 turns.
Kill REDACTED: +100 If you thought people liked you for killing that Space Monster, you ain't seen nothin' yet! Lasts 50 turns.
Subterfuge Assassinated a Faction's Leader: -50 This triggers immediate war. What did you expect when you assassinated their leader (i.e. drew the Assassination random event)? Lasts 20 turns.
Assassinated An Enemy Faction's Leader: +50 This is applied to each of the factions at war with the faction whose diplomat you assassinated. Lasts 10 turns.
Espionage: -20 When your spies are caught or when you're framed by someone else's spies. First time offenses generally result in a warning. Repeat offenses will trigger war. Lasts 10 turns.
Spy Confession: -20 max If the spy was just Hiding (as opposed to conducting an Espionage or Sabotage mission), the maximum penalty for a confession is -5. Note that xenophobes force a Sabotage confession out of Hiding spies, so your spy networks in xenophobic factions are more likely to kick up a ruckus. Repeat offenses will trigger war. Lasts 10 turns.
Sabotaged Factories: -20 max Hey, we were using those! This lasts 10 turns, unless your target was an industrialist. Industrialists remember their sabotaged factories for 20 turns.
Sabotaged Missile Bases: -30 max They probably have a good idea why you want those missile bases to not be there anymore. Last 20 turns for Pacifists, 10 for all others.
Incited Rebellion: -25 max Last 20 turns for xenophobes who hate rebels as much as they hate aliens. Lasts 10 turns for non-xenophobes.
Evicted Spies Threat: -10 If you tell a spying faction to stop spying, the spies will just go into hiding and the diplomatic meter won't budge. But if you tell a spying faction to remove their spies, this penalty applies regardless of whether they remove the spies. This one lasts 10 turns and doesn't degrade over time.
Diplomacy Financial Aid: +10 max Free money is the best kind of money. The impact of giving away free money isn't based on how much you gave them. Instead, it's based on how much you gave them in proportion to their total economy. Lasts 3 turns.
Technological Aid: +15 max When you give a faction a free technology, they're going to appreciate it. The degree of their appreciation depends on the value of the technology proportional to their economy. Lasts 3 turns.
Exchanged Technology: +5 Regardless of the terms of the trade, you'll enjoy this boost for 3 turns.
Signed Trade Treaty: +5 Romulan Ale is finally legal! The buzz lasts 10 turns.
Signed Non-Aggression Pact: +5 Warm fuzzies all around. A 10-turn honeymoon phase.
Signed Alliance: +5 More warm fuzzies all around, and a second 10-turn honeymoon phase.
Allied with Enemy or At War with Ally: -10 You're allies with them, we're at war with them, so now we don't like you as much. Or vice versa. These crossed diplomatic wires are checked every turn, so think of the accumulated -10s as permanent modifiers.
Good neighbors First Contact: -30 Hello, there. You look funny. Lasts 10 turns.
Over-Expansion: -50 max Whoa, whoa, whoa, your faction is getting too big. Slow your roll. The severity of the penalty scales with the expanse of your over-expansion, so it'll take a long time to get to -50. Allies and treaty members are less bothered, but this drives xenophobes crazy. It's checked each turn.
Military Buildup: -10 max You've been building up ships near our border. You didn't think we wouldn't notice, did you? Lasts 3 turns after the ships are withdrawn. Trespassing: -10 max This only lasts two turns, assuming you depart the premises with your trespassers. The penalty is higher if you're at war or if the offended faction is xenophobic.
Paranoia: -50 max We've concluded you are out to exterminate us because you are currently occupying a planet we originally colonized. We were there first! You can reduce this penalty by abandoning our planet, but we bet you won't, since obviously you plan to just take more stuff from us. We knew you were out to get us! This incident is checked each turn and it will be especially pronounced when dealing with xenophobic leaders.
Money Trade Income: up to +30 max This is based on the amount of income generated by a trade treaty as a proportion of your economy. This is checked each turn and the effect lasts three turns, so you'll likely have three of these bonuses in effect with all your trade partners.
Aid Enemy: -10 max When you give financial (-5 max) or technological aid to a faction's enemy, they'll like you less for 5 turns.
Integrity Oathbreaker: -30 max When you break a treaty, the severity of the penalty depends on the treaty type; the duration of the penalty depends on the offended leader's personality. Erratic leaders remember for 25 turns, Honorable leaders remember forever, and everyone else remembers for 50 turns. Diplomatic leaders double the duration. Ruthless leaders don't care one whit. Note there are additional penalties for each treaty type.
Break Trade Treaty: -5 So you didn't want all that money? Lasts 10 turns.
Break Non-Aggression Pact: -15 Now our ships will shoot at your ships. Lasts 10 turns.
Break Alliance: -30 The alliance is no more! Lasts 10 turns.
Used Bioweapons: -30 max This is a long-memory event, lasting 50 turns. The duration resets with each use of bioweapons. The severity of the penalty depends on the leader's personality, but Ruthless leaders don't mind in the least. Genocide: -50 This penalty is applied for all factions when you exterminate a race, provided those factions have made contact with the victim (if you want to genocide completely isolated races, no one will be the wiser). Basically, this is what happens if you conquer a faction completely rather than just contain them to a colony or two. Also, note that aggressive leaders don't mind genocide because they're aggressive. Why stop conquering at the last colony? Ruthless leaders will apply the penalty, but they'll get over it after 10 turns. Erratics remember for 25 turns, honorables remember for 50 turns, xenophobes remember for 100 turns, and pacifists remember forever.
The Council Voted For in the Galactic Council: +25 You like us, you really like us! Note that when you're voting for an ally, they already knew you liked them, so the bonus is only +5. Lasts 10 turns.
Voted Against in the Galactic Council: -25 If you're already at war with the faction, it's only a -5 penalty. Lasts 10 turns.
Abstained in the Galactic Council: -5 This only applies to your allies, who expected you to vote for them. Instead, you voted for nobody, so they're going to sulk. The hurt feelings last 10 turns.
Final War: -200 The Council has spoken and you have opted not to listen. You have chosen death. Lasts all the turns. This penalty does not degrade.
5.3. Treaties
Treaties are independent from the relations meter. They're related, in that a faction who likes you will be more likely to accept and offer treaties. But just because you and another faction like each other, just because you've worked your way into the green part of the relations meter, that doesn't mean their ships won't fight your ships. You don't have to declare war to fight because the default state with all factions is no treaty at all ("peace" is a temporary conclusion to war, and not an ongoing state). This means ships will battle each other and bombard colonies unless you sign a treaty stipulating otherwise.
5.3.1. Exchange Technology
This isn't a treaty per se, but it does require a check on the relations meter to determine whether a faction will be willing to trade technologies. Each technology's tier and cost are listed to give you a sense of their relative values. Note that technology trading can be restricted to Alliances or eliminated completely in the Advanced Options when you set up a game. See 1.3 for more details.
5.3.2. Trade Treaty
The Trade Treaty is a requirement for any other type of treaty. This opens the door to friendlier relations by cultivating trade profits after an initial period of trade losses. You can see your trade treaties' current profit and intended profit on each faction's Diplomacy tab on the Races screen. Trade income is divided among your colonies proportional to their contribution to your overall production. For more on production, see 2.1.
5.3.3. Non-Aggression Pact
Factions with a Trade Treaty can enter a Non-Aggression pact, which means they won't attack each other's ships or bombard each other's colonies. They also pledge not to sabotage each other's colonies, so if any of your spies get busted, you'll break the Non-Aggression Pact and trigger an Oathbreaker penalty. However, this isn't an invitation for your ships to base with each other while your fleets tour your pact member's colonies. Trespassing penalties still apply.
5.3.4. Alliance
Factions with a Non-Aggression Pact can enter an Alliance, which means they can freely traverse each other's territory, they can use each other's colonies to extend the range of their ships, they'll join any wars alongside their Allies, and they'll share all intelligence about the map and other races. They also pledge not to commit espionage or sabotage against each other; any of those actions against an Ally will trigger the Oathbreaker penalty. An AI Ally will support you in the Galactic Council (unless he's also one of the nominees) and will join any wars you fight.
Alliances have their own under-the-hood rating based on how well the participants are holding up their end of the bargain. If you agree to assist your Ally in a war and then sit back and twiddle your thumbs, he will notice and potentially cancel the Alliance, applying the negative penalty to your relations meter. Just remember that Alliances create expectations.
5.3.5. Unity
When a Galactic Council vote passes and declares a winner, all the factions who accept the vote will be part of a special alliance known as Unity. In addition to all the benefits of an Alliance, they will share technologies with each other. Any races that don't accept the Galactic Council vote will be declared enemies in a "Final War". Unity is an unbreakable state of Alliance and Final War is an unbreakable state of war.
5.4. War
"When is the AI going to declare war on me?" That's what most people want to know when they talk about unpredictable AIs. And as much as it pains us to tell you this, sometimes you simply can't know. In fact, there's an entire personality type for this in Remnants of the Precursors, aptly named erratic. We can't help you with your erratic neighbors, who have a 1% chance every turn of declaring war on someone, regardless of diplomatic standing. But for everyone else, it's relatively easy to know when a war is breathing down your neck. This is because there are three common types of wars in Remnants of the Precursors, and if you know what to look for, you can see them coming. The first type of war is simply based on hatred. When the relations meter is low enough, any faction can declare war. As you're creeping down into the red end of the relations meter, obviously war will follow. You have only yourself to blame if you didn't see that one coming! The second common type of war is based on a precipitating incident: a colony was destroyed, sabotage was attempted despite previous warnings, or maybe you were framed for something you didn't even do. You'll be able to see this coming because you saw the event that caused it. Avoid the event and you would have avoided the war!
The third common type of war is a war of opportunity. Non-pacifist AI factions will attack factions that are weaker and/or isolated. Factions will launch these wars of opportunity even if they're in a Non-Aggression Pact (unless they're honorable, since honorable factions won't break treaties). To prevent wars of opportunity, make sure to keep a fleet built up as a show of strength. You can tell how well you're keeping up on the Status screen under the Races tab; the Fleet Strength box will show any disparities between you and your neighbors.
Beyond the three common types of wars, there are the wars launched by erratic personalities. Furthermore, a random event that can happen once per game will force two factions into war whether they like it or not (see 10.15 for more on random events).
The AI will launch wars like a human player. Which is to say, it won't always declare war before sending out an attack fleet or invasion. Instead, it will quietly assemble its forces, send them to attack your planet without warning, and then let the war just happen naturally. In these cases, scanners are your friend. It's hard to launch a surprise attack across scanned space.
6. How Spies Work
"An army without spies is like a Human without eyes or ears." --Sun Tzu, Human military expert
Many players think of spying as the distasteful bits of business on the fringes of diplomacy, but stopping short of war. Spying in many games is optional. But in Remnants of the Precursors, everybody does it, because espionage is your eyes and ears. It's how you see the galaxy and how you listen for incoming attacks. In later 4Xs, your eyes and ears will be lone scouts trotting around the map to extend your visibility. Remnants of the Precursors gives you scouts to suss out planets and fleets, but it abstracts the scut work of drawing another faction's borders, getting the lay of the land, and monitoring other factions' activities.
As long as you have a spy network installed with a faction, you'll be able to see their colonies on the map and their statistics on the Races screen. The Status tab in particular relies on having an active spy network. This is how you can compare fleet strength, population, technology, planets, production, and total power. This is how you know if you're winning, losing, or somewhere in between.
6.1. Spy networks
You'll manage a spy network for each faction from the Intelligence tab of the Races screen. The Intelligence tab shows information for the faction you've selected from the column on the right side of the screen. The top selection will always be your faction. From here, you can use the Manage Spies button to control all your spy networks at once. For more about the interface, refer to 1.6.5b.
If you select another faction from the column on the right, your Intelligence Report will show the report's age (i.e. how long since you've had a spy network installed, or "current" if you currently have a spy network installed), the current and intended number of spies in the network, and a spending slider that will reserve up to 10% of all colonies' spending to buy new spies until the network is filled with the intended number of spies.
To establish a spy network with a faction, you must have a colony within range of one of its colonies (i.e. you must be able to reach it with a ship that has your best fuel cells and Reserve Fuel Tanks, so fuel cell range +3). Make sure the number next to Spy Networks is set to at least one (set this to zero to deactivate a spy network) and set the slider bar to allocate spending to "buy" new spies. Each click of the slider bar is a half of a percent, with a full slider bar representing 10% of your colonies' production.
The first spy in a network costs 25BC plus your Computer technology level (this level also determines your spy's efficacy, so think of it as merit-based pay; see 3.1.4 for more on technology levels). The second spy in a network costs twice the amount of the first spy. The third spy costs twice the amount of the second spy, and so on. Each successive spy is doubled in price.
Once you've "bought" the intended number of spies, spending stops. Spy networks don't incur any maintenance costs, so as long as your spies don't die, they won't consume any of your colonies' production. But as spies are captured and killed -- that's the main reason the report with the spy icon will pop up from time to time -- replacements will automatically be purchased with whatever spending you've allocated. So while it's relatively inexpensive to maintain spy networks with multiple factions, it can be a huge resource drain to maintain large spy networks with high turnover rates.
Which is a perfectly viable way to fight another faction! If you're forcing them to replace their spies, you're forcing them to spend production just as surely as if you were knocking their ships out of the sky. And if you can afford it better than they can, you're winning the exchange.
6.2. Hide
The default action of a spy network is Hide. Spies who are hiding are less likely to be captured. This can be changed from the Manage Spies button on your faction's Intelligence screen or the Spy Orders box on each faction's Intelligence screen. Whenever orders are indicated in red text, you're being warned that the orders will put your diplomatic state at risk. Note that you can shut down a spy network entirely by setting the number of spies to zero.
6.3. Espionage
When you change a spy network's orders to Espionage, the spies will attempt to steal a technology you don't know from the target faction. As soon as one of your spies succeeds, you'll be able to choose the category of technology to steal. Espionage puts your spies at risk and violates Alliances. Whenever your spy network's orders are indicated in red text, a warning will indicate why those orders put your diplomatic state at risk.
6.4. Sabotage
When you change a spy network's orders to Sabotage, the spies will attempt to destroy factories, destroy missile bases, or incite a rebellion. As soon as a spy rolls a success, you'll be able to choose which type of sabotage he conducts. The number of factories or missile bases destroyed will be based on how well the spy rolled, and it will be boosted by your Weapons technology level. When you incite rebellion, you'll build up the colony's chance of rebelling until it finally turns hostile to its previous owner (the result is similar to the Rebellion random event). Sabotage puts your spies at risk and violates Non-Aggression Pacts and Alliances. Whenever your spy network's orders are indicated in red text, a warning will indicate why those orders put your diplomatic state at risk.
7. How Combat Works
Ensign, bring me my quartz-flecked pants! --punchline to a popular Cryslonoid joke about the Battle of Dschubba
7.1. Space combat
When ships from different non-Allied factions end their turn at the same star, and at least one of the ships has weapons, combat occurs. Battles are fought on a grid, with each type of ship arranged into its own stack. The number under the stack, preceding the ship's name, is the number of ships in the stack. Small yellow numbers indicate the number of missiles in a stack. The attacker begins on the left of the screen and the defender begins on the right of the screen. If there's a planet at the star, it will be represented in the center of its side of the screen. The number preceding the planet's name is the number of missile bases present. A battle might include a random number of asteroids, which are impassable but will disappear over time.
Each ship in combat has a tactical overlay. Across the top of a stack will be the top ship's hit points. The number in the top right is the number of ships in the stack. The numbers along the side of the stack are color-coded. Yellow is shields, red is attack level, dark blue is missile defense, and light blue is beam defense. Mousing over a stack or colony will bring up a tooltip with all of its stats, assuming you know them. You won't see the stats for enemy ships until they've been scanned.
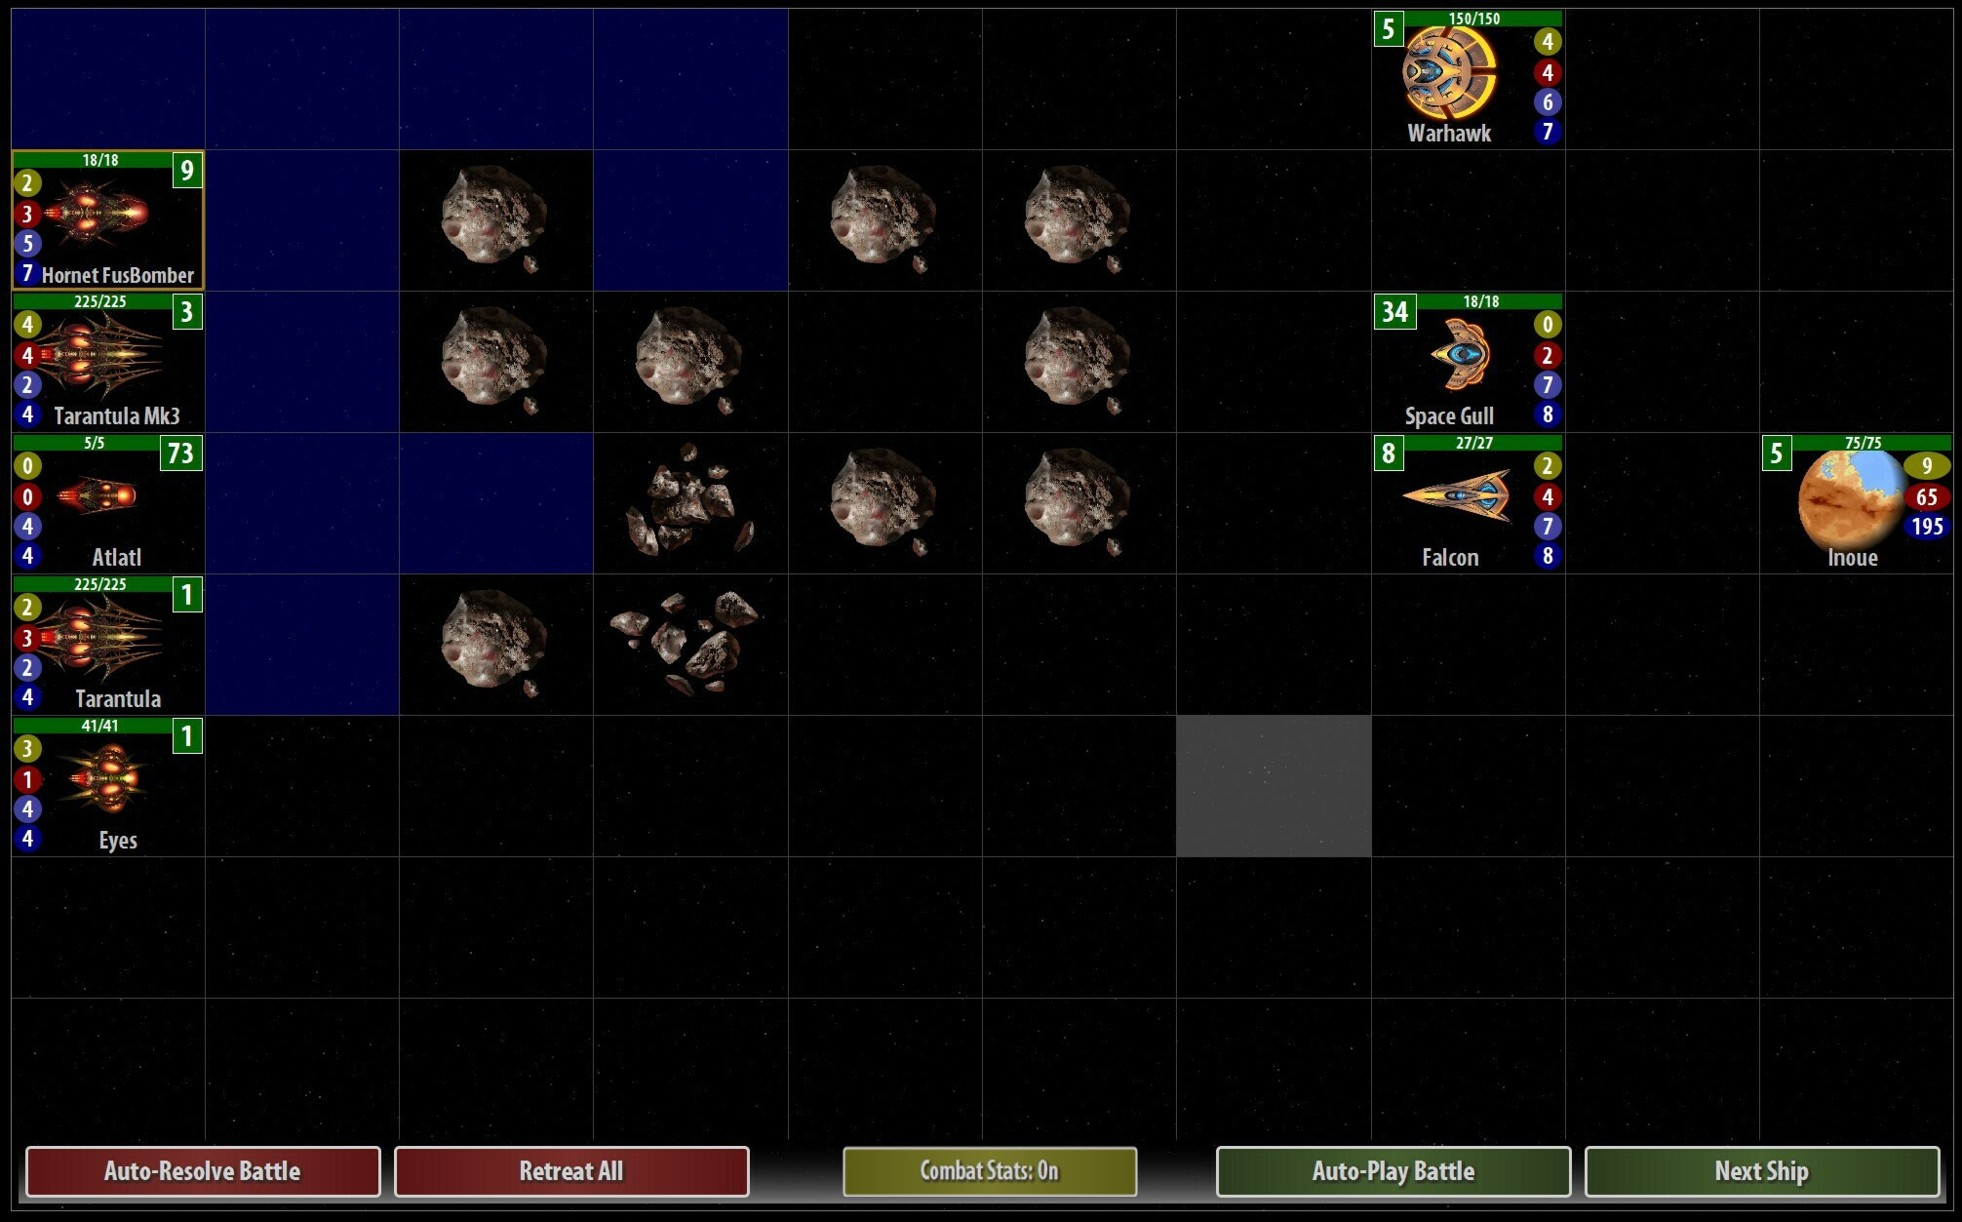
Ships move in order of initiative, a number determined by adding the ship's maneuverability class and attack level (determined by its engines and computer, respectively). All Altairi ships get +3 to initiative, and all Fiershan ships get +4 to initiative.
During its turn, a ship can move its combat speed in spaces. Ship designs cannot stack with each other, and ships can't pass through hostile ships, asteroids, or planets. A ship can opt not to move. It can also use its movement to retreat from anywhere on the map. Retreating ships will return to the closest friendly colony if their side loses the battle. Note that retreating ships will not leave if their faction wins the battle. As long as you're victorious, you can freely retreat unarmed or vulnerable ships without breaking up your fleets.
Also during its turn, a ship may attack with each of its weapons, as well as use any special devices. Weapons are either beams, missiles, or bombs. Beams and bombs can typically only attack adjacent targets. Enemy ships can only be attacked with beams and missiles, but all weapons types can attack colonies and their missile bases. Bombs and non-torpedo missiles do full damage against colonies and missile bases, but beam weapons and torpedoes only do half damage against colonies and missile bases.
Attacks are resolved by comparing the attacker's attack level with the defending beam defense or missile defense, depending on the weapon. Attack level is determined by a ship's computers. Fiershan ships get +4 to all attacks. Beam defense is determined by the ship's size and maneuverability. Missile defense is determined by the ship's size, maneuverability, and ECM jammer. Altairi ships get +3 to all defenses. When a beam or bomb hits, it inflicts variable damage based on a die roll. When a missile hits, it does a fixed amount of damage.
Shields mitigate all types of damage unless otherwise specified (e.g. Neutron Pellet Guns halve shield strength). A ship's hit points are determined by its type of armor. When a ship's hit points are reduced to zero, it's destroyed. Any excess damage is lost unless otherwise specified (e.g. Tachyon Beams apply excess damage to the next ship in the stack).
For more on ship weapons and components, see the Appendix and Chapter 4.2 on ship design.
7.2. Ground combat
Ground combat is a simple matter of flying transports to an enemy colony. Assuming the transports aren't intercepted by enemy fleets or missile bases, they'll initiate ground combat. But if they are intercepted -- maybe you lost the battle to remove a defensive fleet just as your transports are arriving, or maybe you're just throwing overwhelming odds against light defenses -- Remnants of the Precursor runs an under-the-hood battle between the transports and whatever defenders intercept them. First, the game determines how many rounds combat will last based on your transports' speed, which is in turn based on your best warp technology. Then it determines how hardy your transports are, based on your best armor technology. Finally, it factors whether you have Combat Transporters, which gives every transport a 50% chance of skipping any combat altogether (reduced to 25% if you're attacking a faction with Subspace Interdictors).
This abstracted battle then applies to your transports whatever damage the defenders can output for however many rounds the battle lasts. Regardless of the weapons actually being used, this damage uses the same calculation as streaming weapons. This means after each transport is killed, the excess damage carries over to the next transport (normally, excess damage after a kill is lost). Any transports that survive the gauntlet are advanced to ground combat.
This means it's possible to overwhelm a target's defenses with invaders. It also means your own colonies can be invaded even if you have defenses in place. That lone missile base or those couple of fighters aren't going to hold back a determined invasion. To calculate the odds of an invasion fleet getting past defenses, compare their damage values of the defenders to the transport stats in Table 10.16 in the Appendix. Ground combat is resolved automatically. Each faction takes turns rolling a d100 to see if they kill an enemy colonist. This continues until there's only one faction surviving. The odds of a successful hit are based on your ground troops' equipment, including armor from the Construction category and handheld firearms from the Weapons category. Ursinathis add +25 to their ground combat rolls.
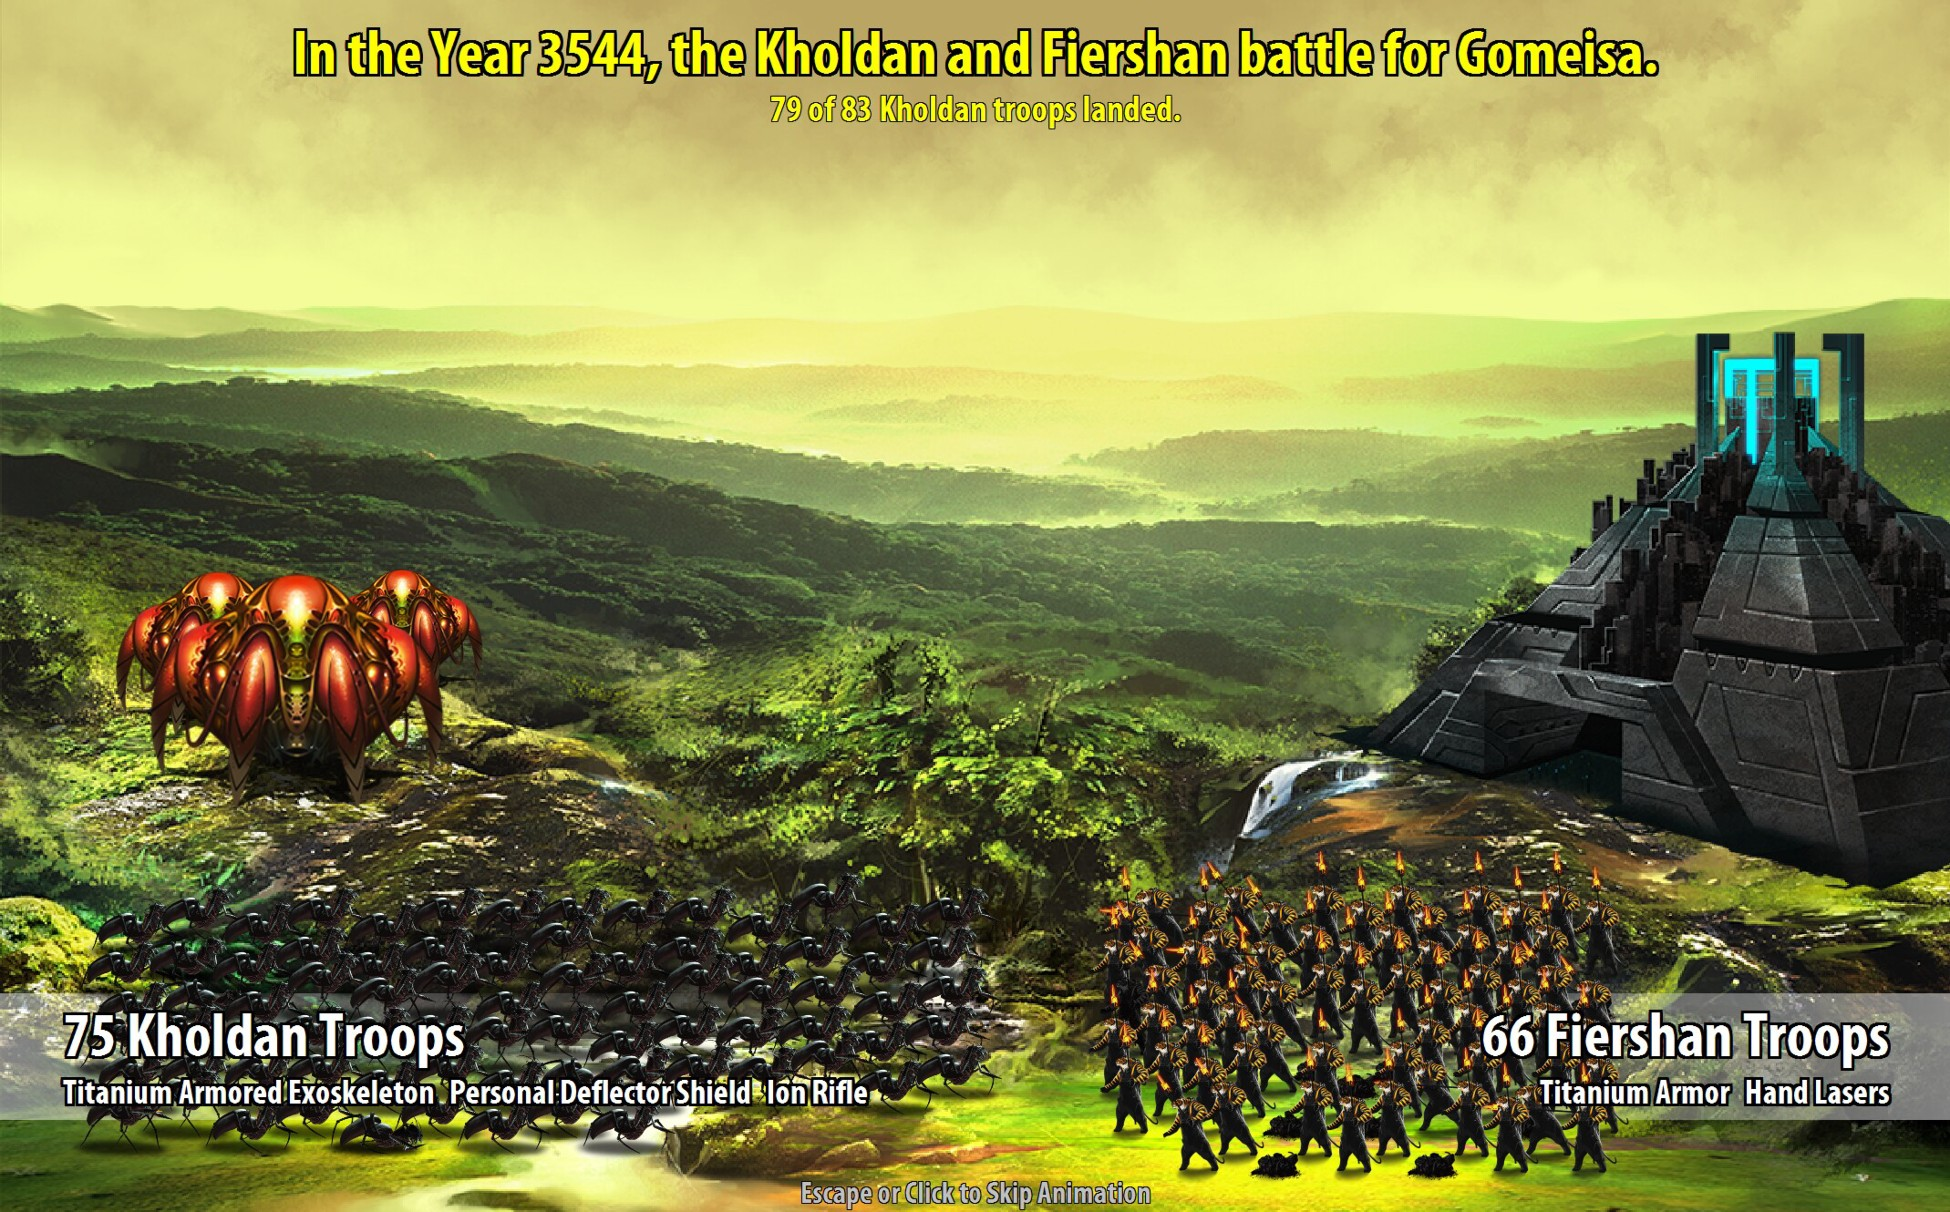
8. How Races Work
"A fleet warps on its digestive chambers." --Kholdan Wardrone Ixilitil
Remnants of the Precursors includes ten playable races that mostly play by the same rules. However, there's plenty of asymmetry among the races, primarily in the form of a primary bonus for each race. For instance, the Altairis fly better, the Ursinathis fight on the ground better, the Nazloks spy better, and so on. Each race also has unique cost modifiers for different technology categories and unique diplomatic stances with other races. AI leaders of each race are weighted heavily towards specific personalities and objectives.
8.1. Racial bonuses and penalties
Here are the bonus rules for each race, along with a breakdown of their default diplomatic states and their most likely AI personality and objective.
The Altairis get +3 defense and +3 initiative for their ships. The Altairis pay 40% less to research Propulsion technologies and 25% more to research Force Field technologies. Their default diplomatic state with the Fiershans is Restless. Their default diplomatic state with the Nazloks, Kholdans, and Ssslauras is Unease. Their default diplomatic state with Humans is Relaxed. Altairi leaders tend to be honorable and militarist.
The Ursinathis get +25 to ground combat. The Ursinathis pay 20% less to research Construction and Weapons technologies and 25% more to research Computer technologies. Their default diplomatic state with the Nazloks and Fiershans is Unease. Their default diplomatic state with Humans is Relaxed. AI Ursinathi leaders tend to be aggressive and ecologist.
The Nazloks pay half price for spies. Their spies get a +30 bonus when rolling for mission success. Nazlok attempts to capture enemy spies get a +20 bonus. Nazloks never reveal their Relations Meter to other races. The Nazloks pay 20% less to research Computer technologies. Their default diplomatic state with everyone except Humans is Unease. Their default diplomatic state with Humans is Relaxed. AI Nazlok leaders tend to be aggressive and diplomatic.
Humans earn a 25% boost to trade treaty income. Their diplomatic bonus for favorable actions is doubled. They gain a permanent +5 modifier on the Relations Meter with all factions. The Humans pay 40% less to research Force Field technologies and 20% less to research Planetology and Propulsion technologies. Their default diplomatic state with everyone is Relaxed. AI Human leaders tend to be honorable and diplomatic.
Kholdan colonists generate twice as much production as non-Kholdans. The Kholdan pay 40% less to research Construction technologies and 25% more to research Propulsion technologies. Their default diplomatic state with the Altairis, the Nazloks, the Fiershans, and the Ssslauras is Unease. Their default diplomatic state with Humans and Cryslonoids is Relaxed. Kholdan AI leaders tend to be xenophobic and industrialist.
Meklonars can operate two additional factories per colonist, and they don't have to pay refit costs when they research Improved Robotic Controls to allow their colonists to operate additional factories. The Meklonar pay 40% less to research Computer technologies and 25% more to research Planetology technologies. Their default diplomatic state with Nazloks and Ssslauras is Unease. Their default diplomatic state with Humans and Cryslonoids is Relaxed.
Fiershan ships get +4 attack and +4 initiative for their ships. The Fiershan pay 40% less to research Weapons technologies and 25% more to research Construction technologies. Their default diplomatic state with the Altairis is Restless. Their default diplomatic state with the Ssslauras is Wary. Their default diplomatic state with Ursinathis, Nazloks, and Kholdans is Unease. Their default diplomatic state with Humans and Cryslonoids is Relaxed. Fiershan AI leaders tend to be ruthless and militarist.
Mentarans get a 50% boost to research. Whereas other factions have a 50% chance for each technology to be in their tech tree, Mentarans have a 75% chance for each technology to be in their tech tree. The Mentarans pay 20% less to research all technology categories. Their default diplomatic state with Humans is Relaxed. Their default diplomatic state with the Nazloks is Unease. Mentaran AI leaders tend to be pacifist and technologist.
The Ssslauras grow population at twice the normal rate. The Ssslaura pay 40% less to research Planetology technologies. Their default diplomatic state with Fiershans is Wary. Their default diplomatic state with Altairis, Nazloks, Kholdans, and Meklonars is Unease. Their default diplomatic state with Humans is Relaxed. Ssslaura AI leaders tend to be aggressive and expansionist.
The Cryslonoids grow population at half the normal rate, but they don't generate waste and they can colonize all environments without having to research Planetary technologies. The Cryslonoids pay 20% less to research Computer technologies and 25% more to research all other technologies. Their default diplomatic state with the Nazloks is Unease. Their default diplomatic state with Humans, Kholdans, and Meklonars is Relaxed. Cryslonoid AI leaders tend to be xenophobic and expansionist.
8.2. AI personalities
An AI leader's personality will affect how it handles diplomacy and interaction with the other factions. Every race is weighted toward a specific personality, but is by no means limited to that personality.
Honorable (Altairi, Human) Honorable leaders place great importance on the value of treaties. Other races will eventually forgive you for breaking a treaty, but honorable races will see it as a permanent stain. If they are caught spying in your faction, they will generally back off if threatened. Allying with an honorable leader can be a double-edged sword. While they will never betray you, they will expect you to assist them in their wars. They are the least likely to retreat from the defense of allied planets.
Ruthless (Fiershan) These are the counterpoint to honorable leaders. They do what is necessary to achieve their goals, even if that means breaking oaths, dropping a few bioweapons, genociding a few races, or even just exiting a battle to fight another day. To their credit, they will not hold it against you if you do the same. They see the complete extermination of factions as a necessary evil. The best way to ingratiate yourself to a ruthless race is to never display weakness and to fight their enemies alongside them.
Pacifist (Mentaran) These leaders are more willing to enter into non-aggression pacts. They're also quicker to give in to threats. While they will never start a war of opportunity, they will never forget when another race is completely wiped out (the genocide event eventually times out for other personalities; see 5.2 for more information on Diplomatic Incidents and the Relations Meter). Pacifists will more quickly retreat from battle, or tire of war if you strike at their population centers. If you are lucky enough to find yourself neighboring a pacifist race, it is generally safe to turn your attention elsewhere.
Aggressive (Ursinathi, Nazlok, Ssslaura) Aggressive leaders are the opposite of pacifists. They honor treaties and they find bioweapons distasteful, but they abhor weakness and are less likely to retreat from a battle. They see the elimination of factions as a natural consequence of struggle and shrug their shoulders at it. As with ruthless leaders, the best way to get along with aggressive races is to fight alongside them, but maybe leave the bioweapons at home. It is possible to win with the support of aggressive neighbors; just never turn your back on them.
Xenophobic (Kholdan, Cryslonoid) These leaders prefer isolation. They are less interested in making treaties and have a great distrust for spies. Not the spies they have in your faction, of course. They need those to keep tabs on you. But if they find your spies in their faction, they will react more angrily. If you capture a system that belongs to a xenophobic race, their paranoia modifier is much greater. They have long memories for genocide, although perhaps not as long as pacifists. Erratic (Meklonar) Erratic leaders are unpredictable. They may make treaties and then declare war on you just because. They're likely to remain neutral except for their tendency to randomly wage war. For obvious reasons, the player faction is considered to be erratic by the AI.
8.3. AI objectives
An AI's objective will affect how it plays the game. Every race is weighted toward a specific objective, but is by no means limited to that personality.
Militarist (Altairi, Fiershan) Militarists value the projection of strength and will build larger fleets than most other factions. Even pacifists can be militarists as their fleets can be seen as a deterrence against attacks: peace through strength! Militarists will become weary of war when their fleets are devastated by conflict.
Ecologist (Ursinathi) Ecologists focus on perfecting their planets with terraforming. They're especially horrified at the use of bioweapons. They value planetology technologies and are more likely to research them and trade for them.
Diplomat (Nazlok, Human) Diplomats will doggedly use treaties to avoid conflict and achieve their goals. They take a particularly negative view of factions that break their oaths by violating treaties.
Industrialist (Kholdan, Meklonar) Industrialists value their manufacturing capacity and will prioritize technologies towards that goal. Sabotage is a big no-no to an industrialist, and bombing their industrial base is the most effective way to demoralize them during war and push them into a favorable settlement.
Expansionist (Ssslaura, Cryslonoid) Expansionist leaders prioritize propulsion technologies to expand their faction as quickly as possible. They are more likely to start a war of opportunity against a weaker faction. Capturing their systems is the quickest way to force them into peace.
Technologist (Mentaran) Technologist leaders despise espionage and will make technology trades whenever possible. They prize artifact planets more than other races.
9. FAQ
"We already know all this." --Mentaran reaction to this FAQ
Q: I can't colonize the planet type I just researched! A: Many of the technologies unlock new Special Devices for your ships. This is how the Planetology technologies work. Instead of simply making less hospitable planets magically eligible for your regular ol' colonists, they instead give you a new Special Device for planets you can't normally settle. For instance, Controlled Dead Environment will unlock a Dead Colony Base you can equip to a ship's Special Devices slot. So to colonize a planet with a Hostile environment, you need to build a colony ship with the appropriate colony base in one of its Special Device slots. Note that there's a hierarchy of hostility! Any colony base can settle its environment type, as well as any less hostile environment types. The hierarchy of hostility is as follows, from least hostile to most hostile: barren, tundra, dead, inferno, toxic, irradiated. Which means the Irradiated Colony Base is the Mother of All Colony Bases, because it can set up shop anywhere it can land.
Q: My colonies are growing too slowly! A: A colony begins with two colonists and no factories. In the beginning of the game, this means it will generate 1BC, which will take 10 turns to build a single factory. At which point it produces 2BCs. You can transfer funds from the treasury, but the per-turn limit is double the planet's innate production. So unless you want to wait for natural population growth, think of colonization as a two-step process. Step one, send the colony ship. Step two, transport more colonists from someplace else. Use the Send Transport buttons at a more populous colony to send more colonists and boost your new colony's production.
Q: These sliders are a nightmare! How am I supposed to manage all the sliders for all my colonies? A: Believe it or not, colony management in Remnants of the Precursors is pretty hands-off. The sliders are there to let you tweak production, but your faction will do just fine if you never tweak a single slider. Once a colony is underway, it will auto-adjust its sliders to build the maximum number of factories, then build defenses, and finally put all its production into research, keeping its ecology clean and its population growing all the while. You'll only ever have to interrupt it when you want to build ships. Also, if you want to adjust spending for large numbers of colonies, the Colonies screen supports selecting and managing multiple colonies at once.
Q: Why can't I see the whole tech tree? A: Because tech trees are dynamic, looking ahead to see which technologies will be available would be cheating! But if you'd like to look at all the possible technologies, you can pore over the entire tech tree in the Appendix (table 10.4) and be jealous of how much the Mentarans will get compared to everyone else.
Q: How do I know what kind of ships to build? A: The Military tab on the Races screen shows you exactly what you'll be fighting. Design accordingly! There won't be a lot of design and counter-design in the early game, since no one has learned any cool technologies yet. So just suck it up and stick as many boring lasers as you can fit onto your medium hull. As the game progresses, you'll get more cool toys. But as the game progresses even further, design is less about picking what's cool and more about picking what will directly counter the ships you're fighting. Once you know what you're trying to kill, the design should fall into place.
Q: Okay, but how do I upgrade my ships? A: You don't. Instead, you have to make a new design when you want to incorporate your newly researched components. That original scout with Retro Engines is never going to have a Nuclear Engine. If you want a scout with Nuclear Engines, you'll have to design it. It's the same with weapons, armor, shields, battle computers, and so forth. (Note that fuel works differently. All ships automatically benefit from the most advanced fuel you've researched.)
Q: How do I make more than six ship designs? A: You don't. This is a fundamental part of strategy in Remnants of the Precursors! A faction can only ever have six designs, and as you've probably discovered if you're reading this, you're going to fill those slots quickly.
Q: How do I scrap a design without destroying all ships of that type? A: You don't. If you want to free up a design slot, you're going to have to destroy all the ships in that slot. The good news is you're going to get a refund on the ships you destroy. The bad news is the refund is only 25% of what you paid. As your game goes on, you'll have to carefully balance when you upgrade old ships.
Q: How do I scrap a single ship? A: You don't. You scrap that entire design. Alternatively, just fly any ships you don't want into the maw of the nearest Space Amoeba.
Q: How do I change my fleet's destination after it's in transit? A: You don't. At the start of the game, you have no way to contact a fleet in hyperspace, so you have no way to give it new orders. Which is why you "deploy" fleets in Remnants of the Precursors instead of "move" them. Once a fleet has been told where to go (i.e. deployed), it's out of your hands until it gets there. However, if you research Hyperspace Communications in the Computers technology area, you can freely change a fleet's destination even after it's in transit.
Q: But I misclicked! A: Any newly launched fleets can be recalled as long as you haven't hit Next Turn yet. Select the errant fleet and click the Undeploy Fleet box. Whew.
Q: These colonies take forever to grow! This game is boring. A: Colonies in Remnants of the Precursors are not fire-and-forget. They need to be cultivated, first by sending population, and sometimes by sending money. You can send population with transports and you can send money by going to the Colonies screen and using the Transfer Funds From Treasury button. Otherwise, yes, these colonies do take forever to grow.
Q: Holy cats, am I really supposed to shuffle population around manually to keep my colonies at their optimal growth rate? Really? I thought you said something about reducing micromanagement! A: Population distribution is a fundamental part of how to win Remnants of the Precursors, but it doesn't have to be as painful as it was in Master of Orion. Forced mass migration has never been easier, thanks to the Fleets screen. From the Fleets tab at the bottom of the main screen, you'll find an option to Select Systems on the main map. Click the Select All button, then click on a colony in need of colonists. Now you'll see a handy sortable list of all your colonies, arranged by proximity and conveniently showing their population and capacity. From here, it's simple to call forth as many transports as you want from as many or as few colonies as you want, and you can easily see which colonies can best afford to spare a few souls. I bet you wished you could do that in Master of Orion!
Q: Hmm, I keep accidentally clicking fleets when I'm trying to click colonies, and vice versa. A: The shaded radius around each star doesn't just mark a distance of one parsec; it's also the clickable area to select the colony. We can't help you if you keep missing the triangles for your fleets, but remember that you don't have to click on a star to select a system: the shaded area is close enough for horseshoes, hand grenades, and Remnants of the Precursors colonies.
Q: Does the manual for the original Master of Orion apply to Remnants of the Precursors? A: Mostly! It's a solid overview of the original game, but sometimes more vague than we would have liked. Also, we would have broken down some of the concepts differently and we would have arranged it to be more accessible to 21st century readers. Which is why we've written this manual instead of just telling you to Google a link to the original manual.
Q: Does Prima's official strategy guide for Master of Orion apply to Remnants of the Precursors? A: Mostly! Alan Emrich and Tom Hughes' exhaustive tome is an excellent resource, but keep in mind that some elements of the strategy guide are based on loopholes or exploits that have been addressed in Remnants. In fact, entire sections of the strategy guide's tips on combat and diplomacy are obsoleted by changes made in Remnants of the Precursors.
10. Appendix/Tables
"Information wants to be ours."
--Nazlok Cyphermaster Morrell
10.1. Stars by color and likely planet type
Yellow             Terran planets
Red                Poor planets
Neutron (purple)   Rich planets
White              Hostile planets
Blue               Hostile and rich planets
Orange             Wide variety
10.2. Planetary environments
                           PLANETOLOGY
ENVIRONMENT DEFAULT SIZE       TIER
    Terran        85-100
    Jungle        75-90
    Ocean         65-80
     Arid         55-70
    Steppe        45-60
    Desert        35-50
   Minimal        30-50
  Barren (H)      30-50         1
  Tundra (H)      20-50         2
   Dead (H)       20-50         2
  Inferno (H)     10-40         3
   Toxic (H)      10-40         3
 Irradiated (H)   10-40         4
10.3. Planetary traits
Hostile           x.5 population growth
Fertile           x1.5 population growth
Gaia              x2 population growth
Artifact          x2 research
Rich              x2 ship, base, and factory production
Ultra-Rich        x3 ship, base, and factory production

Poor              x.5 ship, base, and factory production

Ultra-Poor        x.3 ship, base, and factory production
10.4. Tech tree
Tier   COMPUTERS                       CONSTRUCTION                 FORCE FIELDS                  PLANETOLOGY                         PROPULSION                 WEAPONS


1      ECM Jammer Mk I                 Improved Industrial Tech 9   Class II Deflector Shields    Improved Terraforming +10           Hydrogen Fuel Cells        Hand Lasers


       Deep Space Scanner              Reduced Waste 80%                                          Controlled Barren Environment       Deuterium Fuel Cells       Hyper-V Rockets


       Battle Computer Mk II                                                                      Improved Eco Restoration                                       Gatling Laser


2      ECM Jammer Mk II                Improved Industrial Tech 8   Personal Deflector Shield     Controlled Tundra Environment       Nuclear Engines            Anti-Missile Rockets


       Improved Robotic Controls III   Duralloy Armor               Class III Deflector Shields   Improved Terraforming +20           Irridium Fuel Cells        Neutron Pellet Gun


       Battle Computer Mk III                                                                     Controlled Dead Environment         Inertial Stabilizer        Hyper-X Rockets


                                                                                                  Death Spores                                                   Fusion Bomb


                                                                                                                                                                 Ion Cannon


3      ECM Jammer Mk III               Battle Suits                 Class V Planetary Shields     Controlled Inferno Environment      Sublight Drives            Scatter Pack V Rockets


       Improved Space Scanner          Improved Industrial Tech 7   Class IV Deflector Shields    Enhanced Eco Restoration            Dotomite Crystals          Ion Rifle


       Battle Computer Mk IV           Automated Repair System                                    Improved Terraforming +30                                      Mass Driver


                                       Reduced Waste 60%                                          Controlled Toxic Environment                                   Merculite Missiles


                                                                                                                                                                 Neutron Blaster


4      ECM Jammer Mk IV                Zortrium Armor               Repulsor Beam                 Soil Enrichment                     Energy Pulsar              Anti-Matter Bomb


       Improved Robotic Controls IV    Improved Industrial Tech 6   Class V Deflector Shields     Bio Toxin Antidote                  Fusion Drives              Graviton Beam


       Battle Computer Mark V                                                                     Controlled Irradiated Environment   Uridium Fuel Cells         Stinger Missiles


                                                                                                  Improved Terraforming +40           Warp Dissipator            Hard Beam


                                                                                                                                                                 Fusion Beam


5      ECM Jammer Mk V                 Improved Industrial Tech 5   Personal Absorption Shield    Cloning                             Reajax II Fuel Cells       Ion Stream Projector


       Advanced Space Scanner          Armored Exoskeleton          Class X Planetary Shields     Atmospheric Terraforming            Impulse Engines            Omega-V Bomb


       Battle Computer Mk VI           Reduced Waste 40%            Class VI Deflector Shields    Advanced Eco Restoration                                       Anti-Matter Torpedoes


                                                                                                                                                                 Fusion Rifle


                                                                                                                                                                 Megabolt Cannon


6      ECM Jammer Mk VI                Andrium Armor                Cloaking Device               Improved Terraforming +50           Intergalactic Star Gates   Phasor


       Improved Robotic Control V      Improved Industrial Tech 4   Class VII Deflector Shields   Doom Virus                          Trilithium Crystals        Scatter Pack VII Missiles


       Battle Computer Mk VII                                                                     Advanced Soil Enrichment            Ion Drives                 Auto Blaster


                                                                                                                                                                 Pulson Missiles


                                                                                                                                                                 Tachyon Beam
7    ECM Jammer Mk VII               Improved Industrial Tech 3   Zyro Shield                    Improved Terraforming +60    High Energy Focus       Hand Phasor


     Hyperspace Communications       Tritanium Armor              Class XV Planetary Shields     Complete Eco Restoration                             Gauss Autocannon


     Battle Computer Mk VIII         Reduced Waste 20%            Class IX Deflector Shields                                                          Particle Beam


                                                                                                                                                      Hercular Missile


                                                                                                                                                      Plasma Cannon


8    ECM Jammer Mk VIII              Advanced Damage Control      Stasis Field                   Universal Antidote           Anti-Matter Engines     Death Ray


     Improved Robotic Controls VI    Improved Industrial Tech 2   Personal Barrier Shield        Improved Terraforming +80    Sub-Space Teleporter    Disruptor


     Battle Computer Mk iX           Powered Armor                Class XI Deflector Shields     Bio Terminator               Ionic Pulsar            Pulse Phasor


                                                                                                                                                      Neutronium Bomb


                                                                                                                                                      Hellfire Torpedoes


9    ECM Jammer Mk IX                Adamantium Armor             Class XX Planetary Shields     Advanced Cloning             Thorium Cells           Zeon Missiles


     Battle Computer Mk X            Waste Elimination            Black Hole Generator           Improved Terraforming +100   Inter-Phased Drive      Plasma Rifle


                                                                  Class XIII Deflector Shields                                Sub-Space Interdictor   Proton Torpedoes


                                                                                                                              Combat Transporters     Scatter Pack X Missiles


                                                                                                                                                      Tri-Focus Plasma Cannon


10   Oracle Interface                Neutronium Armor             Lightning Shield               Complete Terraforming        Inertial Nullifier      Stellar Converter


     ECM Jammer Mk X                                              Class XV Deflector Shields                                  Hyper Drives            Neutron Stream Projector


     Improved Robotic Controls VII                                                                                            Displacement Device     Mauler Device


     Technology Nullifier                                                                                                                             Plasma Torpedoes


     Battle Computer Mk XI
10.5. Beam weapons
Beam weapons have a default range of one. They are distinguished from missiles by inflicting
variable amounts of damage. Beam weapons do only half damage against colonies and missile
bases. Anti-shield beams halve the defense effects of a target's shield. Some beams will fire
multiple times per shot. When a target is killed, streaming beams will apply any excess damage
to the next target in the stack.

WEAPON                       TIER   DAMAGE               TYPE              SPECIAL      TO HIT    POWER*
Laser                          0       1-4               beam                                           25
Heavy Laser                    0       1-7           beam (heavy)             rng2                      75
Ion Cannon                     2       3-8               beam                                           35
Heavy Ion Cannon               2       3-15          beam (heavy)             rng2                      105
Neutron Blaster                3       3-12              beam                                           60
Heavy Neutron Blaster          3      3-24           beam (heavy)             rng2                      180
Fusion Beam                    4       4-16              beam                                           75
Heavy Fusion Beam              4       4-30          beam (heavy)             rng2                      225
Megabolt Cannon                5       2-20              beam                              +3           65
Phasor                         6       5-20              beam                                           90
Heavy Phasor                   6       5-40          beam (heavy)             rng2                      270
Plasma Cannon                  7       6-30              beam                                           110
Death Ray                      8    200-1000             beam                                       2000
Disruptor                      8      10-40              beam                 rng2                      160
Tri-Focus Plasma Cannon        9      20-50              beam                                           180
Mauler Device                 10     20-100              beam                                           300
Neutron Pellet Gun             2       2-5         beam (anti-shield)                                   25
Mass Driver                    3       5-8         beam (anti-shield)                                   50
Hard Beam                      4       8-12        beam (anti-shield)                                   100
Gauss Autocannon               7       7-10      beam (anti-shield, x4)                                 105
Particle Beam                  7      10-20        beam (anti-shield)                                   75
Graviton Beam                  4       1-15        beam (streaming)                                     60
Tachyon Beam                   6       1-25        beam (streaming)                                     80
Gatling Laser                  1       1-4             beam (x4)                                        70
Auto Blaster                   6       4-16            beam (x3)                                        90
Pulse Phasor                   8       5-20            beam (x3)                                        120
Stellar Converter             10      10-35            beam (x4)              rng3                      300


* Power is constant, but cost and size vary with miniaturization. Their values are listed dynamically
ingame.
10.6. Missile weapons
All missiles have a range greater than one and a speed at which they'll move toward their target.
They are distinguished from beam weapons by inflicting a fixed amount of damage. Most
missiles have additional onboard computer guidance, but rockets only benefit from the ship's
attack bonus. Some missiles split into multiple warheads that attack separately. Torpedoes can
fire once every two turns.

WEAPON                        TIER   DAMAGE              TYPE              SPECIAL         TO HIT   POWER*
Nuclear Missile-2              0         4              missile           spd3, rng6                    20
Nuclear Missile-5              0         4              missile           spd2, rng4                    30
Hyper-V Rockets-2              1         6          missile (rocket)     spd3.5, rng7                   20
Hyper-V Rockets-5              1         6          missile (rocket)     spd2.5, rng5                   30
Hyper-X Rockets-2              2         8              missile          spd3.5, rng7        +1         20
Hyper-X Rockets-5              2         8              missile          spd2.5, rng5        +1         30
Merculite Missiles-2           3        10              missile           spd4, rng8         +2         20
Merculite Missiles-5           3        10              missile           spd3, rng6         +2         30
Stinger Missiles-2             4        15              missile          spd4.5, rng9        +3         30
Stinger Missiles-5             4        15              missile          spd3.5, rng7        +3         45
Pulson Missiles-2              6        20              missile           spd5, rng10        +4         40
Pulson Missiles-5              6        20              missile           spd4, rng8         +4         60
Hercular Missiles-2            7        25              missile          spd5.5, rng10       +5         40
Hercular Missiles-5            7        25              missile          spd4.5, rng9        +5         60
Zeon Missiles-2                9        30              missile           spd6, rng10        +6         50
Zeon Missiles-5                9        30              missile           spd5, rng10        +6         75
Scatter Pack V Rockets-2       3         6         missile (rocket x5)   spd3.5, rng7                   50
Scatter Pack V Rockets-5       3         6         missile (rocket x5)   spd2.5, rng5                   75
Scatter Pack VII Missiles-2    6        10           missile (x7)         spd4, rng8         +2         50
Scatter Pack VII Missiles-5    6        10           missile (x7)         spd3, rng6         +2         75
Scatter Pack X Missiles-2      9        15        missile (rocket x10)   spd4.5, rng9        +3         50
Scatter Pack X Missiles-5      9        15        missile (rocket x10)   spd3.5, rng7        +3         75
Anti-Matter Torpedoes          5        30         missile (torpedo)      spd3, rng8         +4         300
Hellfire Torpedoes             8        25        missile (torpedo x4)    spd5, rng10        +6         350
Proton Torpedoes               9        75         missile (torpedo)      spd5, rng10        +6         400
                                                                            spd6, rng10
Plasma Torpedoes               10      150         missile (torpedo)      -15 damage/rng
                                                                                             +7         450


* Power is constant, but cost and size vary with miniaturization. Their values are listed dynamically
ingame.
10.7. Bomb weapons
Bombs can only target planets. Bioweapons damage population only, add waste, and have diplomatic
repercussions. Tier: W is the Weapons category, Pl is the Planetology category.


WEAPON                      TIER DAMAGE                 TYPE             POWER*
Nuclear Bomb                  0       3-12              bomb                 10
Fusion Bomb                  W2       5-20              bomb                 10
Anti-Matter Bomb             W4       10-40             bomb                 10
Omega-V Bomb                 W5       20-50             bomb                 10
Neutronium Bomb              W8       40-70             bomb                 10
Death Spore                  Pl2      1pop        bomb (bioweapon)           10
Doom Virus                    P6     1-2pop       bomb (bioweapon)           10
Bio Terminator                P8     1-3pop       bomb (bioweapon)           10


* Power is constant, but cost and size vary with miniaturization. Their values are listed dynamically
ingame.
10.8. Special devices
Tier: W is Weapons, Pl is Planetology, Pr is Propulsion, Cn is Construction, FF is Force Fields.

DEVICE                         TIER    DESCRIPTION                                      POWER*
Battle Scanner                   0     scans enemy ships in combat                          50
Reserve Fuel Tanks               0     +3 light-year range                                  0
Anti-Missile Rockets             0     destroys ~40% incoming missiles                      8
Inertial Stabilizer             Pr2    +2 maneuverability                                   8

Automated Repair System         Cn3    repairs 15% hit points per turn                      3
Repulsor Beam                   FF4    moves enemy back 1 space                            200
Energy Pulsar                   Pr4    damage all adjacent 1-5 +1 per 2 ships              250
Warp Dissipator                 Pr4    slows distant enemy ships                           300
Ion Stream Projector            W5     damage 20% +1% per 2 ships firing                   500
Cloaking Device                 FF6    +5 defense, disabled 1 turn after attacks            10
Zyro Shield                     FF7    destroys ~75% incoming missiles                      12
High Energy Focus               Pr7    +3 range to beam and torpedo weapons                 65
Adv. Damage Control             Cn8    repairs 30% hit points per turn                      9
Stasis Field                    FF8    freezes enemy ship for 1 turn                       275
Sub-Space Teleporter            Pr8    teleports in combat                                  16
Ionic Pulsar                    Pr8    damage all adjacent 1-10 +1 per ship                750

Black Hole Generator            FF9    destroy up to 100% of enemy ships, bases            750
Inertial Nullifier              Pr10   +4 maneuverability                                   12
Oracle Interface                C10    beam weapon attacks halve shields                    12
Lightning Shield               FF10    destroys ~100% incoming missiles                     15
Neutron Stream Projector        W10    damage 40% +1% per ship firing                     1250
Technology Nullifier            C10    negates enemy Computer/ECM bonuses                 1000
Displacement Device             Pr10   avoid 1/3 of all enemy attacks                       5


* Power is constant, but cost and size vary with miniaturization. Their values are listed dynamically
ingame.
10.9. Fuels cells and travel ranges
                                  TECHNOLOGY
   FUEL CELLS         RANGE           TIER
Default                  3
Hydrogen                 4            1
Deuterium                5            1
Irridium                 6            2
Dotomite Crystals        7            3
Uridium                  8            4
Reajax II                9            5
Trilithium Crystals      10           6
Thorium               unlimited       9
10.10. Engines and travel speed
                              TECHNOLOGY
     ENGINES          SPEED       TIER
Retro                   1
Nuclear                 2         2
SubLight                3         3
Fusion                  4         4
Impulse                 5         5
Ion Drives              6         6
Anti-Matter             7         8
Inter-Phased Drives     8         9
Hyper Drives            9         10
10.11. Transports vs. Defenders
When transports are intercepted by defenders, an abstracted battle determines transport
casualties. The length of the abstracted battle is determined by the attacking faction's engine
technology. The damage the transports can take is determined by the attacking faction's armor
technology. See 7.2 for more on Ground Combat.

                                   TURNS IN
ENGINES                            COMBAT
Nuclear, SubLight, Fusion             4
Impulse, Ion Drives                   3
Anti-Matter, Inter-Phased Drives      2
Hyper                                 1


ARMOR TECH               HP
Titanium                    15
Duralloy                    22
Zortrium                    30
Andrium                     37
Tritanium                   45
Adamantium                  52
Neutronium                  60
10.12. Racial bonuses
In addition to these special bonuses, the races have varying costs for technology categories,
varying default diplomatic states with other races, and a weighted preference to AI leaders with
specific personalities and objectives. See 8.1 for more specifics.

Altairi               +3 ship defense, +3 ship initiative
Ursinathi             +25 ground combat
Nazlok                1/2 price spies, +30 spy fate, +20 security
Human                 +25% trade, x2 diplomacy for good incidents, +5 relations
Kholdan               x2 production for colonists
Meklonar              +2 factories/colonist, no refit cost for Robotic Controls
Fiershan              +4 ship attack, +4 ship initiative
Mentarans             +50% research, more technologies for research
Ssslaura              x2 population growth
Cryslonoids           immune to environments and waste, x.5 population growth
10.13. Racial modifiers to technology costs
RACE         40% DISCOUNT     20% DISCOUNT 25% COSTLIER
Altairi        Propulsion                       Force Fields
                               Construction,
Ursinathi                       Weapons
Nazlok                          Computers
                               Planetology,
Human          Force Fields     Propulsion
Kholdan       Construction                      Propulsion
Meklonar       Computers                        Planetology
Fiershan        Weapons                         Construction
Mentaran                       All categories
Ssslaura       Planetology
Cryslonoid                      Computers        All others
10.14. Default diplomatic states
The default setting for the relationship meter between two factions is a factor of their respective
races. The relationship meter will then adjust as the effects of diplomatic incidents are applied,
reverting back towards the default state as the effects of an incident fade over time.

               Altairi   Ursinathi   Nazlok    Human     Kholdan   Meklonar   Fiershan   Mentaran   Ssslaura     Cryslonoid

   Altairi     Calm       Neutral    Unease    Relaxed   Unease     Neutral   Restless    Neutral   Unease        Neutral

 Ursinathi    Neutral      Calm      Unease    Relaxed   Neutral    Neutral   Unease      Neutral   Neutral       Neutral

  Nazlok      Unease     Unease       Calm     Relaxed   Unease    Unease     Unease     Unease     Unease        Unease

  Human       Relaxed    Relaxed     Relaxed    Calm     Relaxed   Relaxed    Relaxed    Relaxed    Relaxed       Relaxed

  Kholdan     Unease      Neutral    Unease    Relaxed    Calm      Neutral   Unease      Neutral   Unease        Relaxed

 Meklonar     Neutral     Neutral    Unease    Relaxed   Neutral    Calm      Neutral     Neutral   Unease        Relaxed

  Fiershan    Restless   Unease      Unease    Relaxed   Unease     Neutral    Calm       Neutral    Wary         Neutral

 Mentaran     Neutral     Neutral    Unease    Relaxed   Neutral    Neutral   Neutral     Calm      Neutral       Neutral

  Ssslaura    Unease      Neutral    Unease    Relaxed   Unease    Unease      Wary       Neutral    Calm         Neutral

 Cryslonoid   Neutral     Neutral    Unease    Relaxed   Relaxed   Relaxed    Neutral     Neutral   Neutral        Calm
10.15. Random events
See 2.6 for more details about how random events happen. We didn't want to spoil too much, so
these are general ideas of what to expect.

Donation: The galaxy is full of people, and some of them are more generous than others.

Depleted Planet: They were called finite resources for a reason.

Enriched Planet: Just because a planet didn't start out rich doesn't mean it can never be rich.

Fertile Planet: The same goes for its fertility!

Computer Virus: You did make a back-up copy of your research, didn't you?

Earthquake: Whole lotta shakin' goin' on! If it's any consolation, the planets with lots of factories
to lose are probably the planets that can most easily rebuild those factories.

Industrial Accident: Oops! Hope you've got some advanced terraforming ready to go.

Rebellion: To put down this uprising, it's going to take boots on the ground. Or whatever
accoutrements your faction wears on its lower extremities.

Ancient Derelict: My god, it's full of technologies! The higher your Force Field and Weapon
technology levels, the better the haul.

Assassination: Suddenly assassinating another faction's leader is a great way to race to the
bottom of the relationship meter and have an impromptu war. You were prepared for war,
weren't you?

Plague: Maybe the scientists at the infected colony could come up with a solution?

Supernova: Those same scientists who cured the plague might also have some ideas about
how to stop a sun from going supernova.

Piracy: Until they're defeated, these pesky buccaneers will take a bit out of everyone's trade
income. If you're okay with that, you can just leave them to do their thing.

Comet: You don't need the world's best deep-core drillers to keep this heavenly body from
destroying one of your colonies! Put enough firepower in the way and you and your colony will
look back and laugh about it when it's all over.

Space Amoeba: We're of two minds about how much to spoil, but we will tell you that you're only
seeing half the picture when you begin a battle with a space amoeba.
Space Crystal: At least this guy will leave a gift for you before moving on to eat the next colony!
And remember that if you're finding the Space Monsters to be too hard, you can disable them
separately from the other random events.
10.16. Hotkeys
F1           help
F2/F3        next/previous player colony
F5/F6        next/previous player colony that has constructed a ship this turn
F7/F8        next/previous player colony with incoming armed enemy fleets or transports
F9/F10       next/previous player fleet
F11/F12      next/previous AI fleet

D            designs
S            systems
C            colonies
R            race reports
T            technology
F            fleets
G            game menu
L            rally point
B            add base construction
N            next year

1-5          allocate spending to ship, def, ind, eco, tech
CTRL+1-5     lock slider
+/-          zoom map
arrows       move map
mousewheel   increment quantities/moves slider
SHF-click    increment in quantities of 5
CTRL-click   increment in quantities of 20